Use this guide if the learning app asked you to connect LTI Advantage, not Brightspace, as the data source. You will still install the tool in Brightspace, but Edlink will not sync Brightspace roster data over the Brightspace API.
If you already connected Brightspace as a data source and only need to add LTI, use this guide instead:
Please confirm with the learning app that an LTI-only source is something they support before proceeding.
You must be a Brightspace Administrator to complete the integration process.
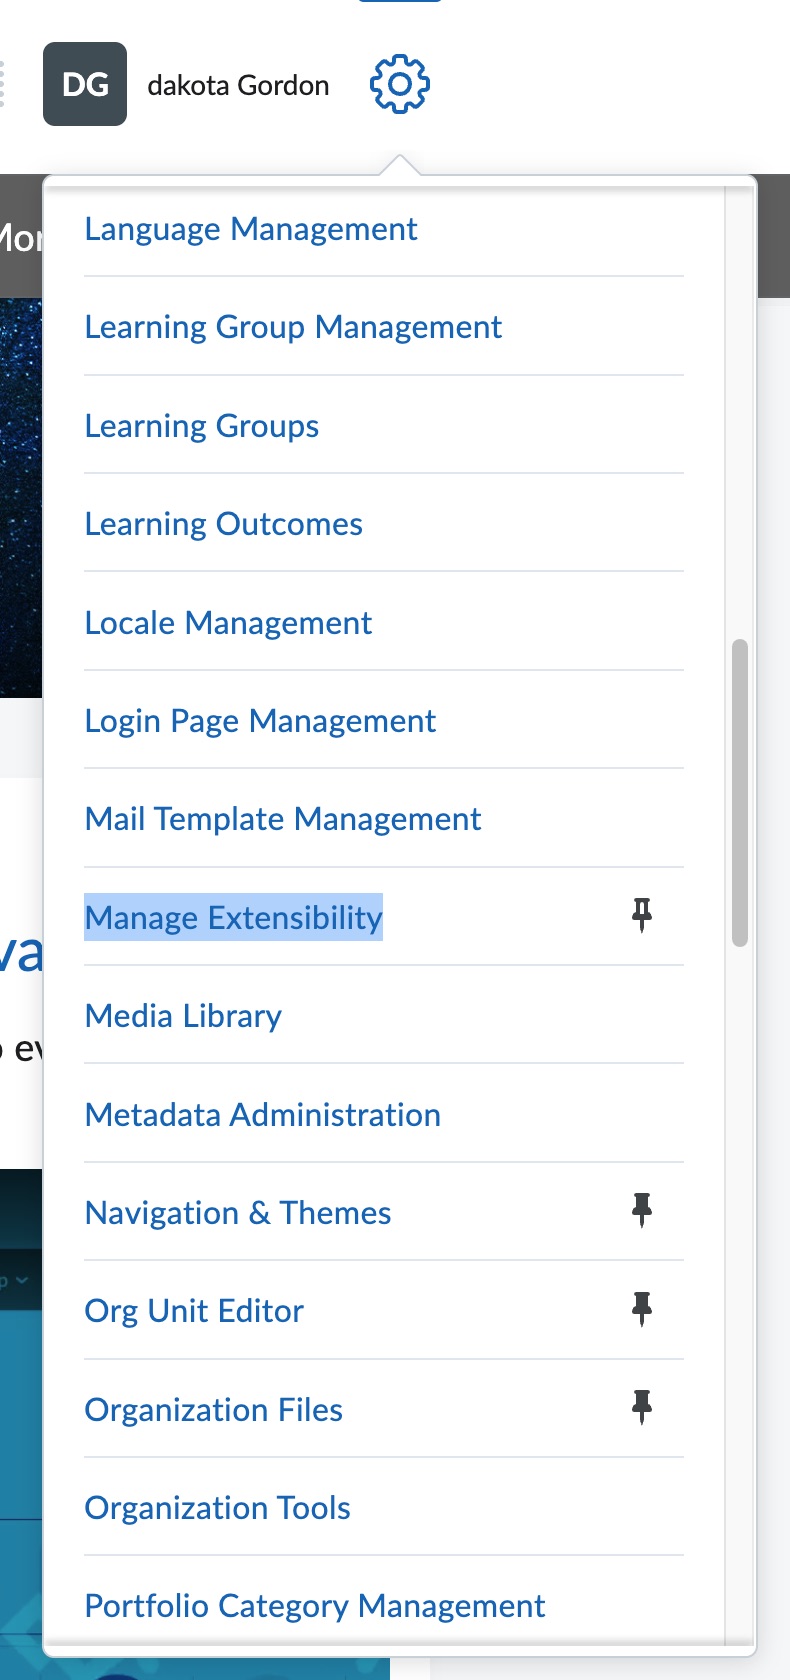
To verify, look for the Manage Extensibility option in your Brightspace settings menu.
Step 1: Start the Integration Flow in Edlink
- Click the integration link provided by your learning app. It will look something like this:
https://ed.link/integrate/cfacdefd-9bf4-4ec6-9bb9-000000000000
If you did not receive a link, please reach out to the learning app you are trying to connect to, or email support@ed.link. If you email support, include the name of the learning app you are trying to connect to. - Create an Edlink account if you don't already have one. If you've connected an app to Edlink before, log in with your existing account.
If you are not sure whether you have an Edlink account, search your email inbox for a previous login code fromsupport@ed.link. The subject of the email will look something like "Your Login Code." All logins require an email code, so this is a good way to check if you have logged in before. - Choose your learning institution. If you have connected to Edlink before, you should see your district. If this is your first time, type your district name in the search bar and select it when it shows up.
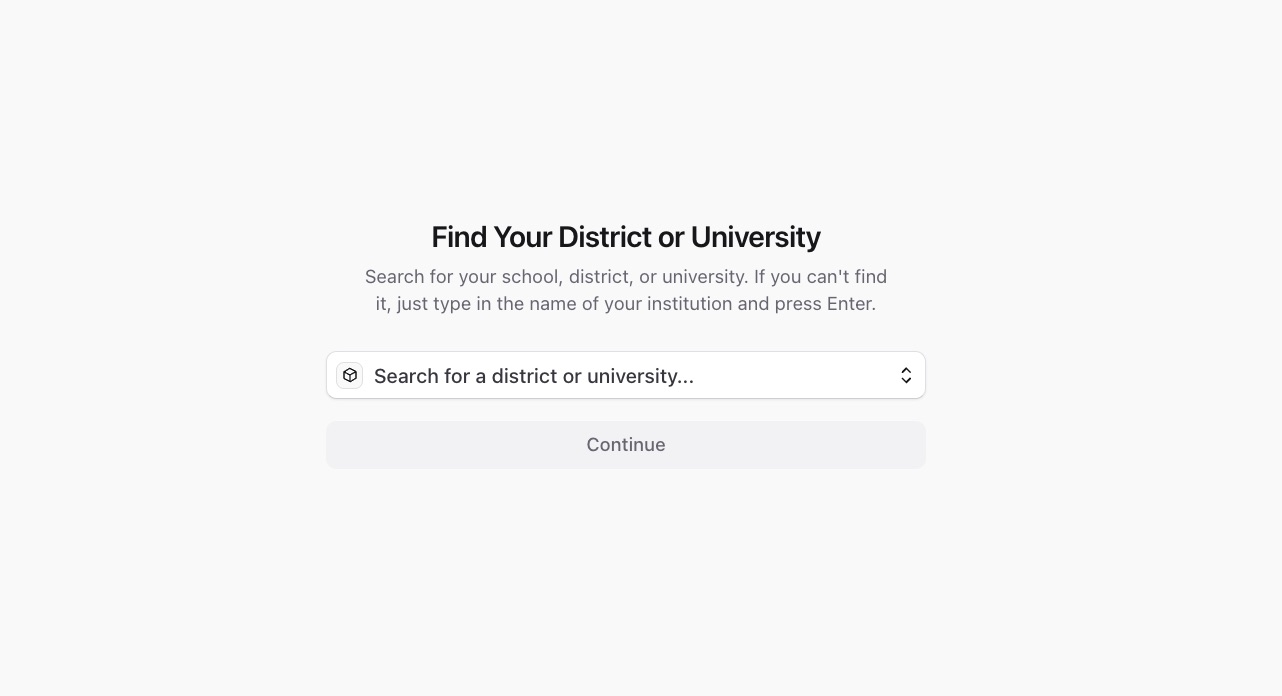
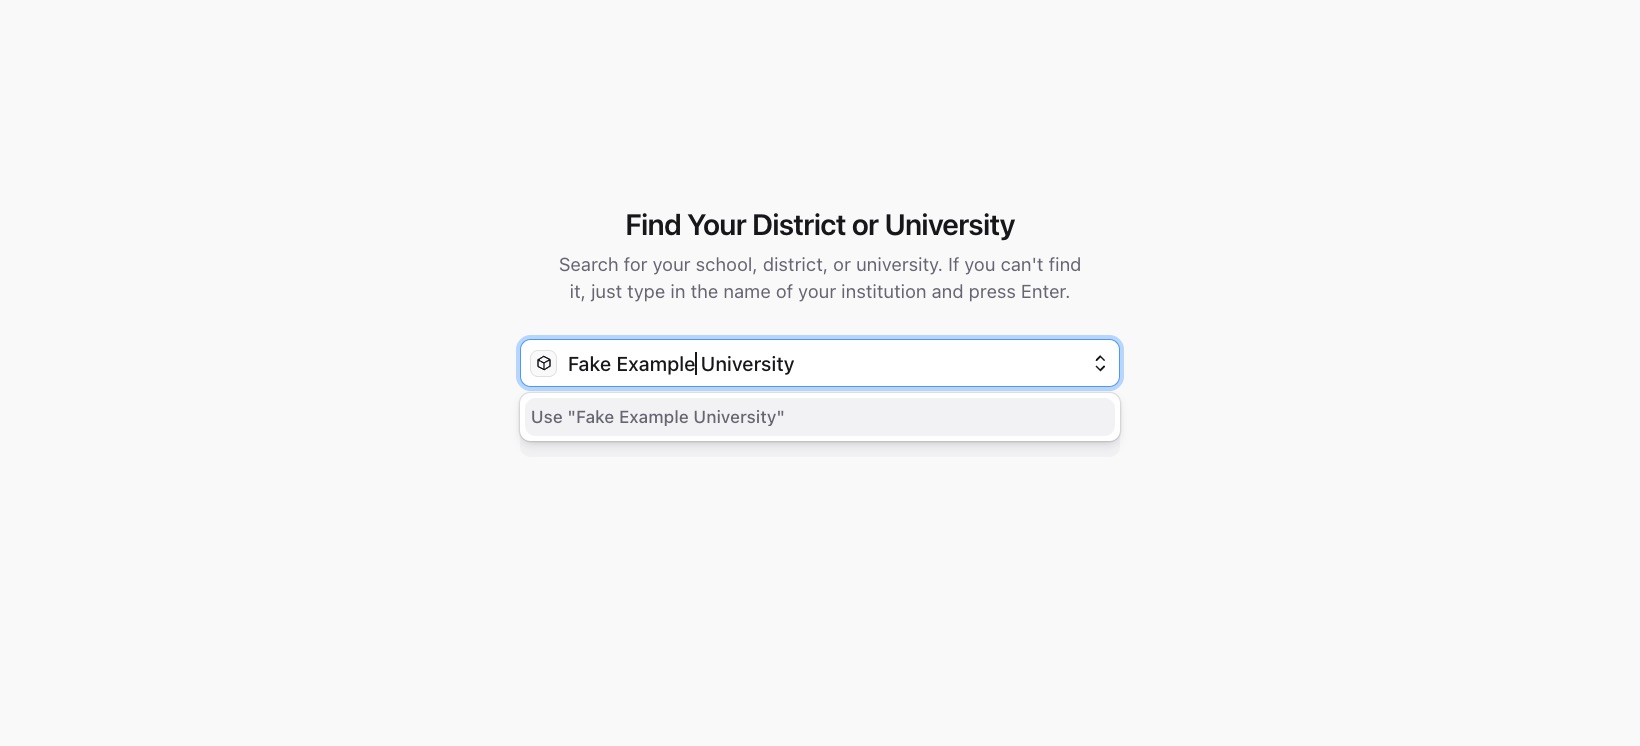
If your district does not appear, click Use 'Learning Institution Name' to create a new district.
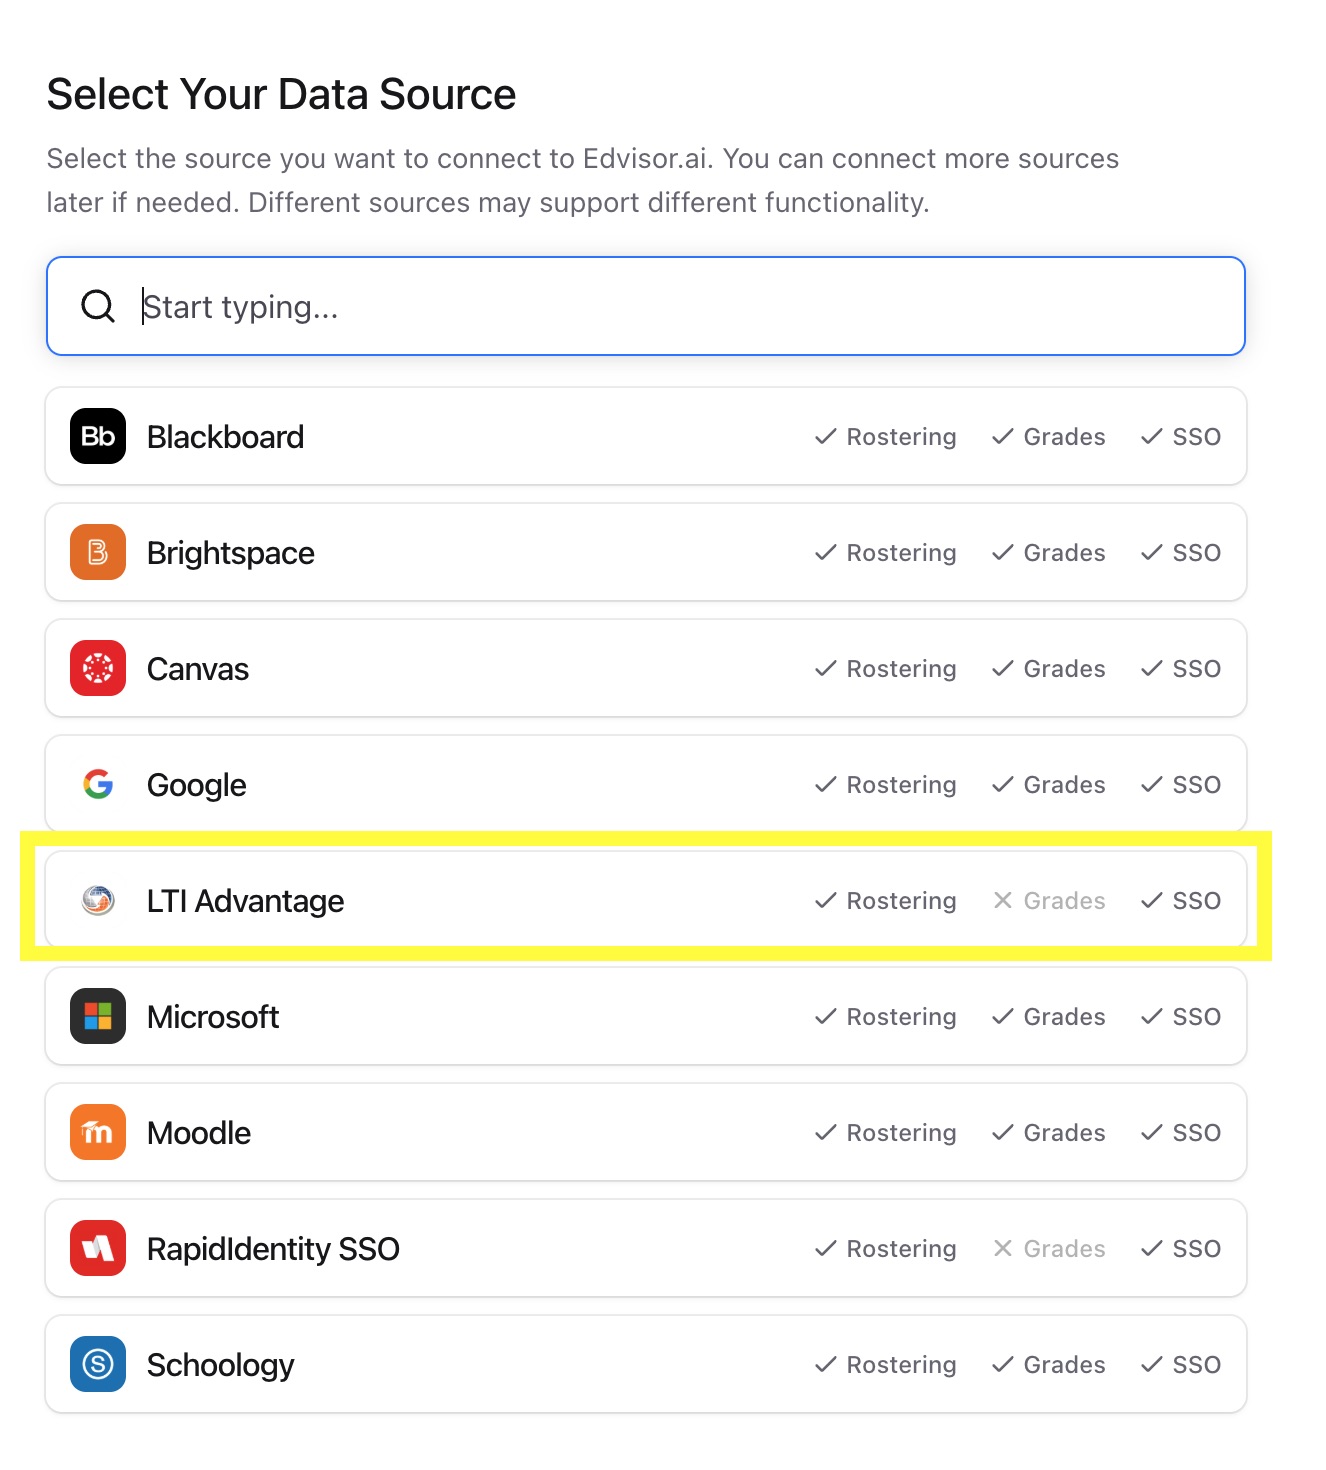
- Search for LTI Advantage (not Brightspace) from the list of available data sources.
- Choose your preferred data storage region.
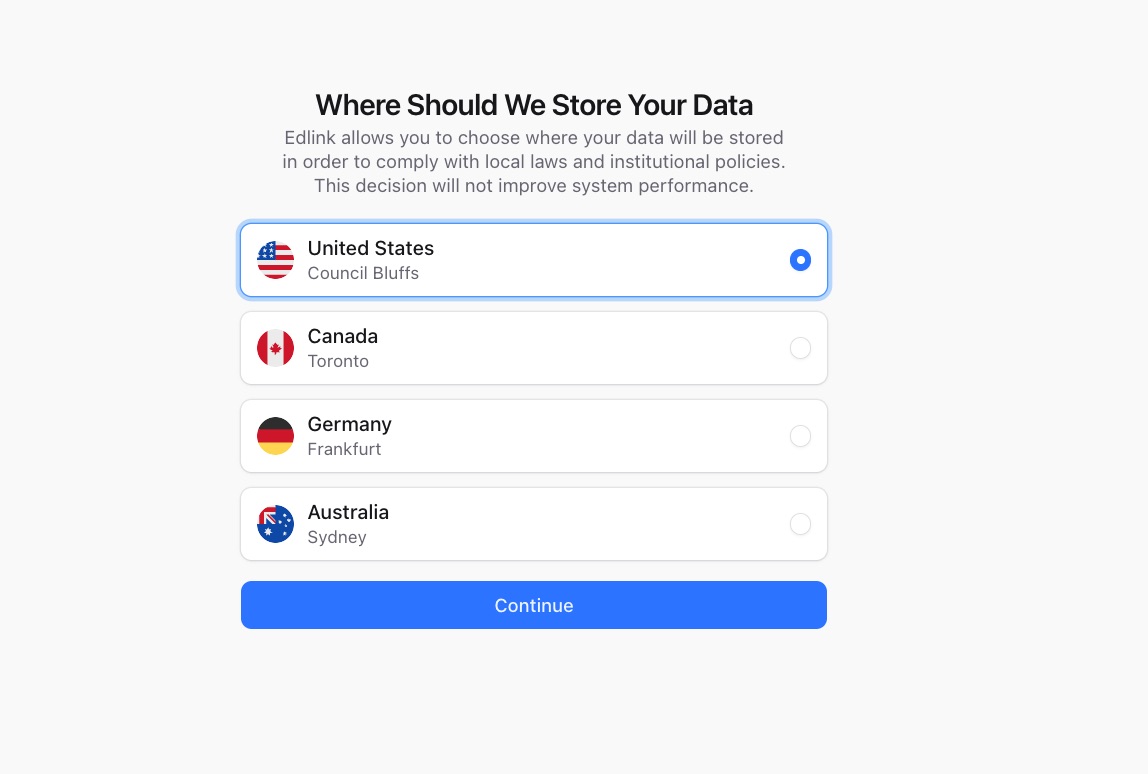
- Click Continue.
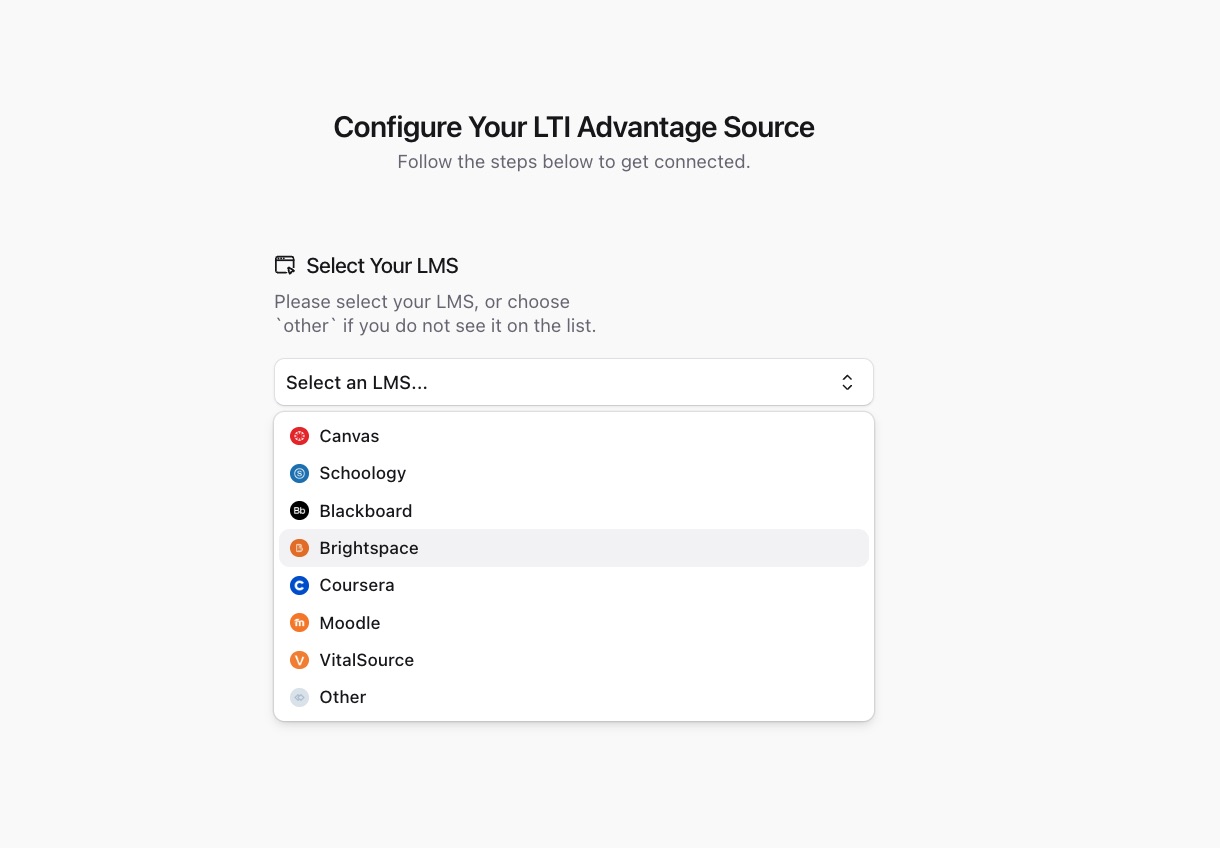
- Select Brightspace as the LMS you are setting up LTI Advantage with.
- Enter your Brightspace URL.
You must includehttps://at the beginning of the URL. When you enter this correctly, the next step in the onboarding flow will be unlocked.
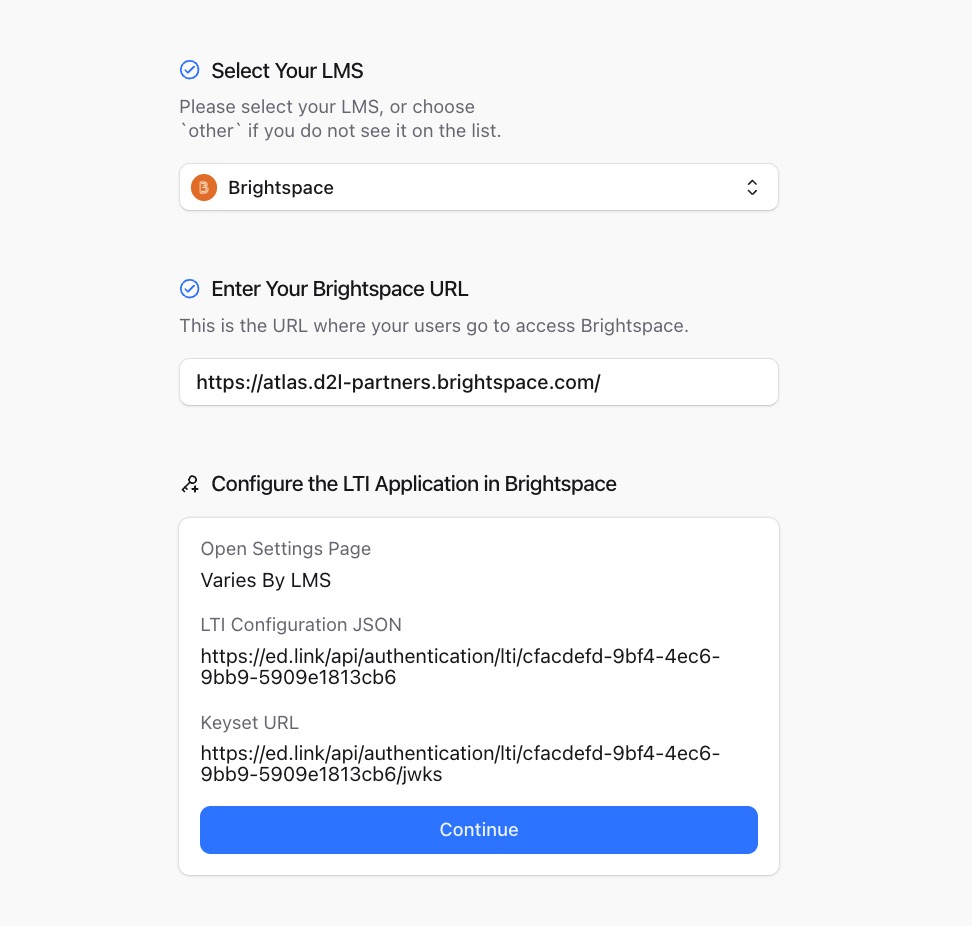
- Click Continue. Leave this tab open. You will need it for later steps.
Step 2: Configure the LTI Advantage Tool in Brightspace
- Log in to Brightspace with an administrator account.
- Select the Settings gear icon, then select Manage Extensibility. This is under the Organization Related header.
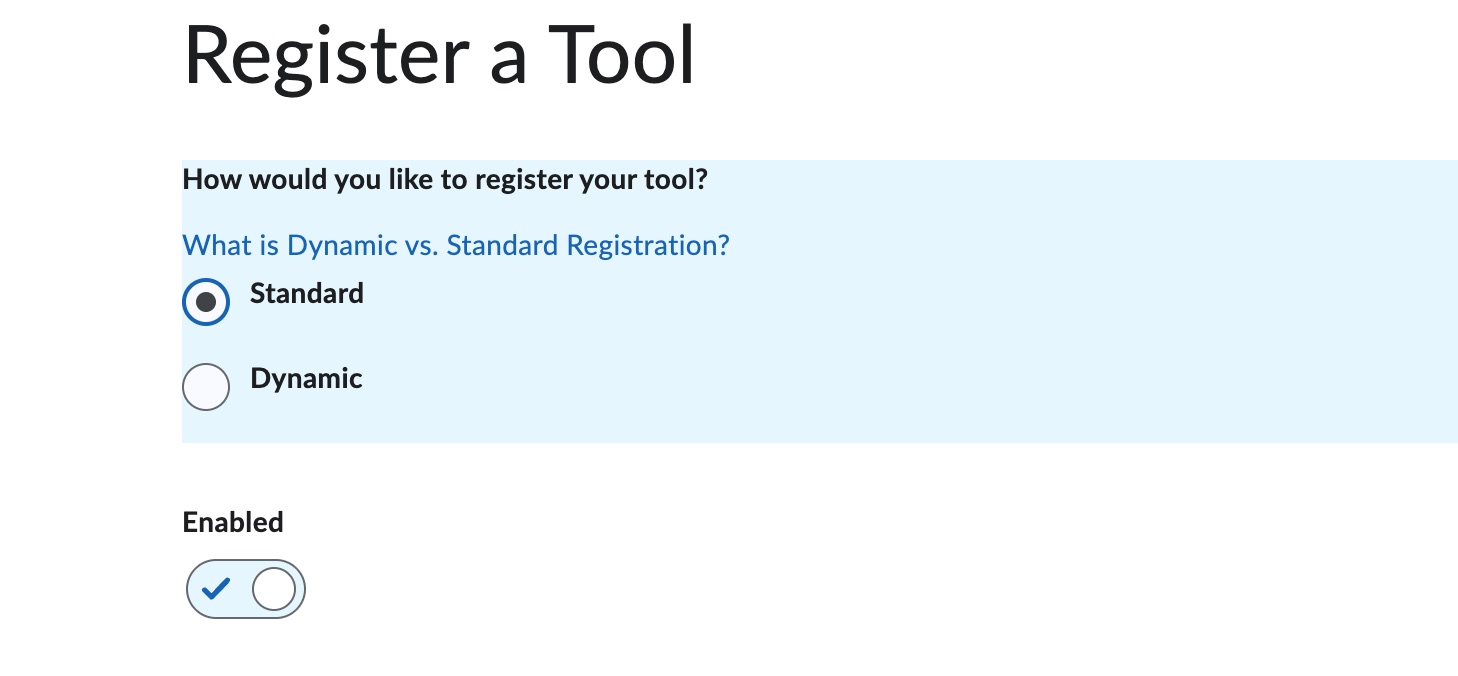
- Select LTI Advantage → Register Tool → Standard.
- Go back to the Edlink tab you left open in Step 1. Fill out the Brightspace fields using the information from the onboarding flow:
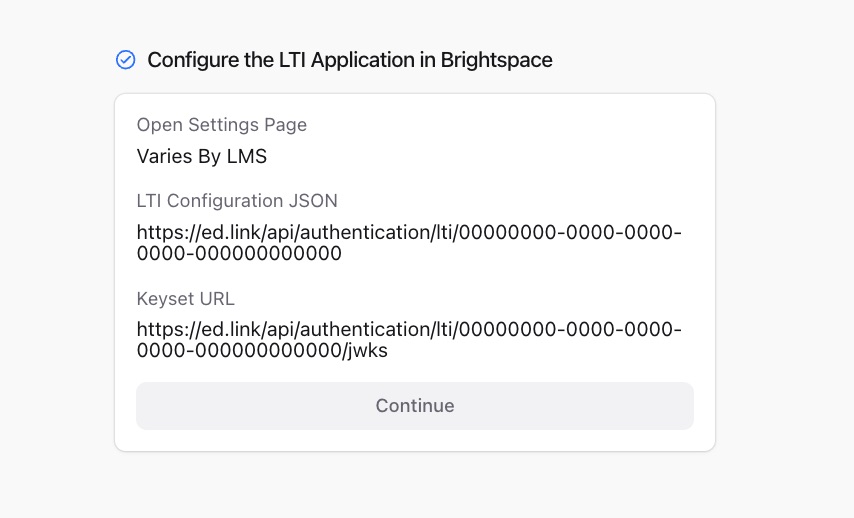
Return to Brightspace and complete the form using the following information:
- Name: Enter the name of your learning application.
- Description: Enter a description of your learning application.
- Domain:
https://{learningappname}.ed.link - Redirect URLs:
{Configuration JSON}/launch
Your Redirect URL should look similar to:https://ed.link/api/authentication/lti/00000000-0000-0000-0000-000000000000/launch - OpenID Connect Login URL:
{Configuration JSON}/launch
Your OpenID Connect Login URL should look similar to:https://ed.link/api/authentication/lti/00000000-0000-0000-0000-000000000000/launch - Target Link URI: Leave this field blank.
- Keyset URL: Enter the Keyset URL provided in the onboarding flow.
Your Keyset URL should look similar to:https://ed.link/api/authentication/lti/00000000-0000-0000-0000-000000000000/jwks
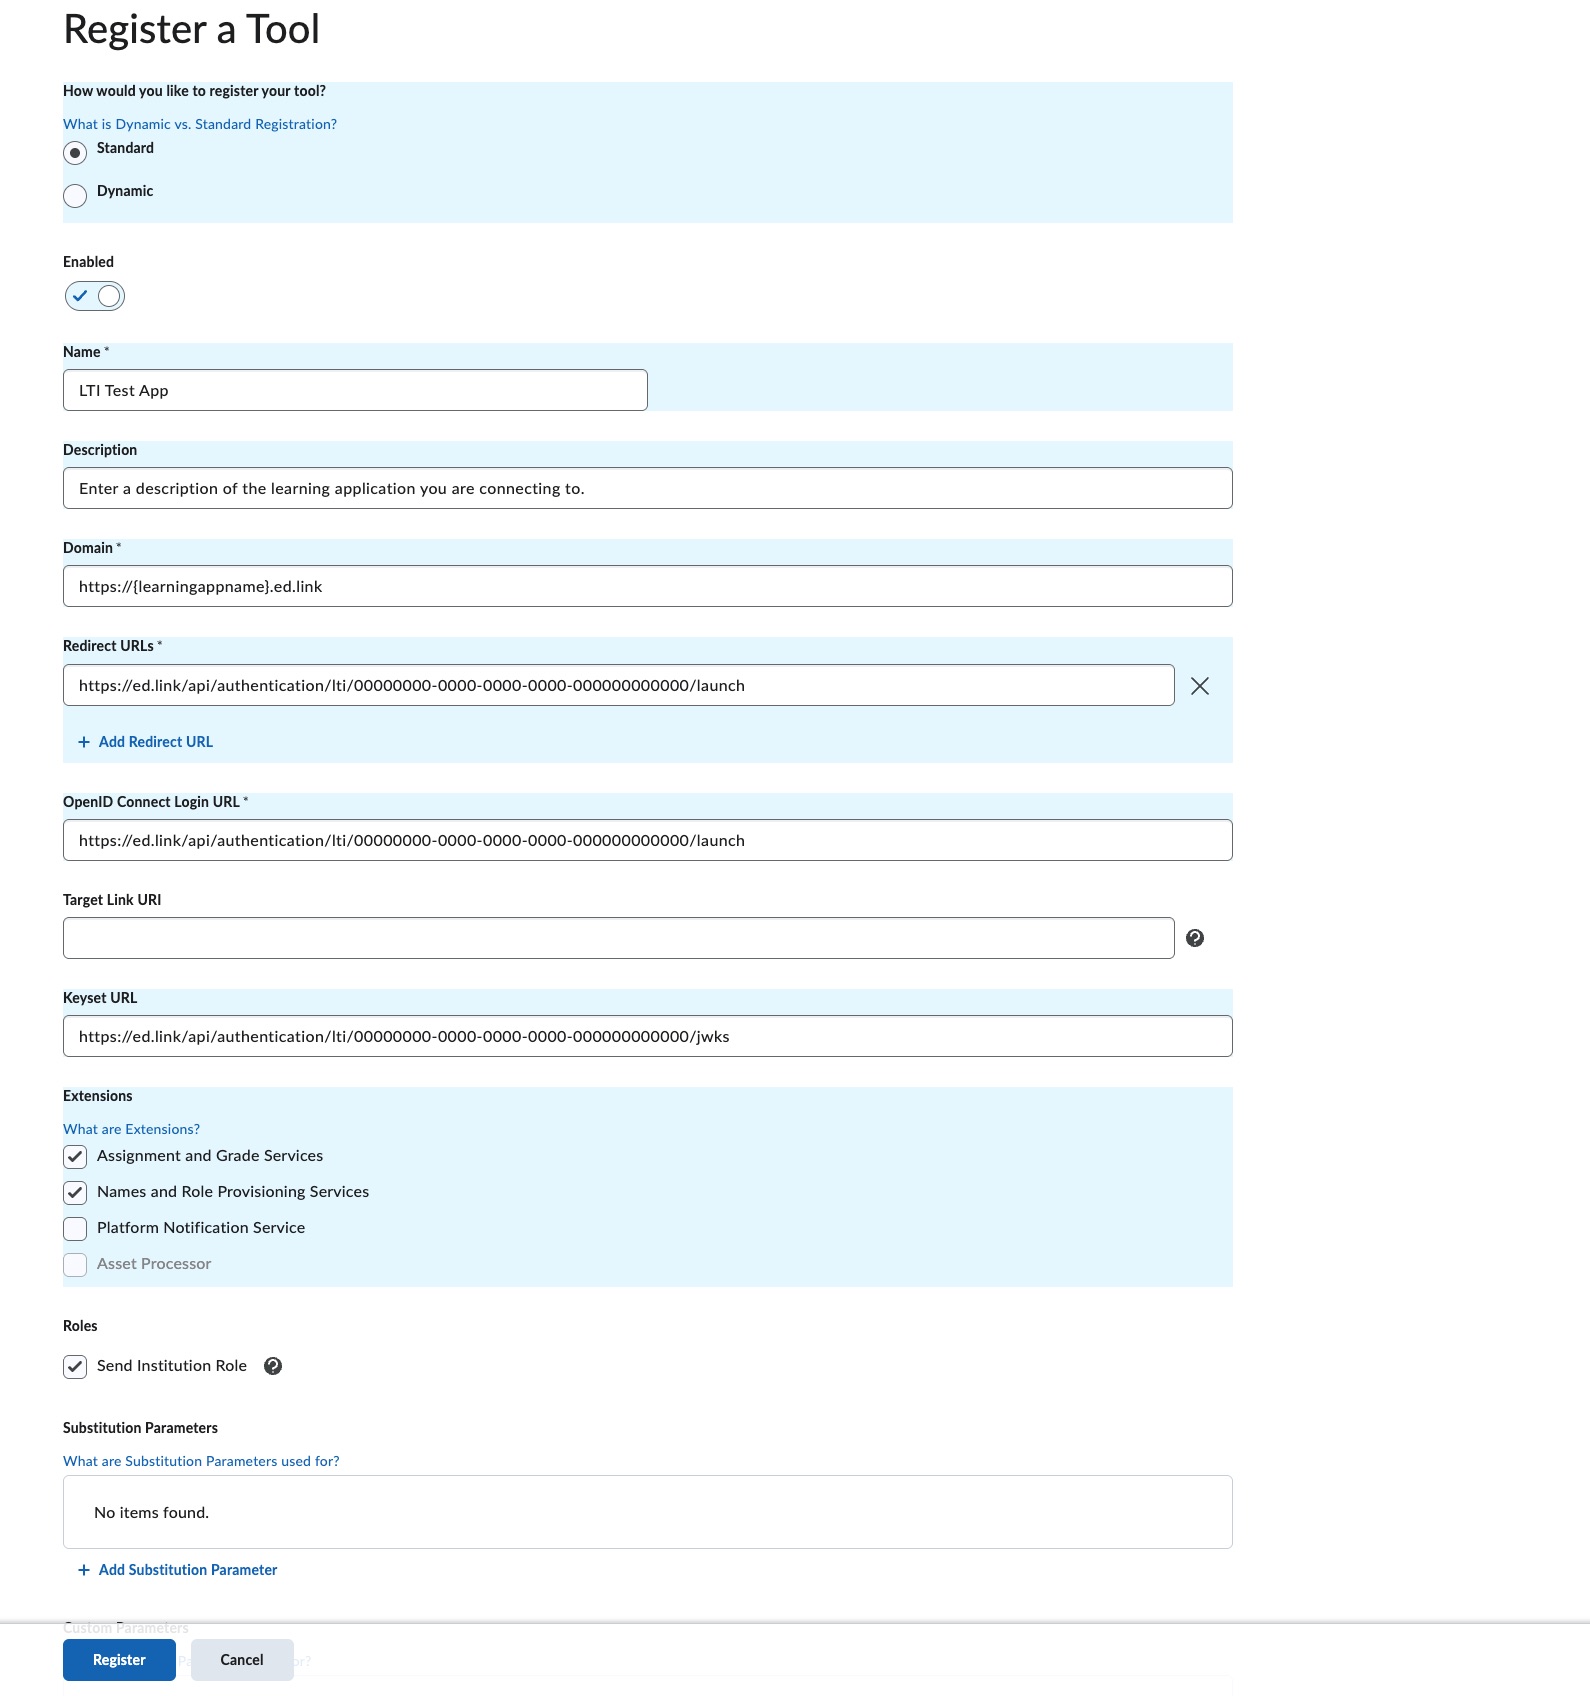
- Click Register. A Brightspace Registration Details window will appear.
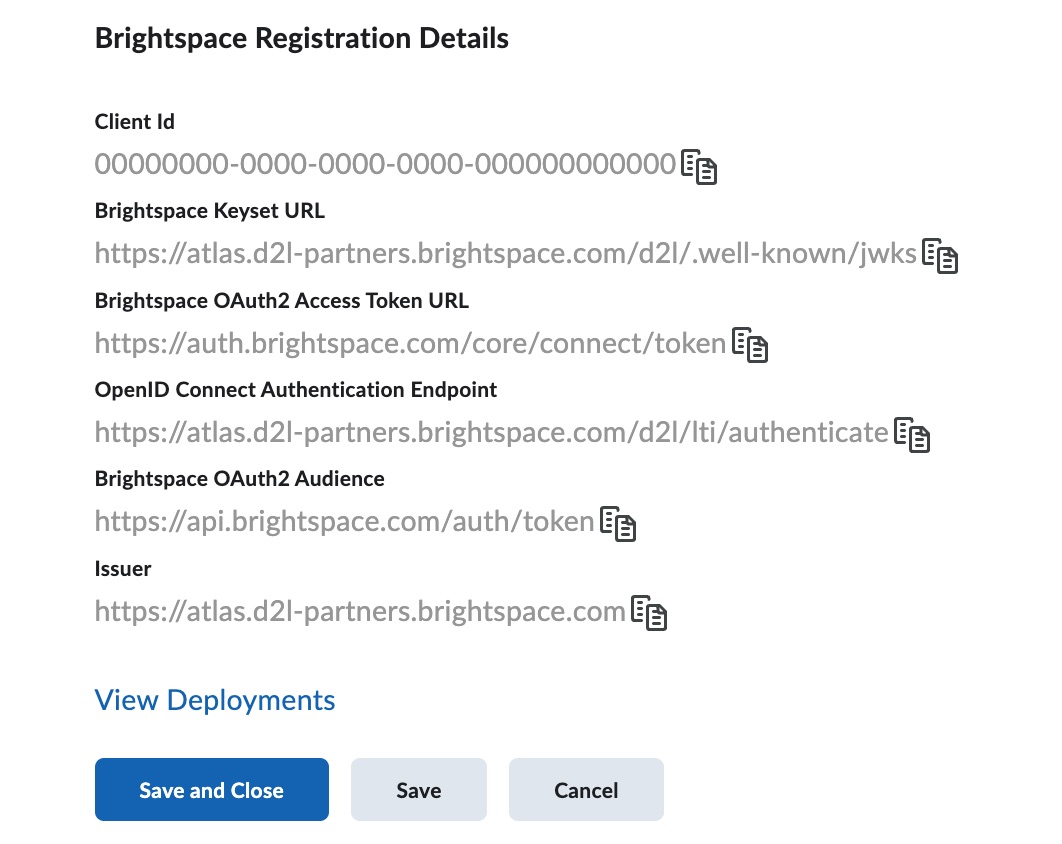
- Leave the Brightspace Registration Details window open and return to the Edlink onboarding tab from Step 1.
- Paste the Client ID that you generated in Brightspace into the Client ID field in Edlink.
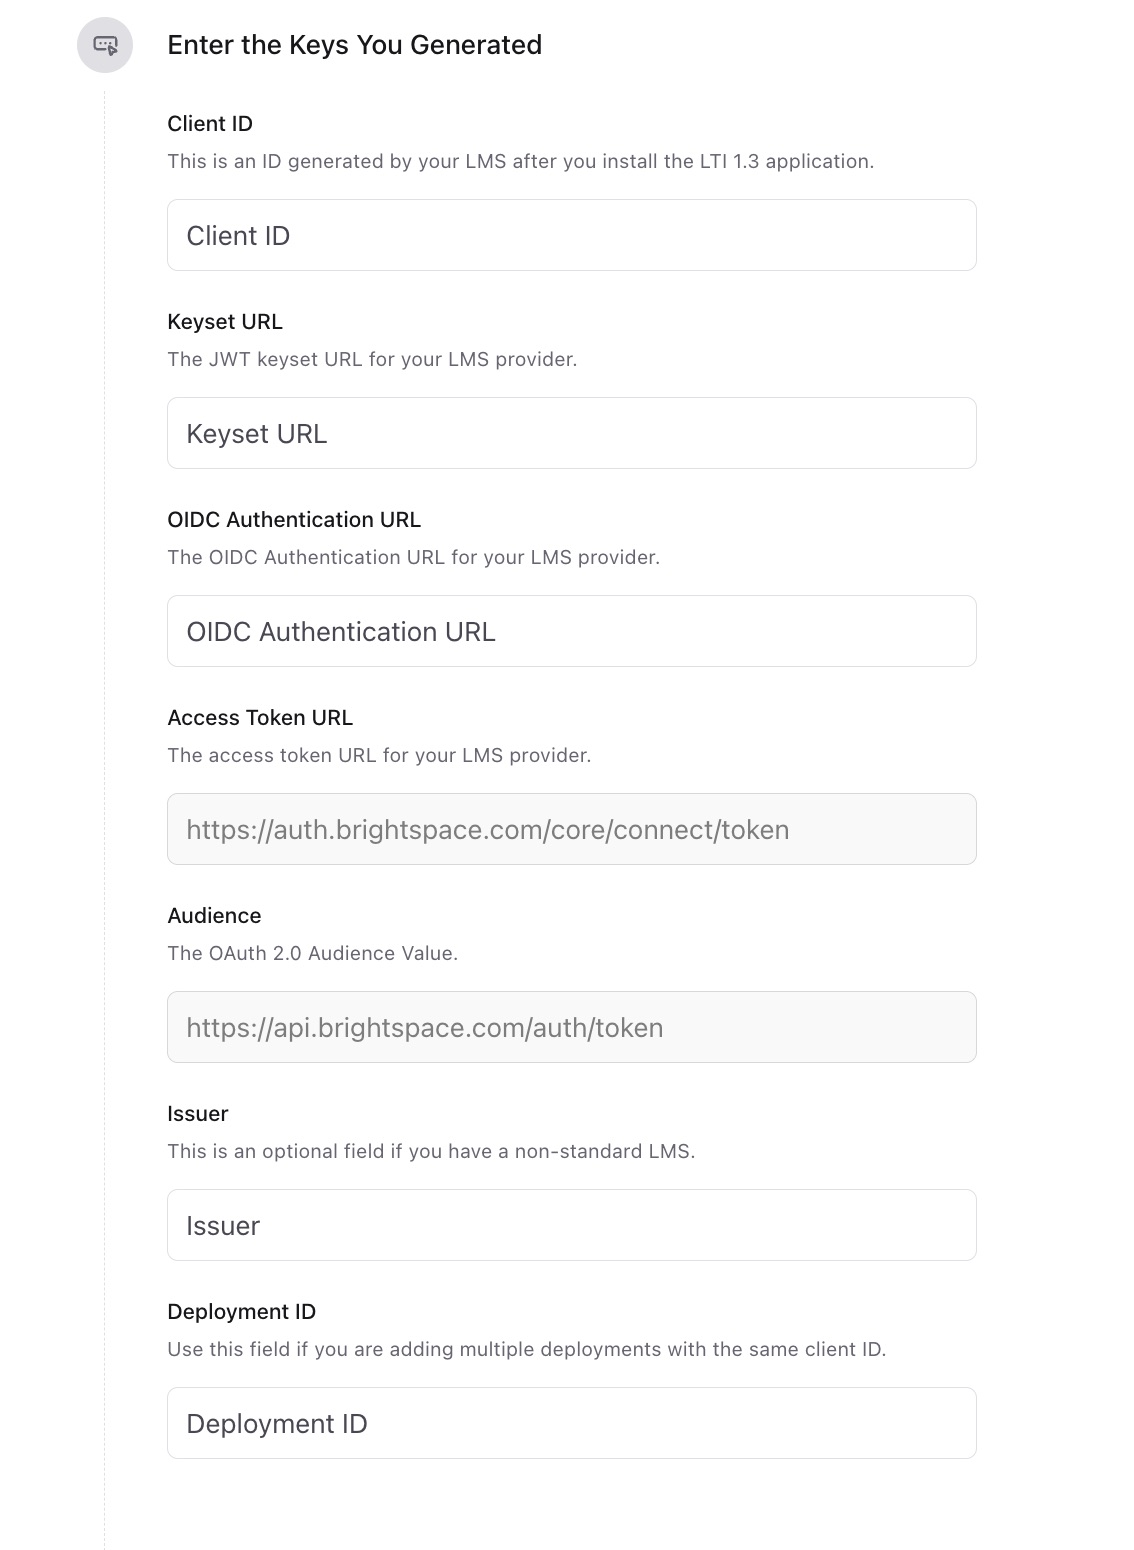
- Return to the Brightspace tab you left open.
- Click View Deployments.
Step 3: Create the Deployment
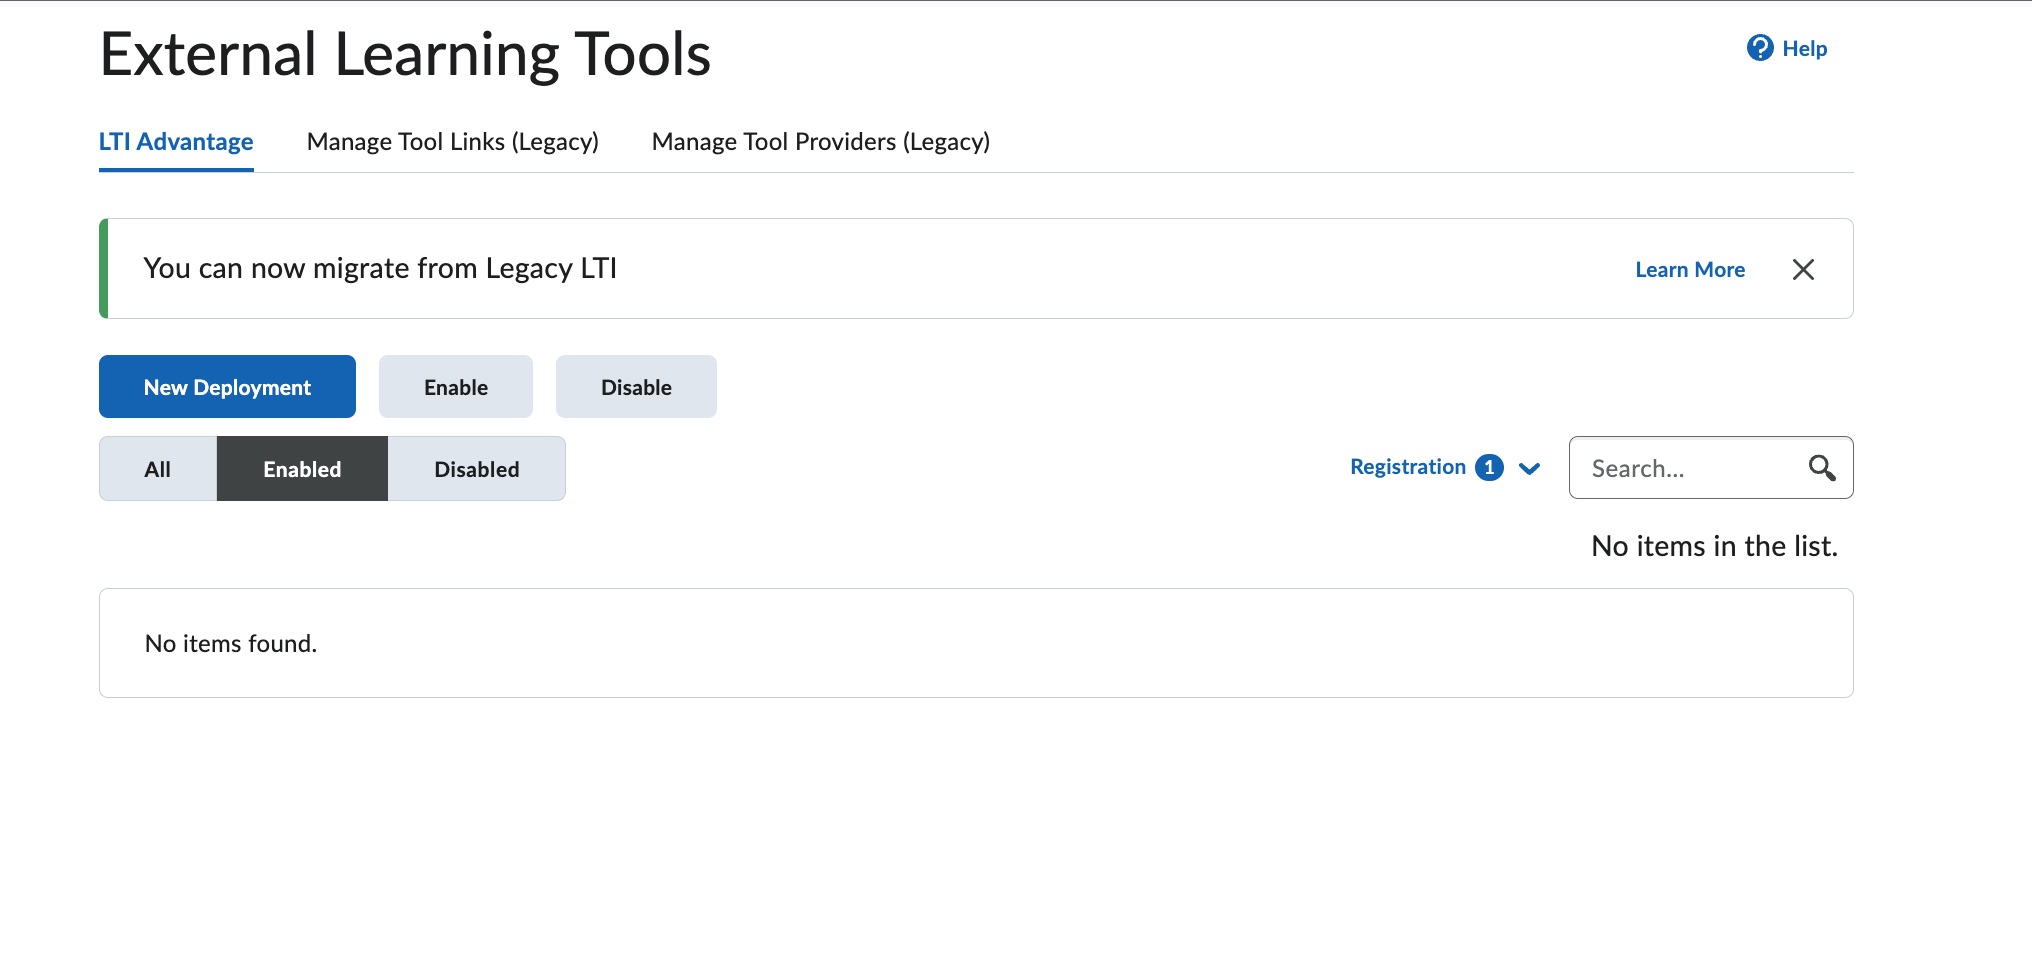
- Click New Deployment.
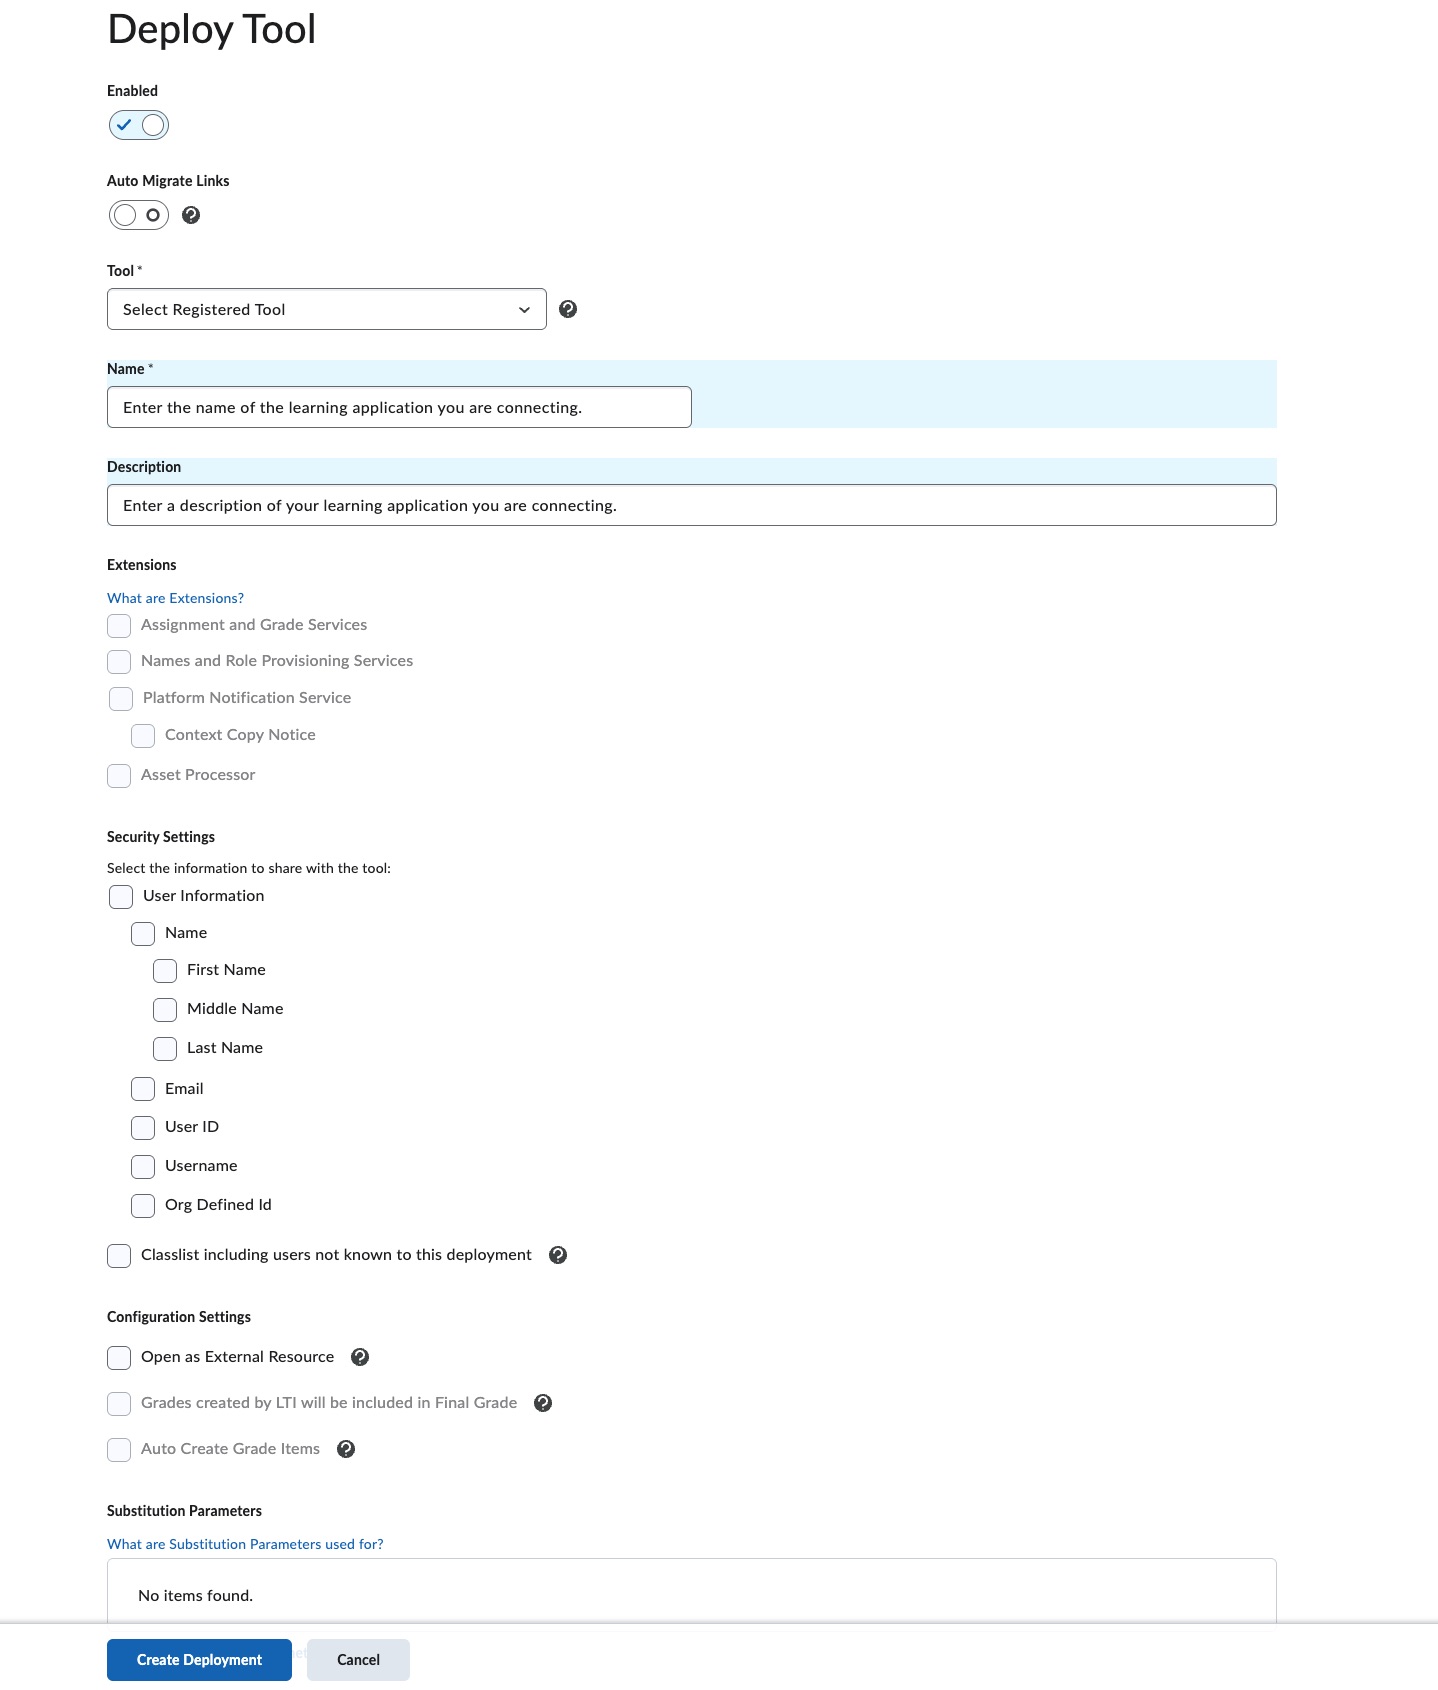
- Complete the deployment details:
- Tool: Select the tool you registered in the previous steps.
- Name: Enter the name of your learning application.
- Security Settings: Select all required permissions.
- Open as External Resource: Enable this option if you want the learning application to open in a new window.
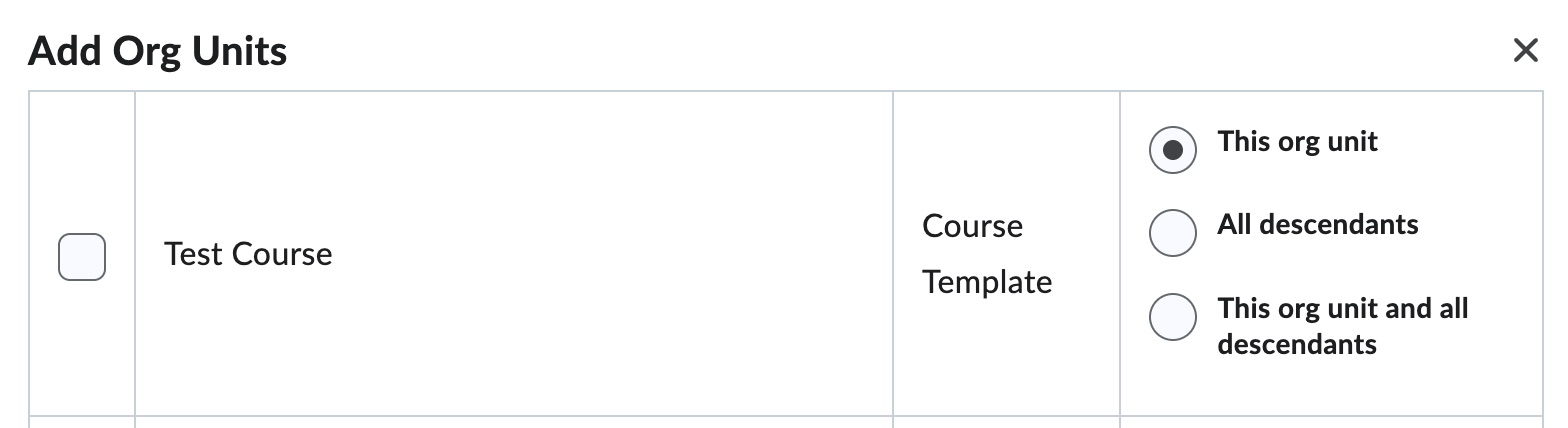
- Click Add Org Units.
- Select the classes or organizations that should have access to the learning application. If appropriate, select This org unit and all descendants to grant access to the selected organization unit and its descendants.
- Click Add.
Step 4: Add to the Required Organization Units
- Click Add Org Units.
- Select the classes or organizations that should have access to the learning application.
- If appropriate, select This org unit and all descendants to grant access to the selected organization unit and its descendants.
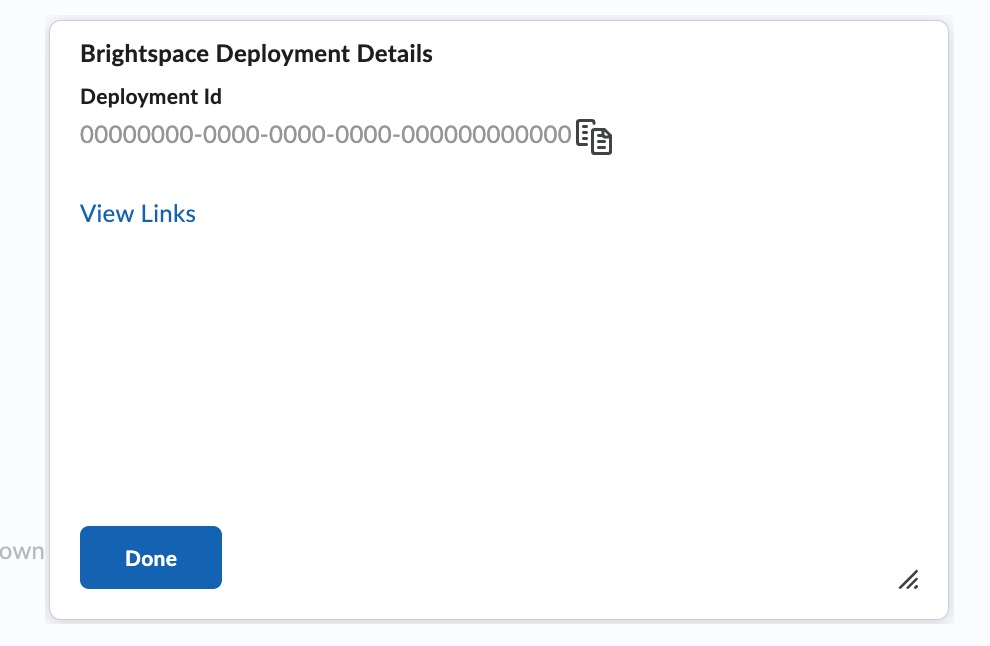
- Click Add. A Brightspace Deployment Details box will appear.
Step 5: Enter the Deployment ID in Edlink and Validate the Integration
- Copy the Deployment ID listed in the Brightspace Deployment Details. Leave this Brightspace tab open. You will need it in a later step.
- Return to the Edlink tab you left open in Step 2.
- Paste the Client ID from Brightspace into the Client ID field within the Edlink onboarding tab if it is not already filled in.
- Click Validate.
If the configuration is correct, you will see green check marks. If you do not see all green check marks, continue with the setup and email support@ed.link so the Edlink team can review the configuration.
Step 6: Create a Link to the Learning Application
- Return to the Brightspace tab you left open in Step 4.
- Click View Links.
- Click New Link.
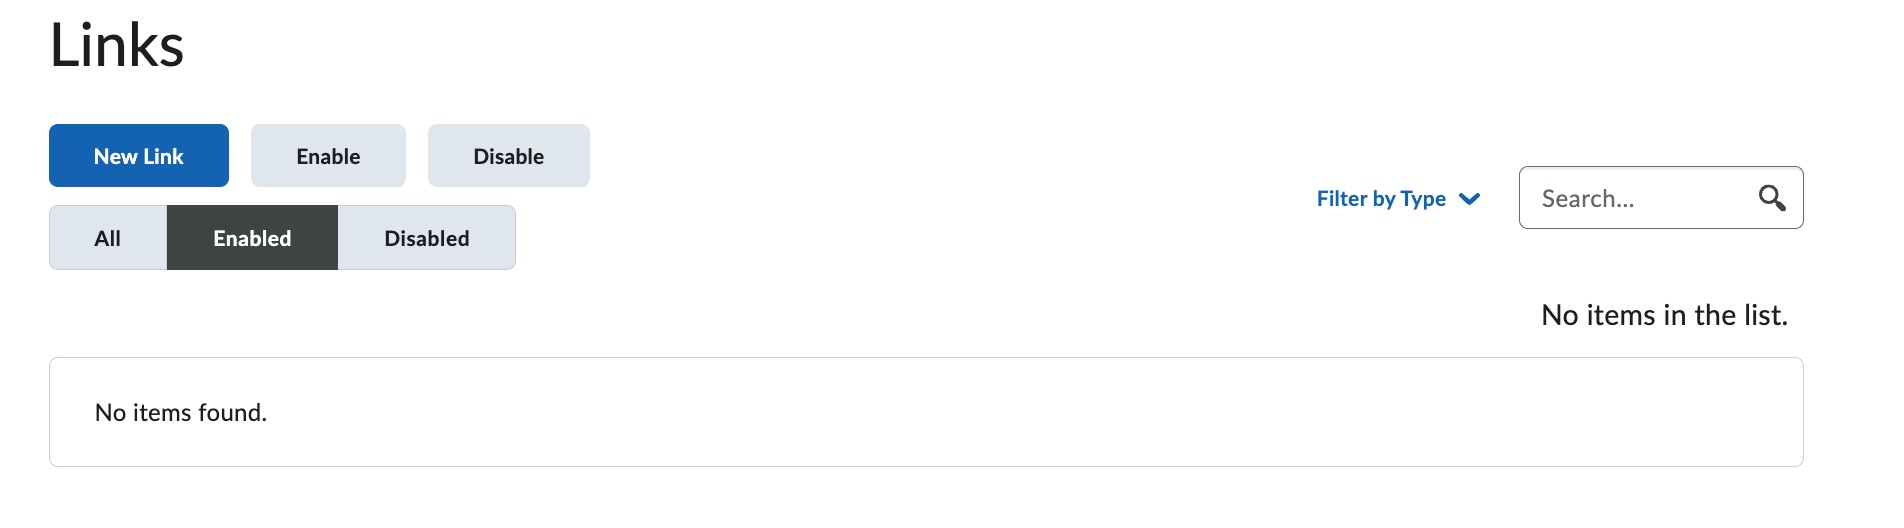
- Enter the information into the following fields:
- Name: Enter the name of your learning application.
- URL:
{Configuration JSON}/launch
Your URL should look similar to:https://ed.link/api/authentication/lti/00000000-0000-0000-0000-000000000000/launch - Description: Enter a description of your learning application.
- Type: Select Deep Linking Quicklink if your learning application supports passing grades and assignments back to Brightspace. Otherwise, select Basic Launch.
- Width:
800 - Height:
600
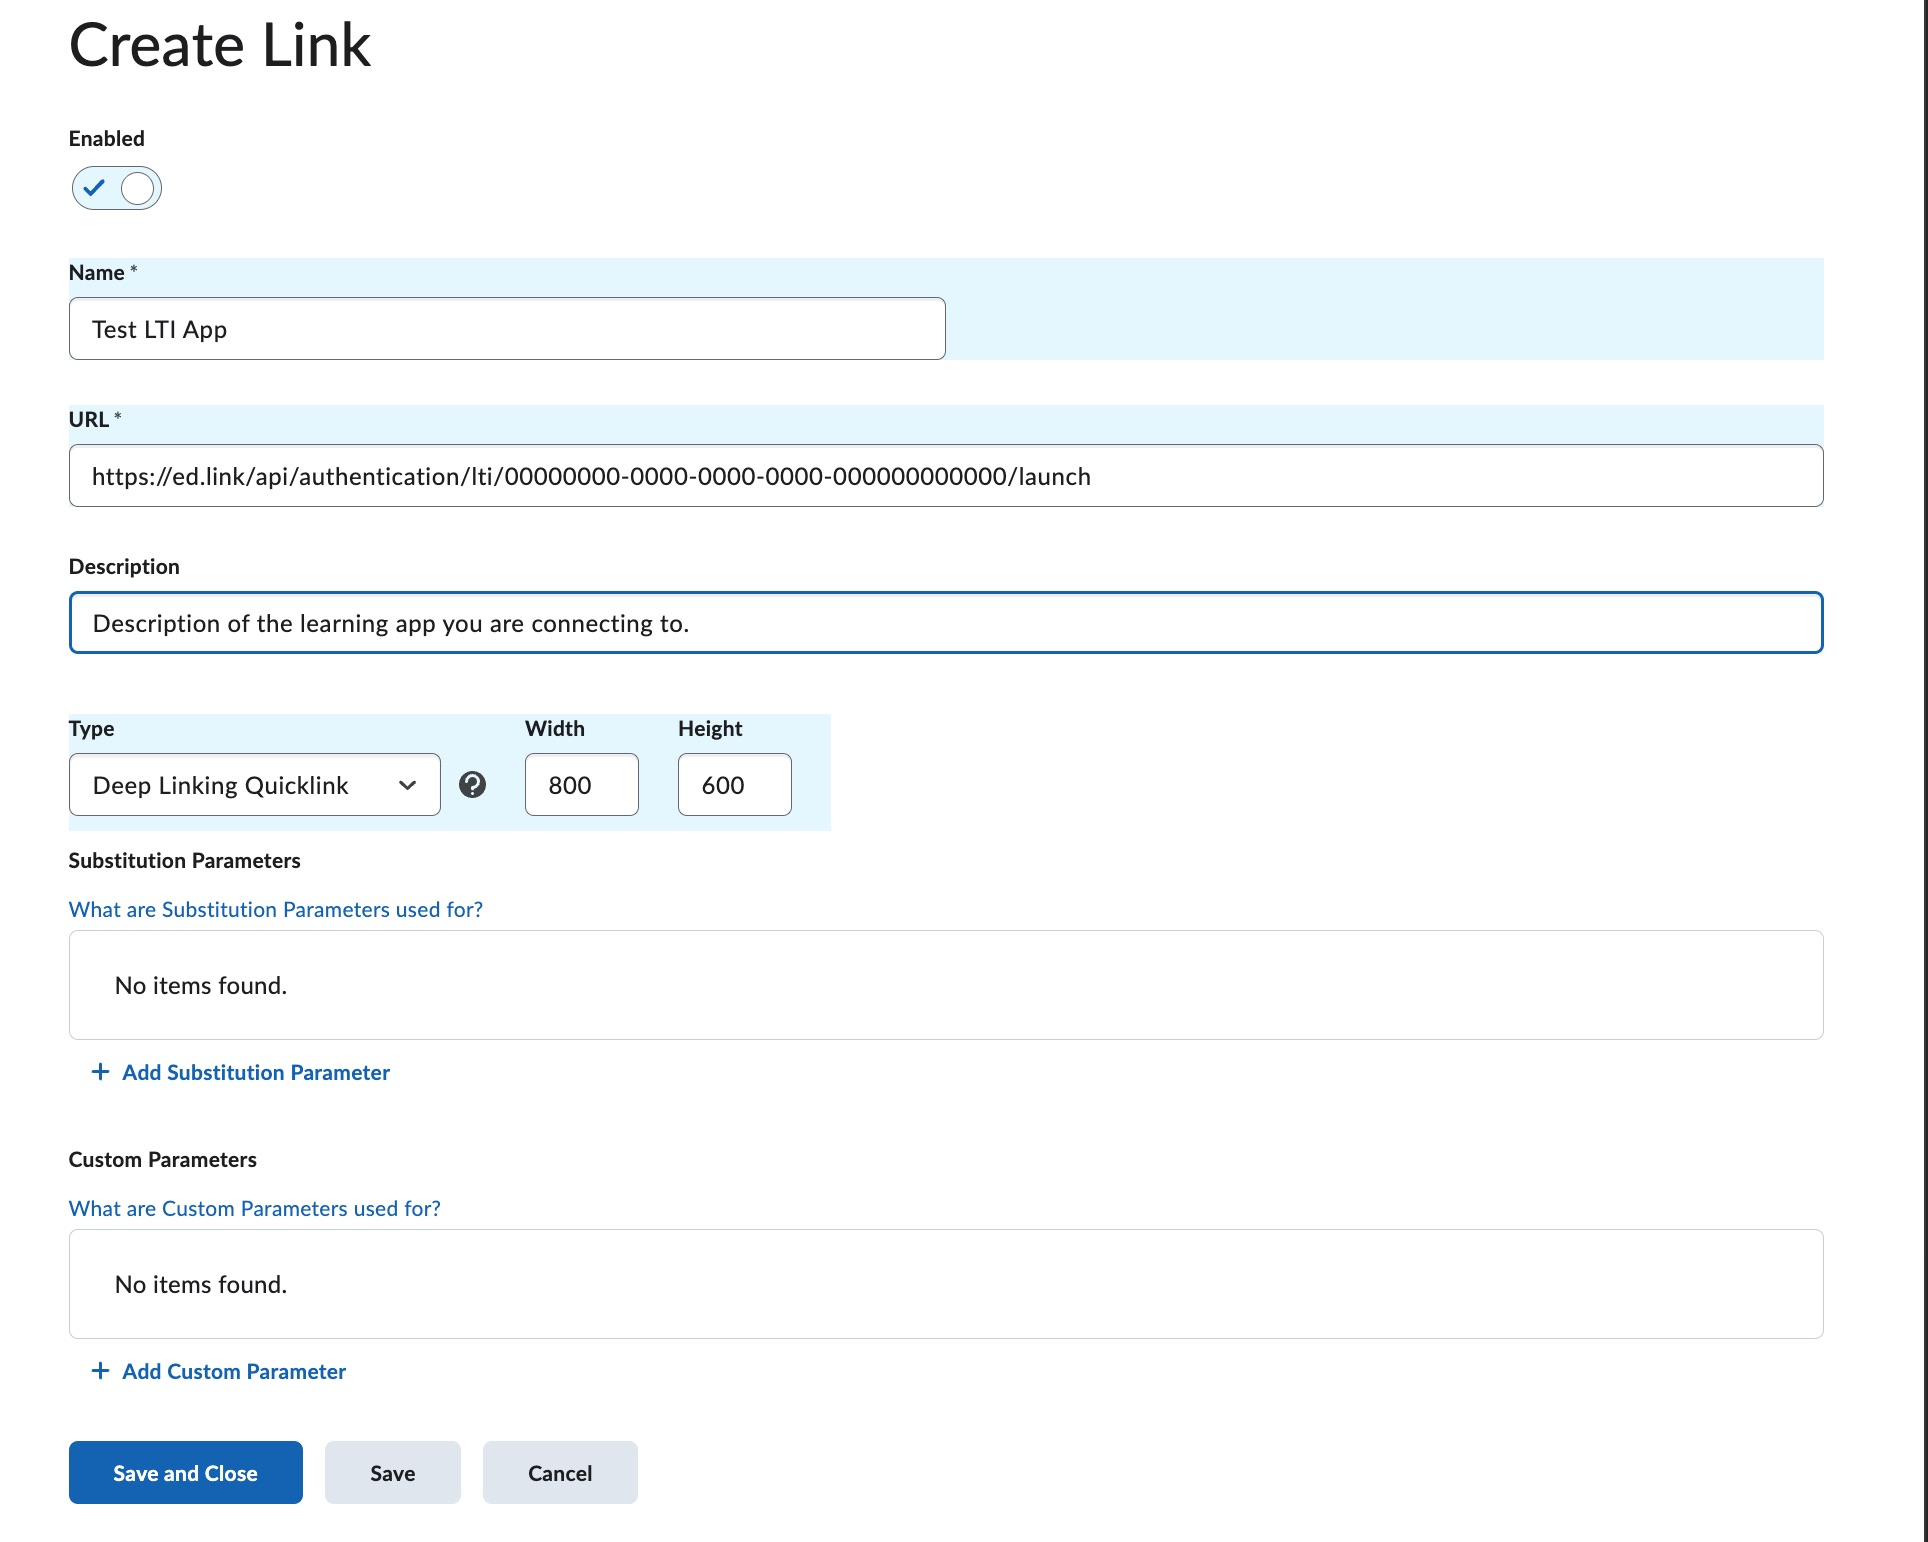
- Click Save and Close.
Well Done!
You have successfully created an LTI Advantage integration for Brightspace and installed your learning application as an LTI tool!
Any Questions?
If you have any questions or encounter issues, please contact our support team. We'll respond within 1 business day.