This guide will walk you through adding the necessary scopes to your Google OAuth client, ranging from basic identity scopes to custom scopes required for advanced integrations (like Google Drive or Google Classroom Addons).
Adding Basic Scopes
Basic scopes are required to link user identities.
- Go to Google Auth Platform / Data Access.
- Click on the Add or remove scopes button.
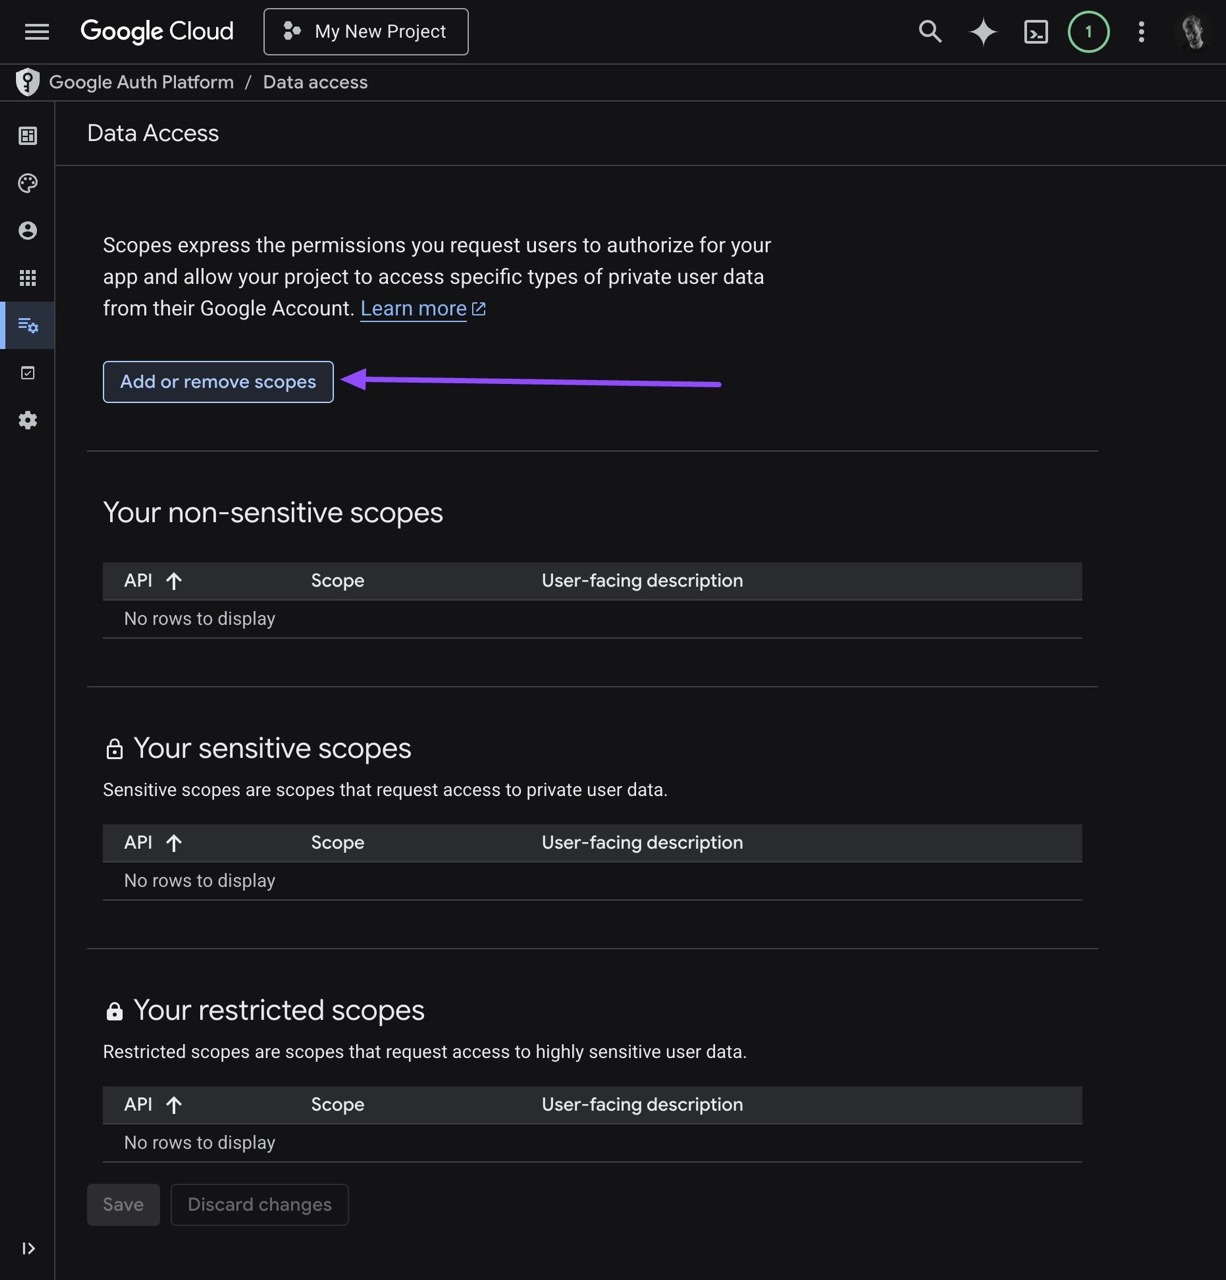
- In the panel that appears on the right side, check these basic scopes provided by Google:
openid.../auth/userinfo.email(Google's equivalent for OpenID'semail).../auth/userinfo.profile(Google's equivalent for OpenID'sprofile)
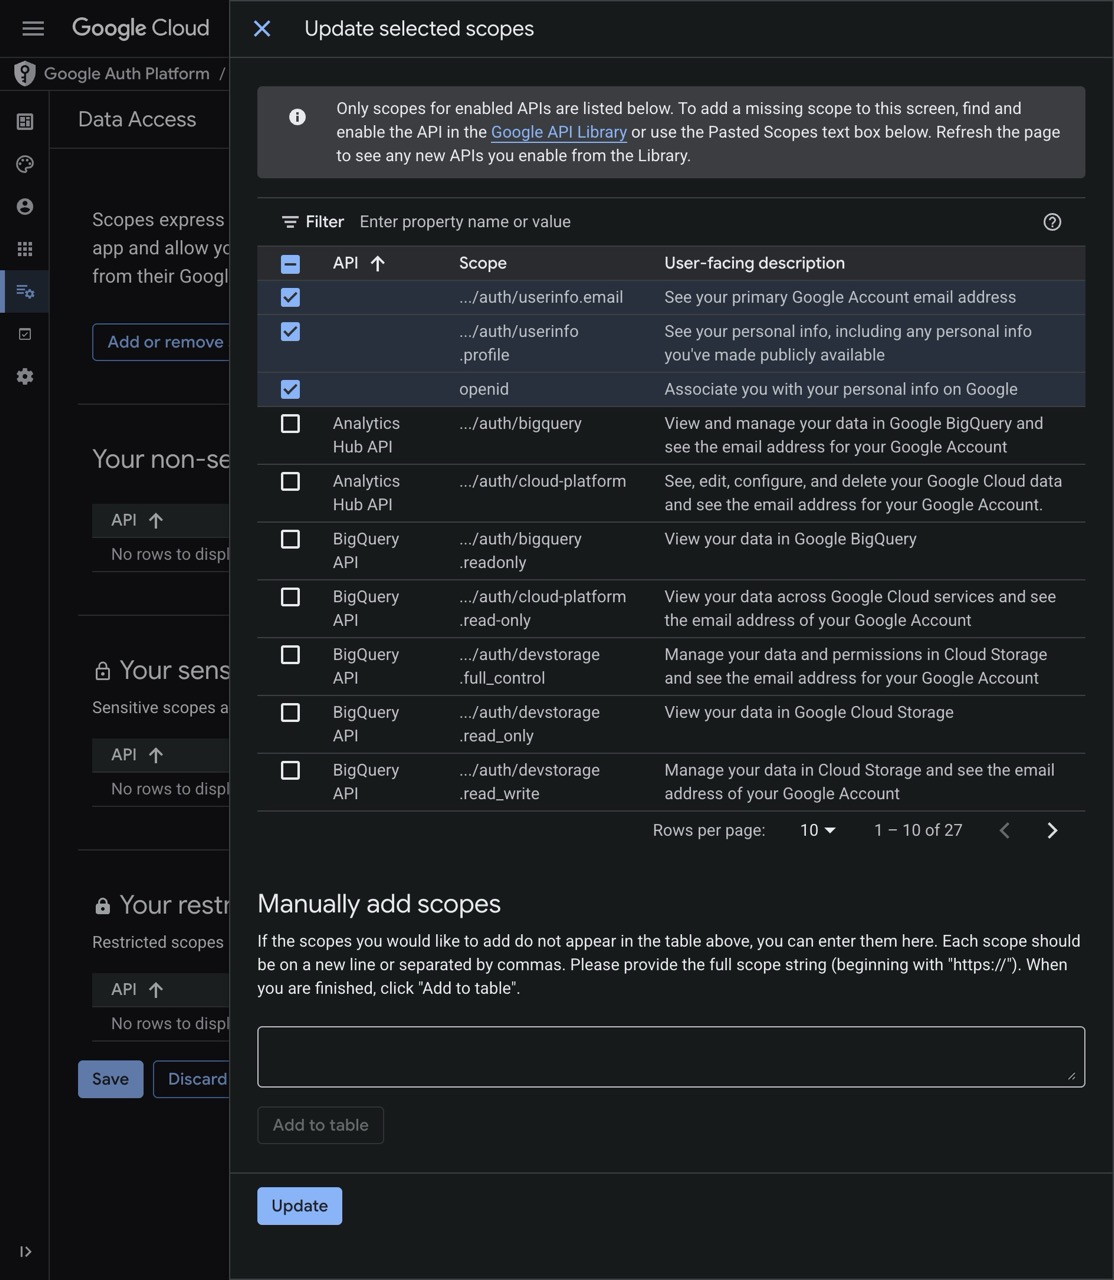
- Click on the Update button at the bottom of the panel.
- Click on the Save button.
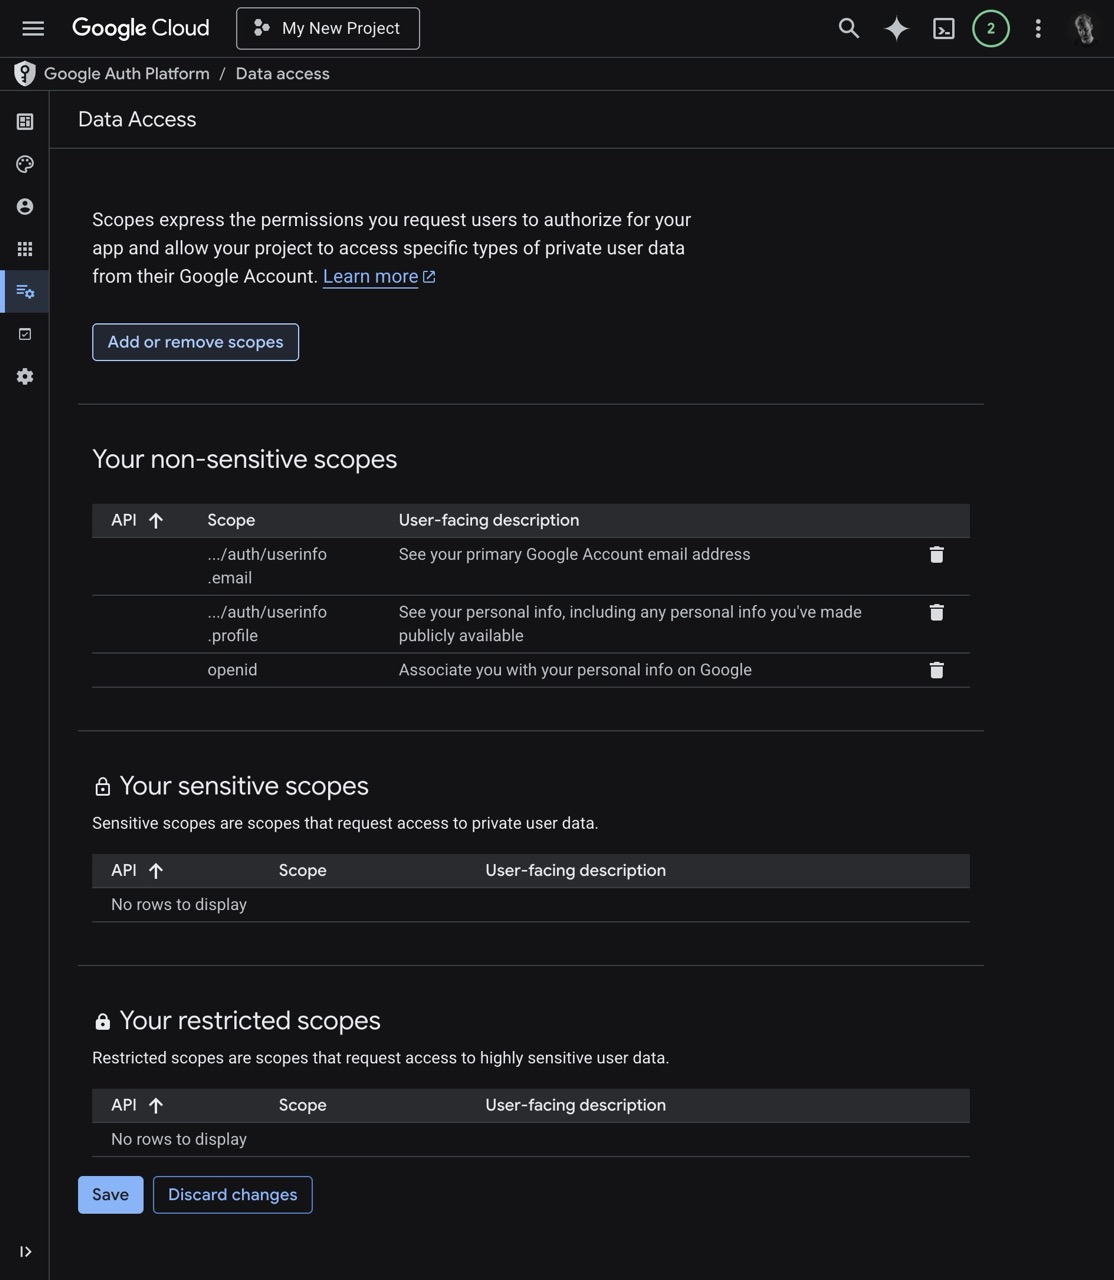
These basic identity scopes do not need to be copied into your Google Provider configuration on Edlink. Edlink requests them by default.
Adding Custom Scopes (Optional)
You only need to add custom scopes if your application requires specific integrations with Edlink, such as Google Drive or Google Classroom Addons.
Required Custom Scopes
- Google Drive Integration:
- If your application wants to read and download files from Google Drive, you must add:
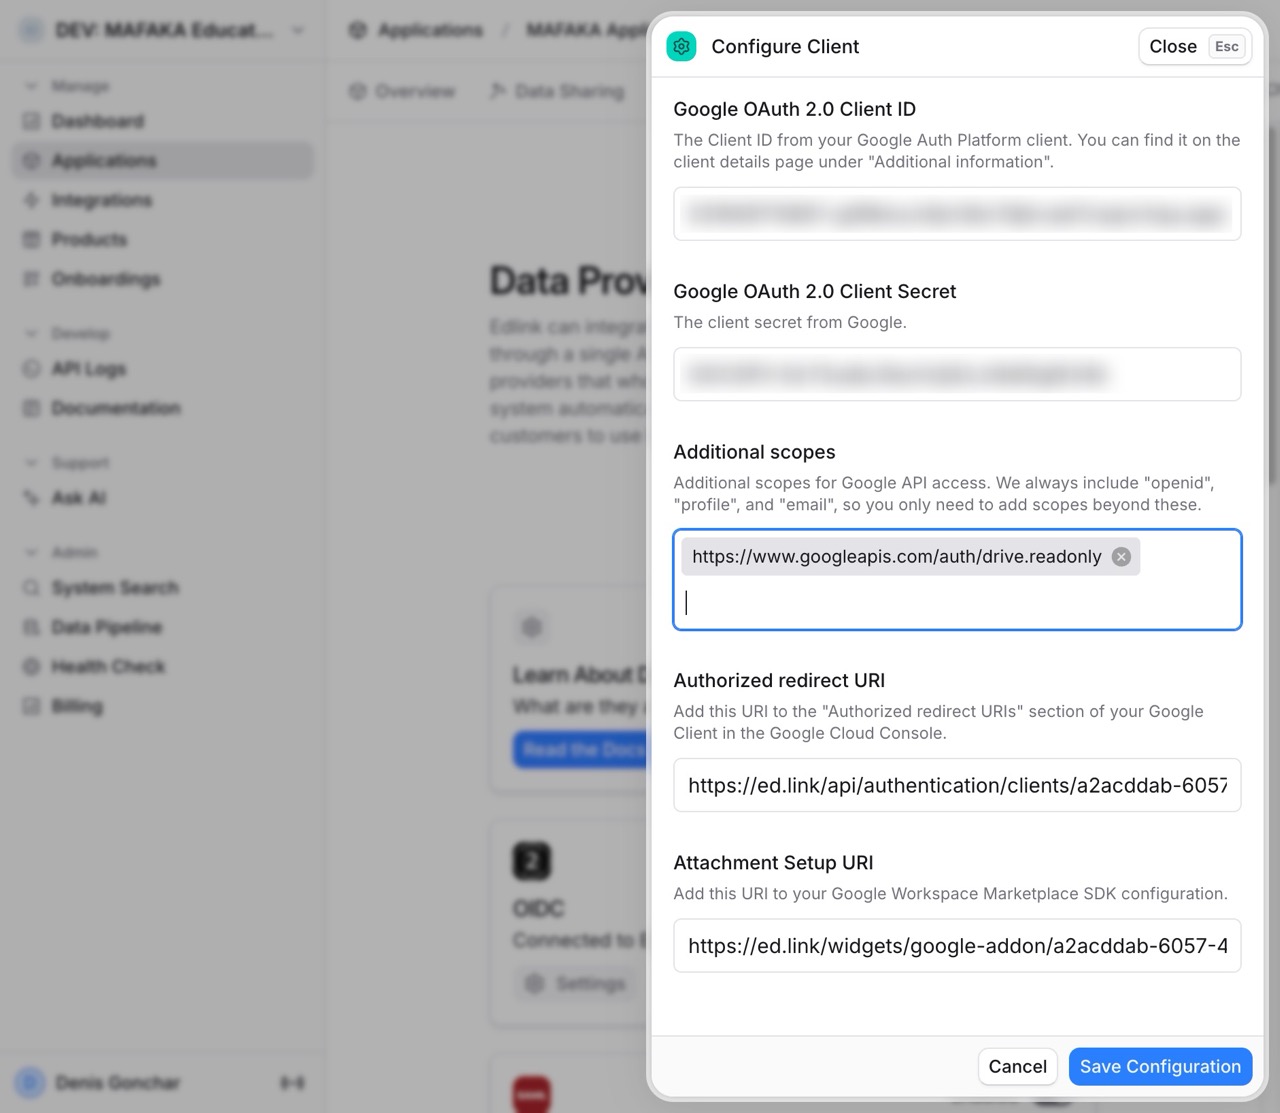
https://www.googleapis.com/auth/drive.readonly, which is a Restricted Scope - If your application wants to upload files to Google Drive, you must add:
https://www.googleapis.com/auth/drive.file, which is a Non-sensitive Scope
- If your application wants to read and download files from Google Drive, you must add:
- Google Classroom Addon: If you are building a Google Classroom Addon via Edlink, you must add:
https://www.googleapis.com/auth/classroom.addons.teacherhttps://www.googleapis.com/auth/classroom.addons.student
Note: If you use both features, you must add all of the above scopes.
How to Add Custom Scopes
- On the Data Access page, click the Add or remove scopes button again.
- In the right panel, scroll down to the Manually add scopes section.
- Paste the required absolute scope URLs (e.g.,
https://www.googleapis.com/auth/drive.readonly). You can separate multiple scopes with commas or put them on new lines. - Click Add to table, and then click Update at the bottom.
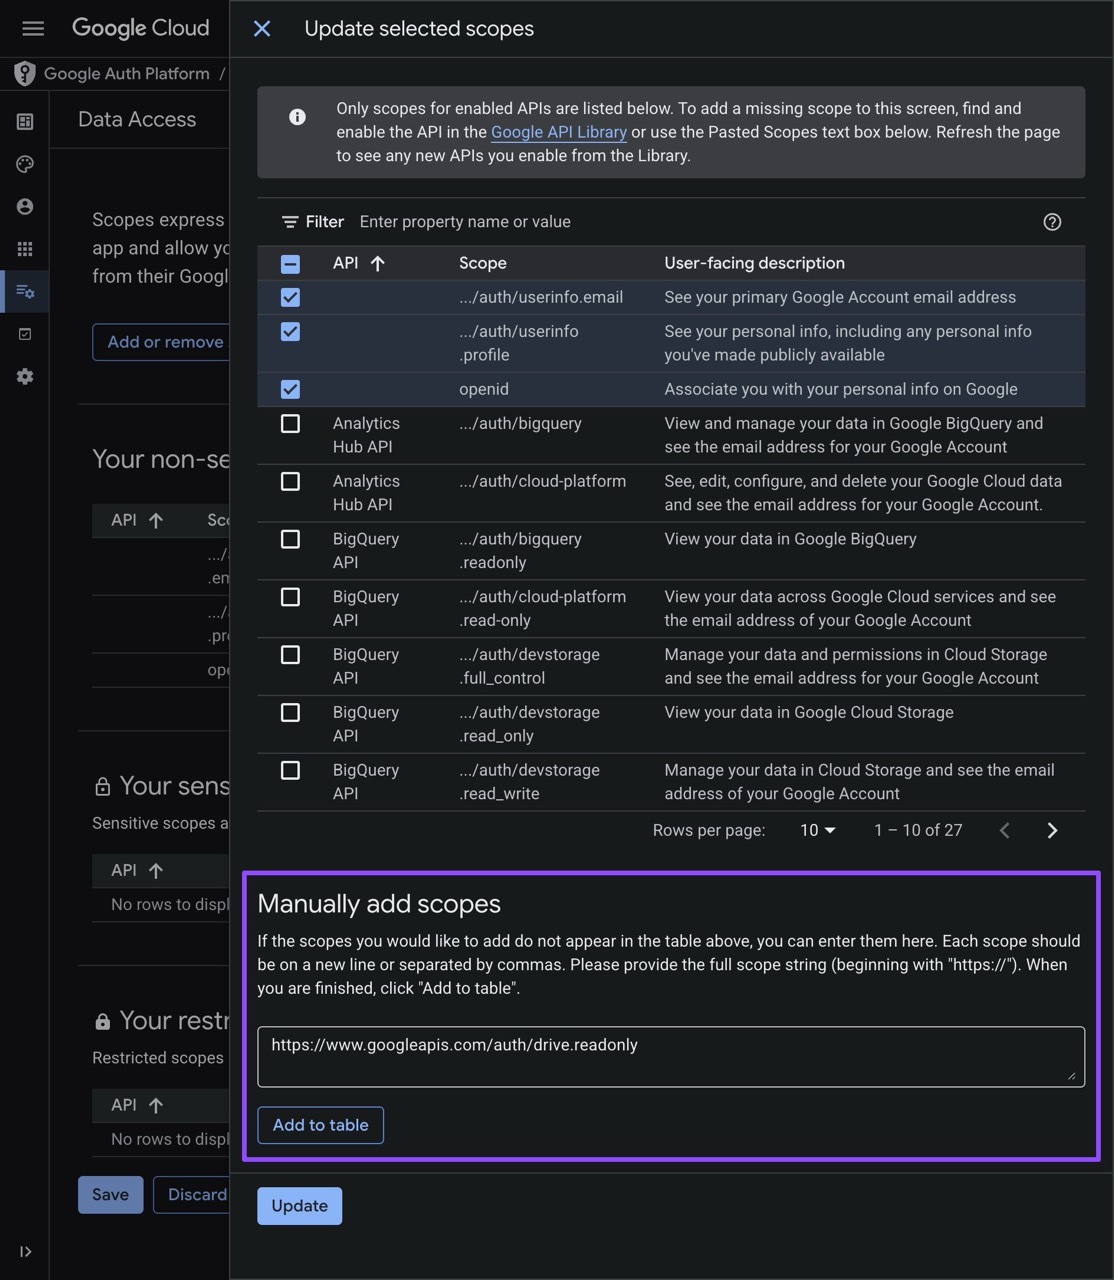
- Click Save on the Data Access page.
Important: All custom scopes that you add manually in the Google Cloud Console must be added 1-to-1 to your Edlink Data Provider configuration!
- Finally, go back to the Edlink dashboard -> Applications -> Your Application -> Providers.
- Open your Google Provider configuration and paste all your custom scopes (comma or space separated) into the Additional scopes field.
- Click Save Configuration.
Well done!
Your scopes are fully configured and synced with your Edlink provider.
Any Questions?
If you still have questions, please contact our support team and we'll get back to you within 24 business hours.