
This guide focuses on Edlink's recommended hybrid integration (API + LTI 1.3). However, it is also possible to configure your app using an LTI Advantage–only setup.
Please confirm with the learning app that an LTI-only source is something they support before proceeding.
Check out the following guide to get your LTI Advantage source set up in Edlink:
Connecting using LTI Advantage
Developer Guide
Click to Read
This process should be completed once you have finished integrating with your learning application. To learn more about connecting your Canvas instance, check out this guide:
Connecting Canvas
Developer Guide
Click to Read
Step 1: Open Developer Keys in Canvas
- In Canvas, go to:
Admin → Your School Name → Developer Keys (left column) - Click + Developer Key → + LTI Key

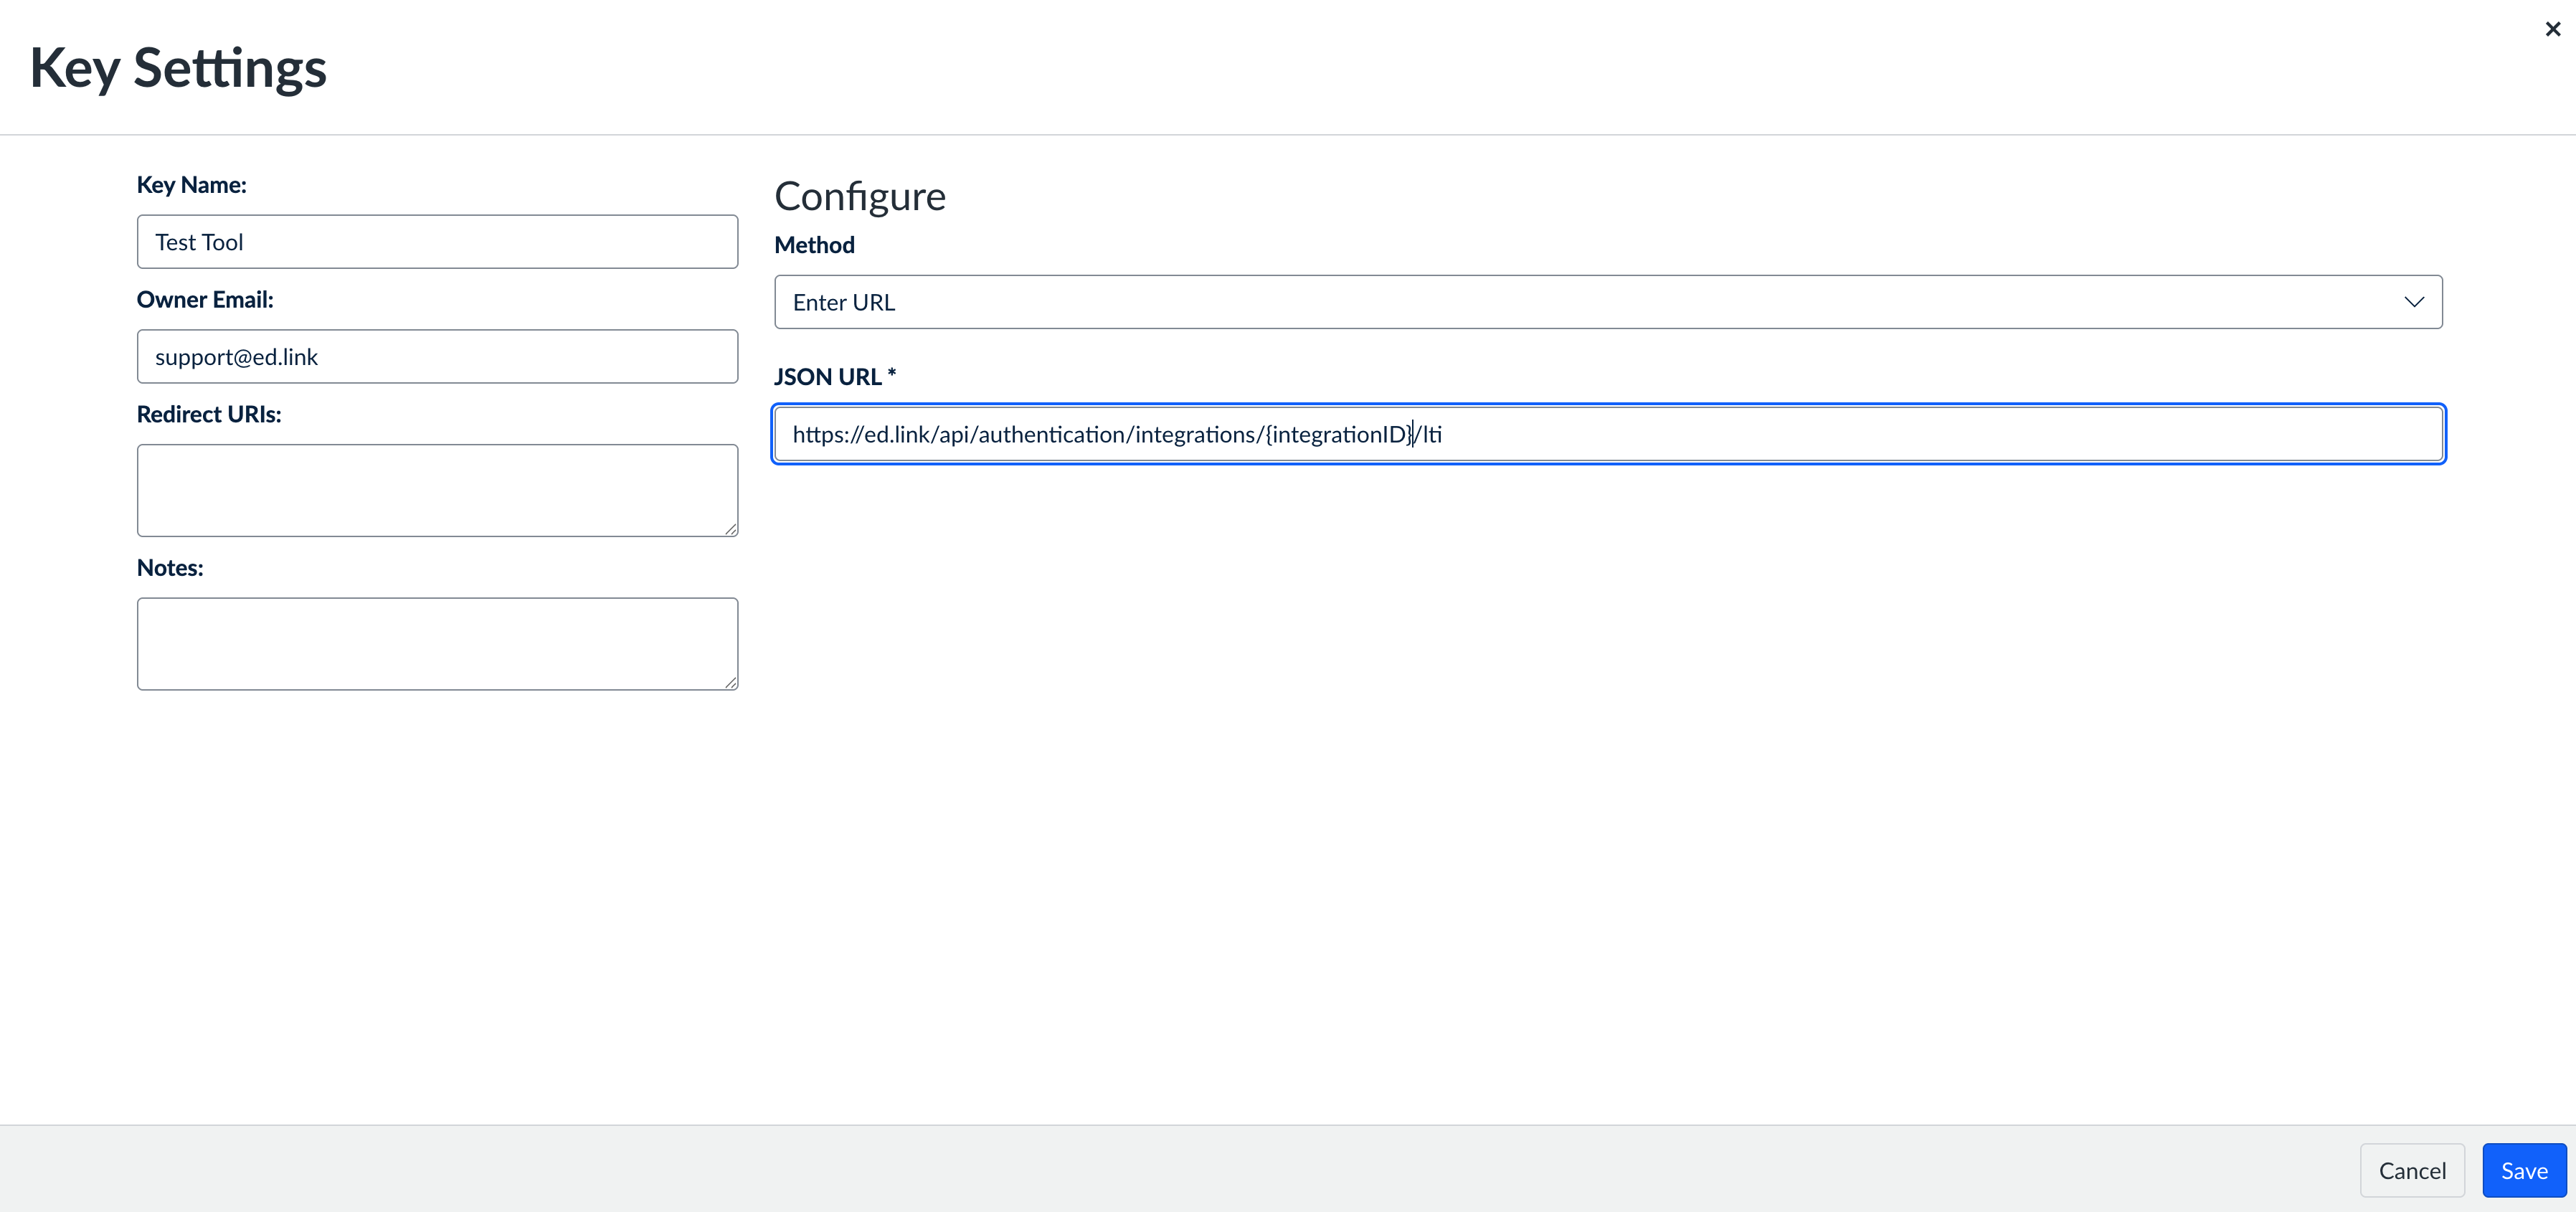
Step 2: Enter Configuration Details
- Choose the Enter URL method
- Fill in the following fields:
- Key Name: Enter the name of the learning application
- Owner Email:
support@ed.link - JSON URL: This is the Configuration JSON found in the Edlink dashboard.
Refer to this guide for help:Finding Your LTI KeysDeveloper GuideClick to Read
- Click Save
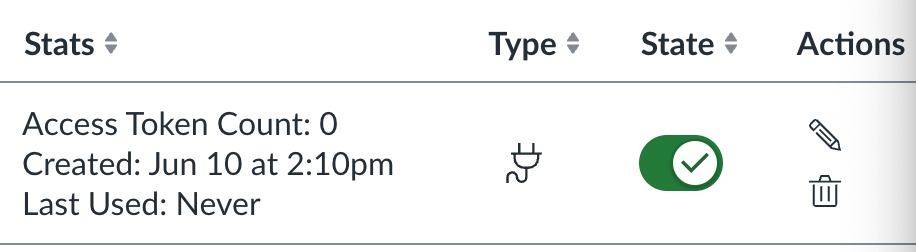
Step 3: Activate the Developer Key
- Find the key you just created
- Toggle the State switch to the "on" position
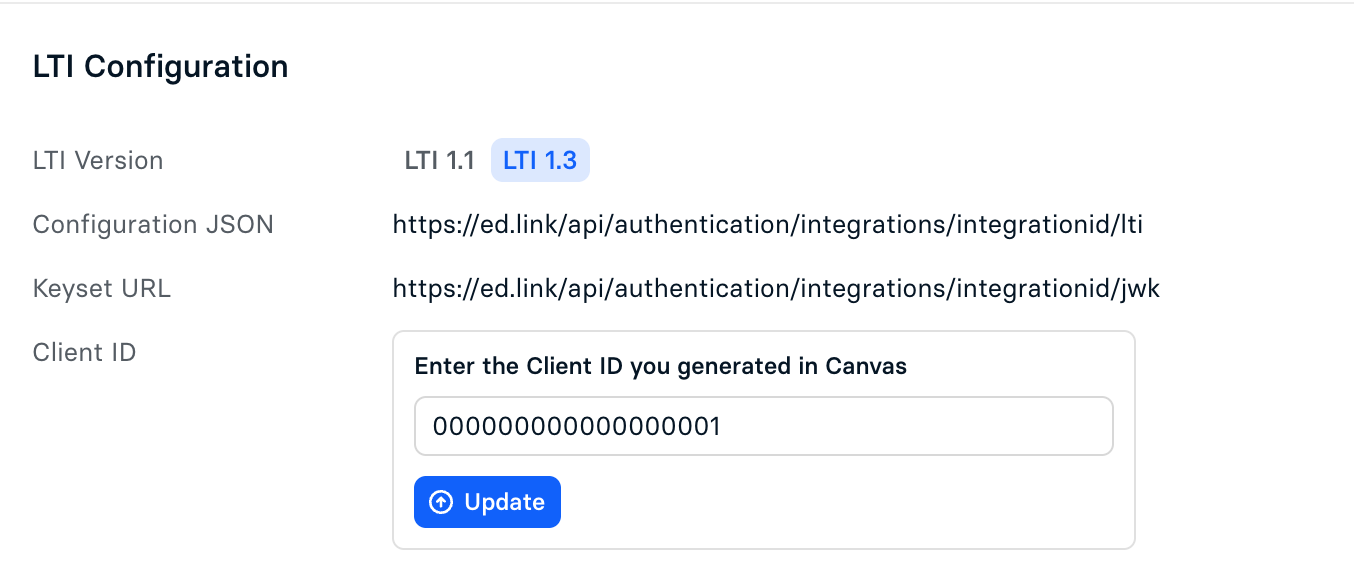
Step 4: Copy the Client ID to Edlink
- Copy the Client ID from the Details section in Canvas
- Go to the LTI 1.3 section of the Edlink dashboard
- Paste it into the Client ID field and click Update
- Save the Client ID for use in the next step
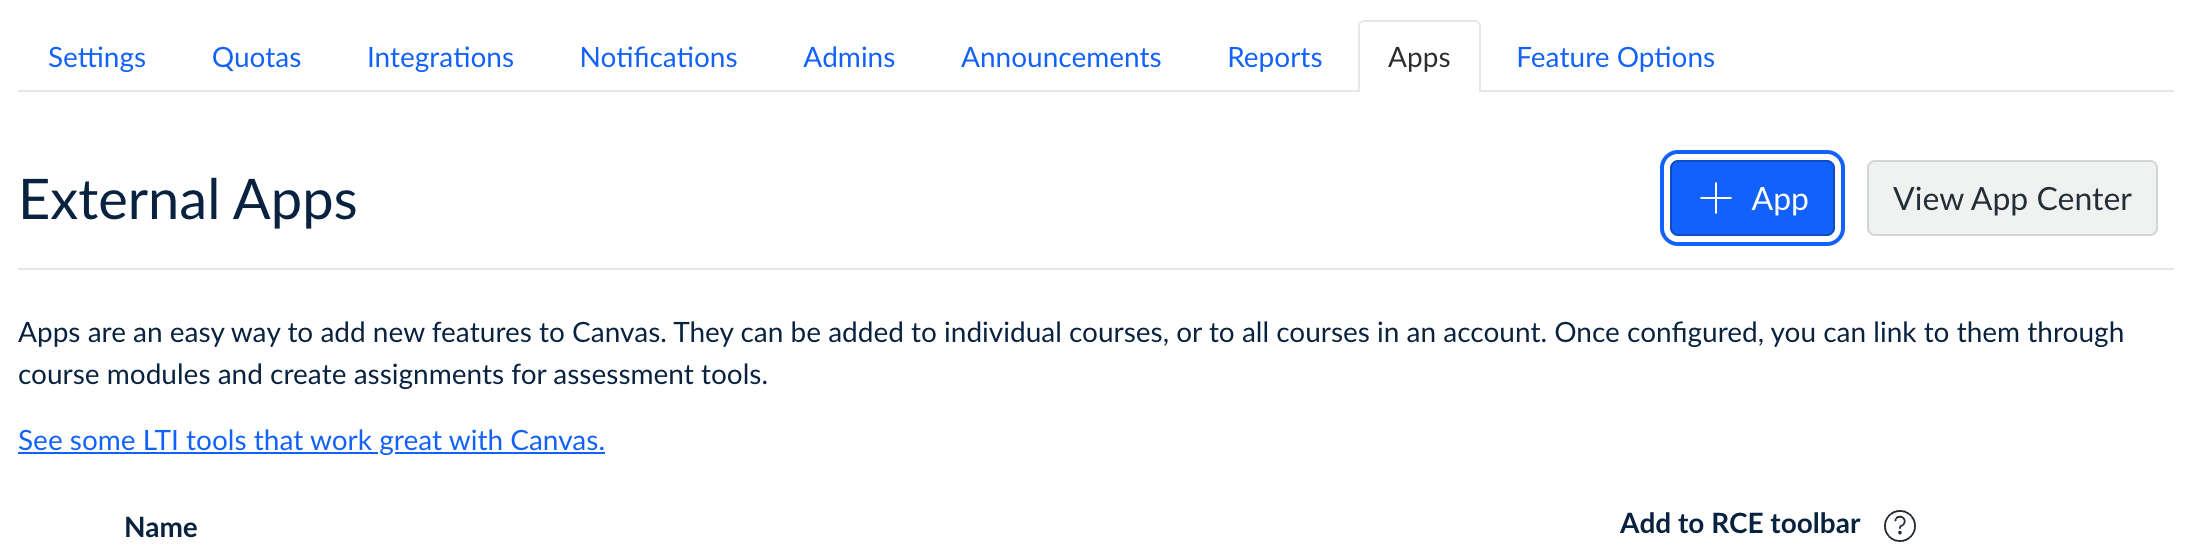
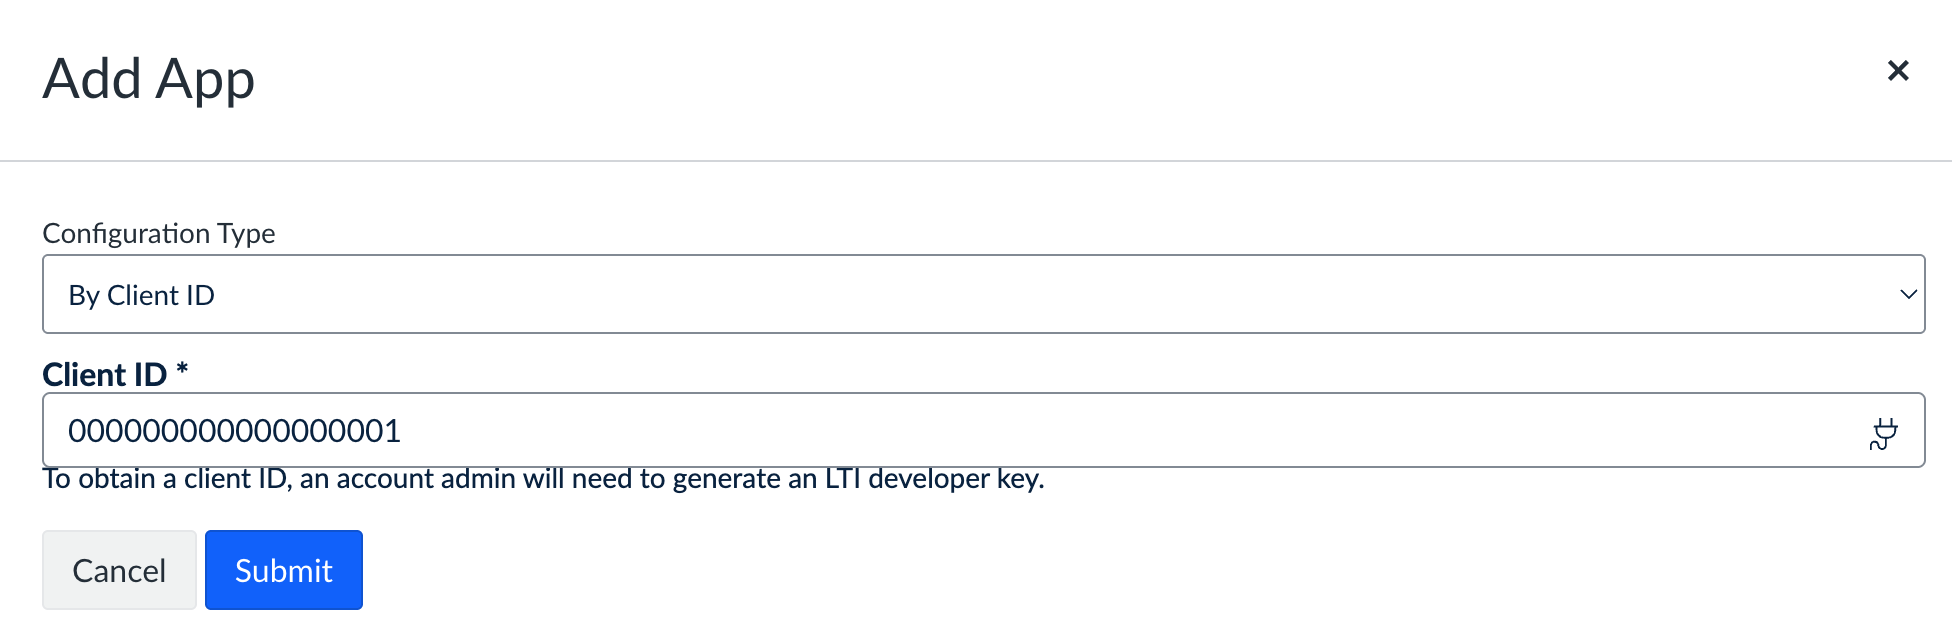
Step 5: Add the App in Canvas
- In Canvas, go to:
Settings → Apps → View App Configurations - Click + App
Step 6: Complete the Installation
- Choose By Client ID as the Configuration Type
- Paste in the **Client ID you saved from Step 4
- Click Submit
- Then click Install when prompted
Well Done!
You have successfully installed your learning application as an LTI source!
Any Questions?
If you have any questions or encounter issues, please contact our support team. We'll respond within 24 business hours.