Before We Get Started:
You must be a Skyward Administrator to complete the integration process.
Step 1: Start the Integration Flow in Edlink
- Click the integration link provided by your learning app.
- Create an Edlink account if you don't already have one.
If you've connected an app to Edlink before, log in with your existing account.
- Select Skyward from the list of available data sources.
- Choose your preferred data storage region.
Note: The integration flow provides direct links and pages to help you complete these steps.
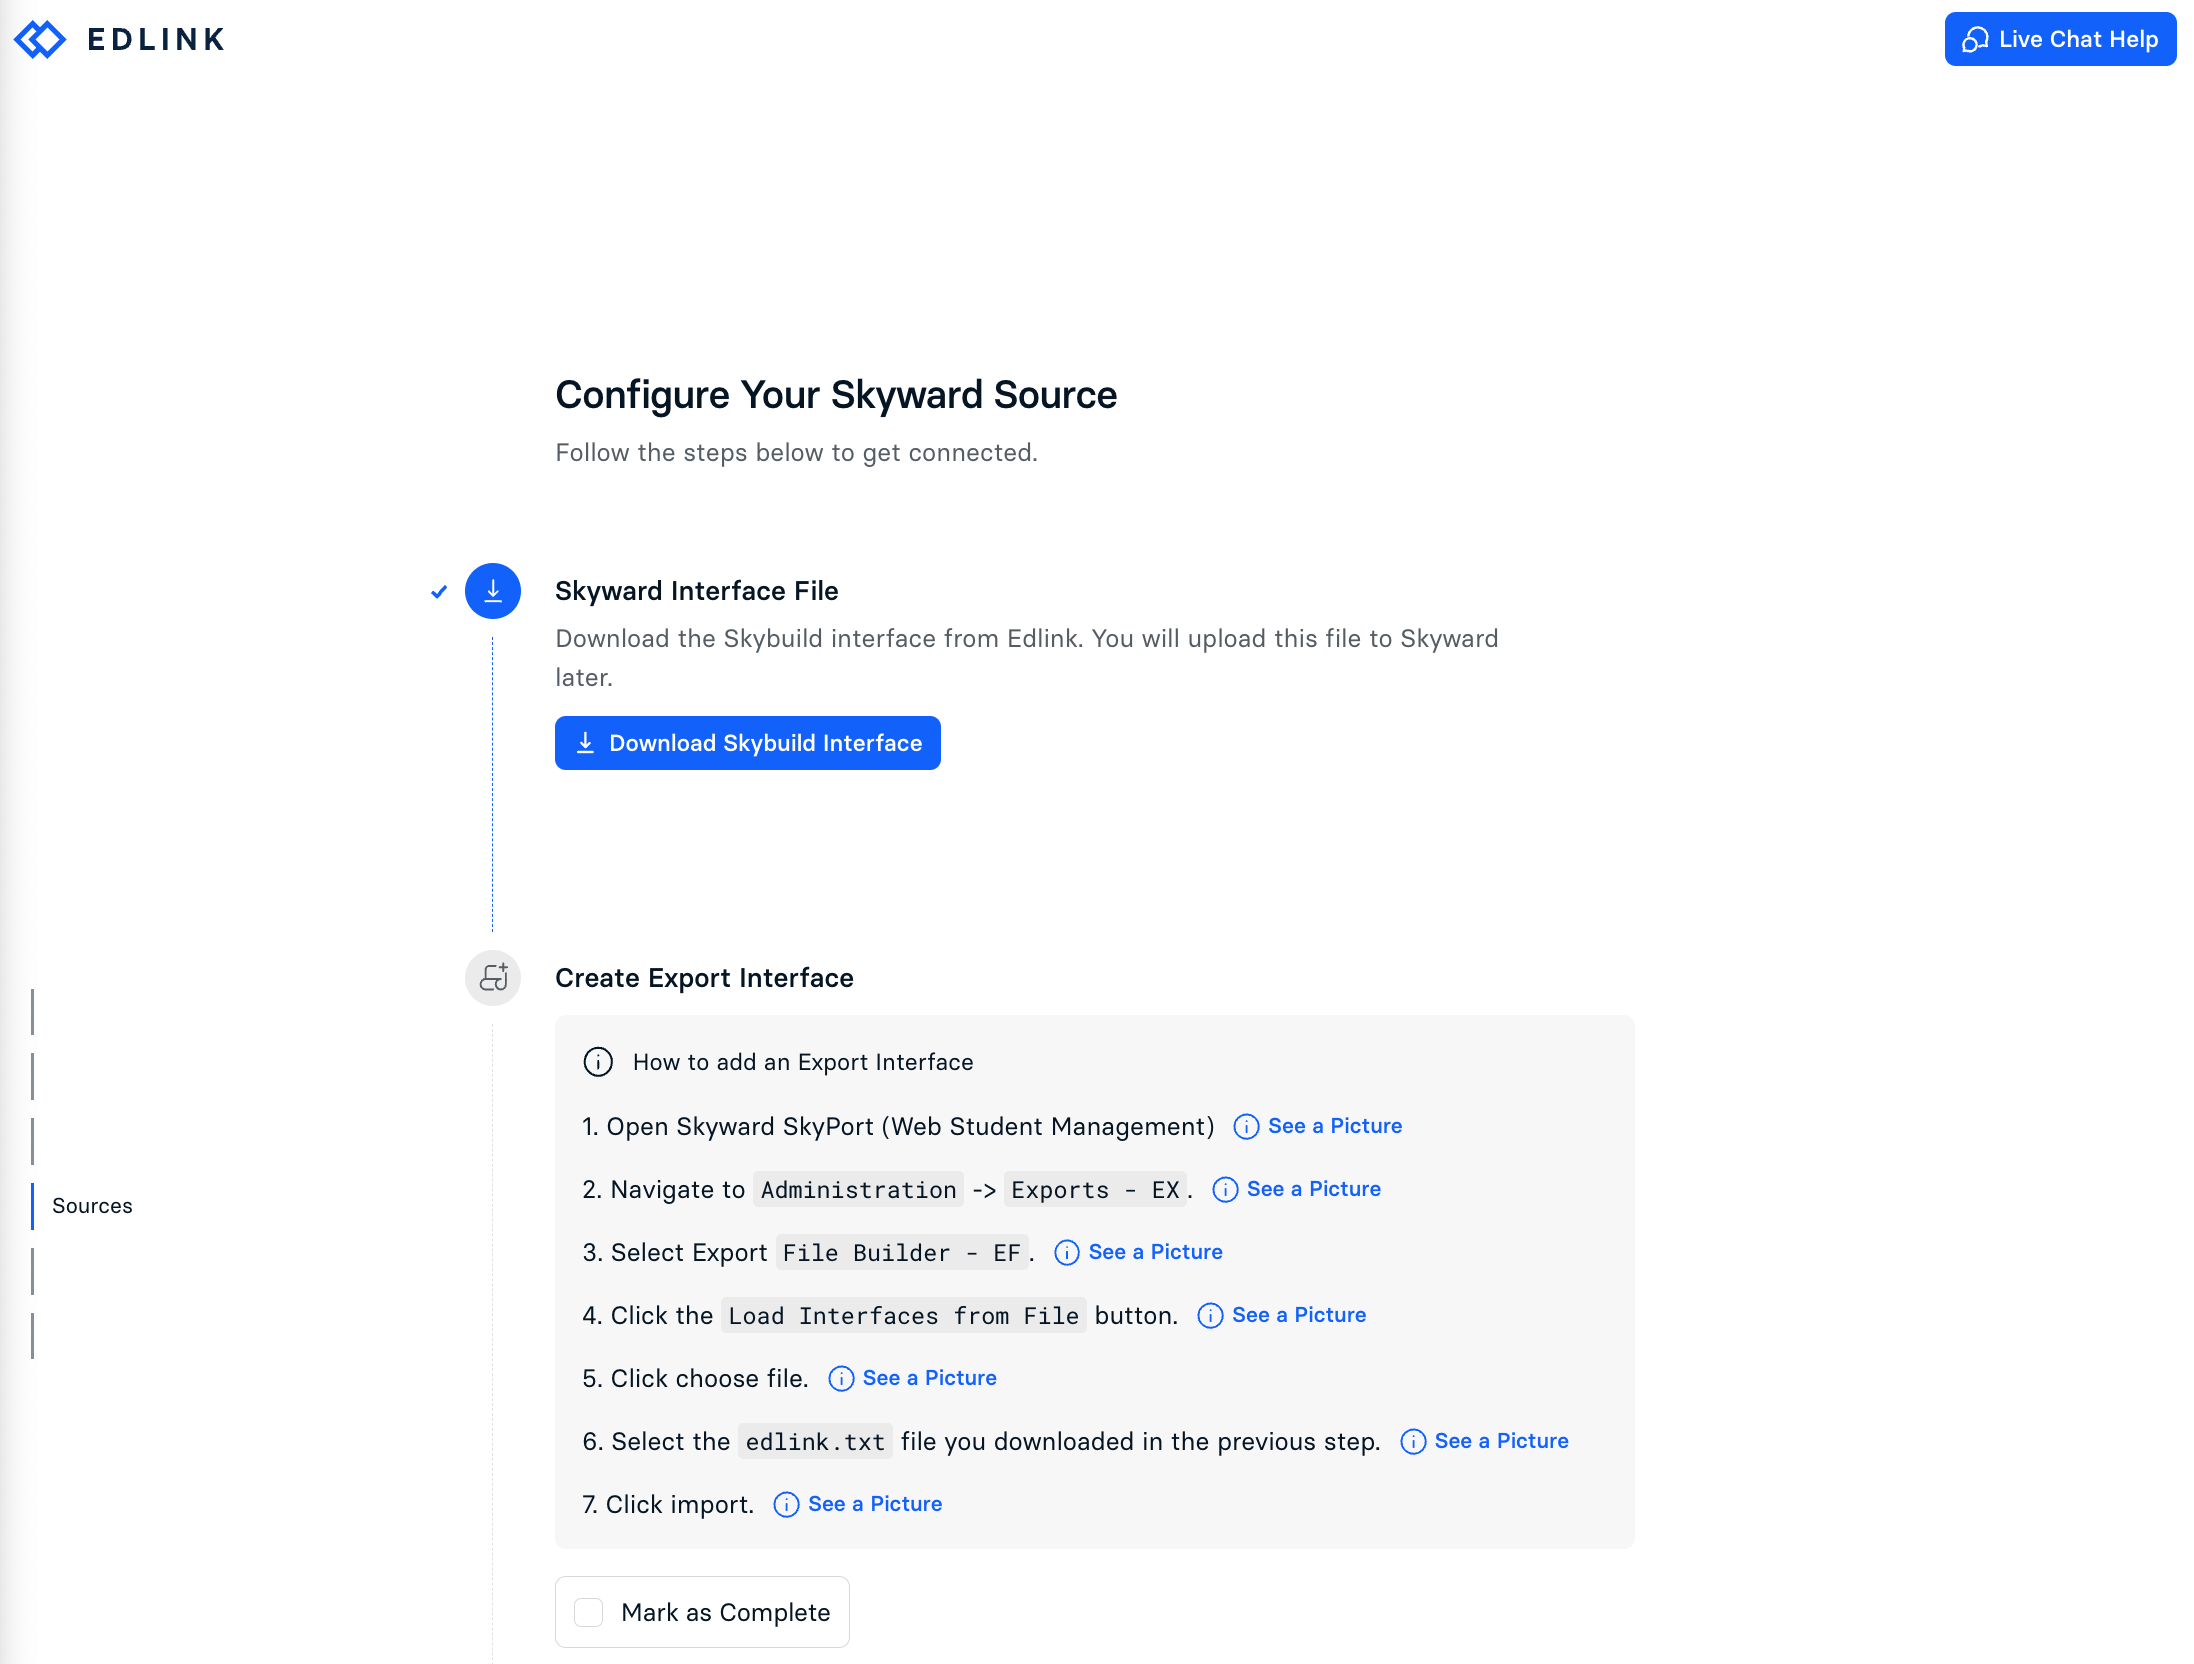
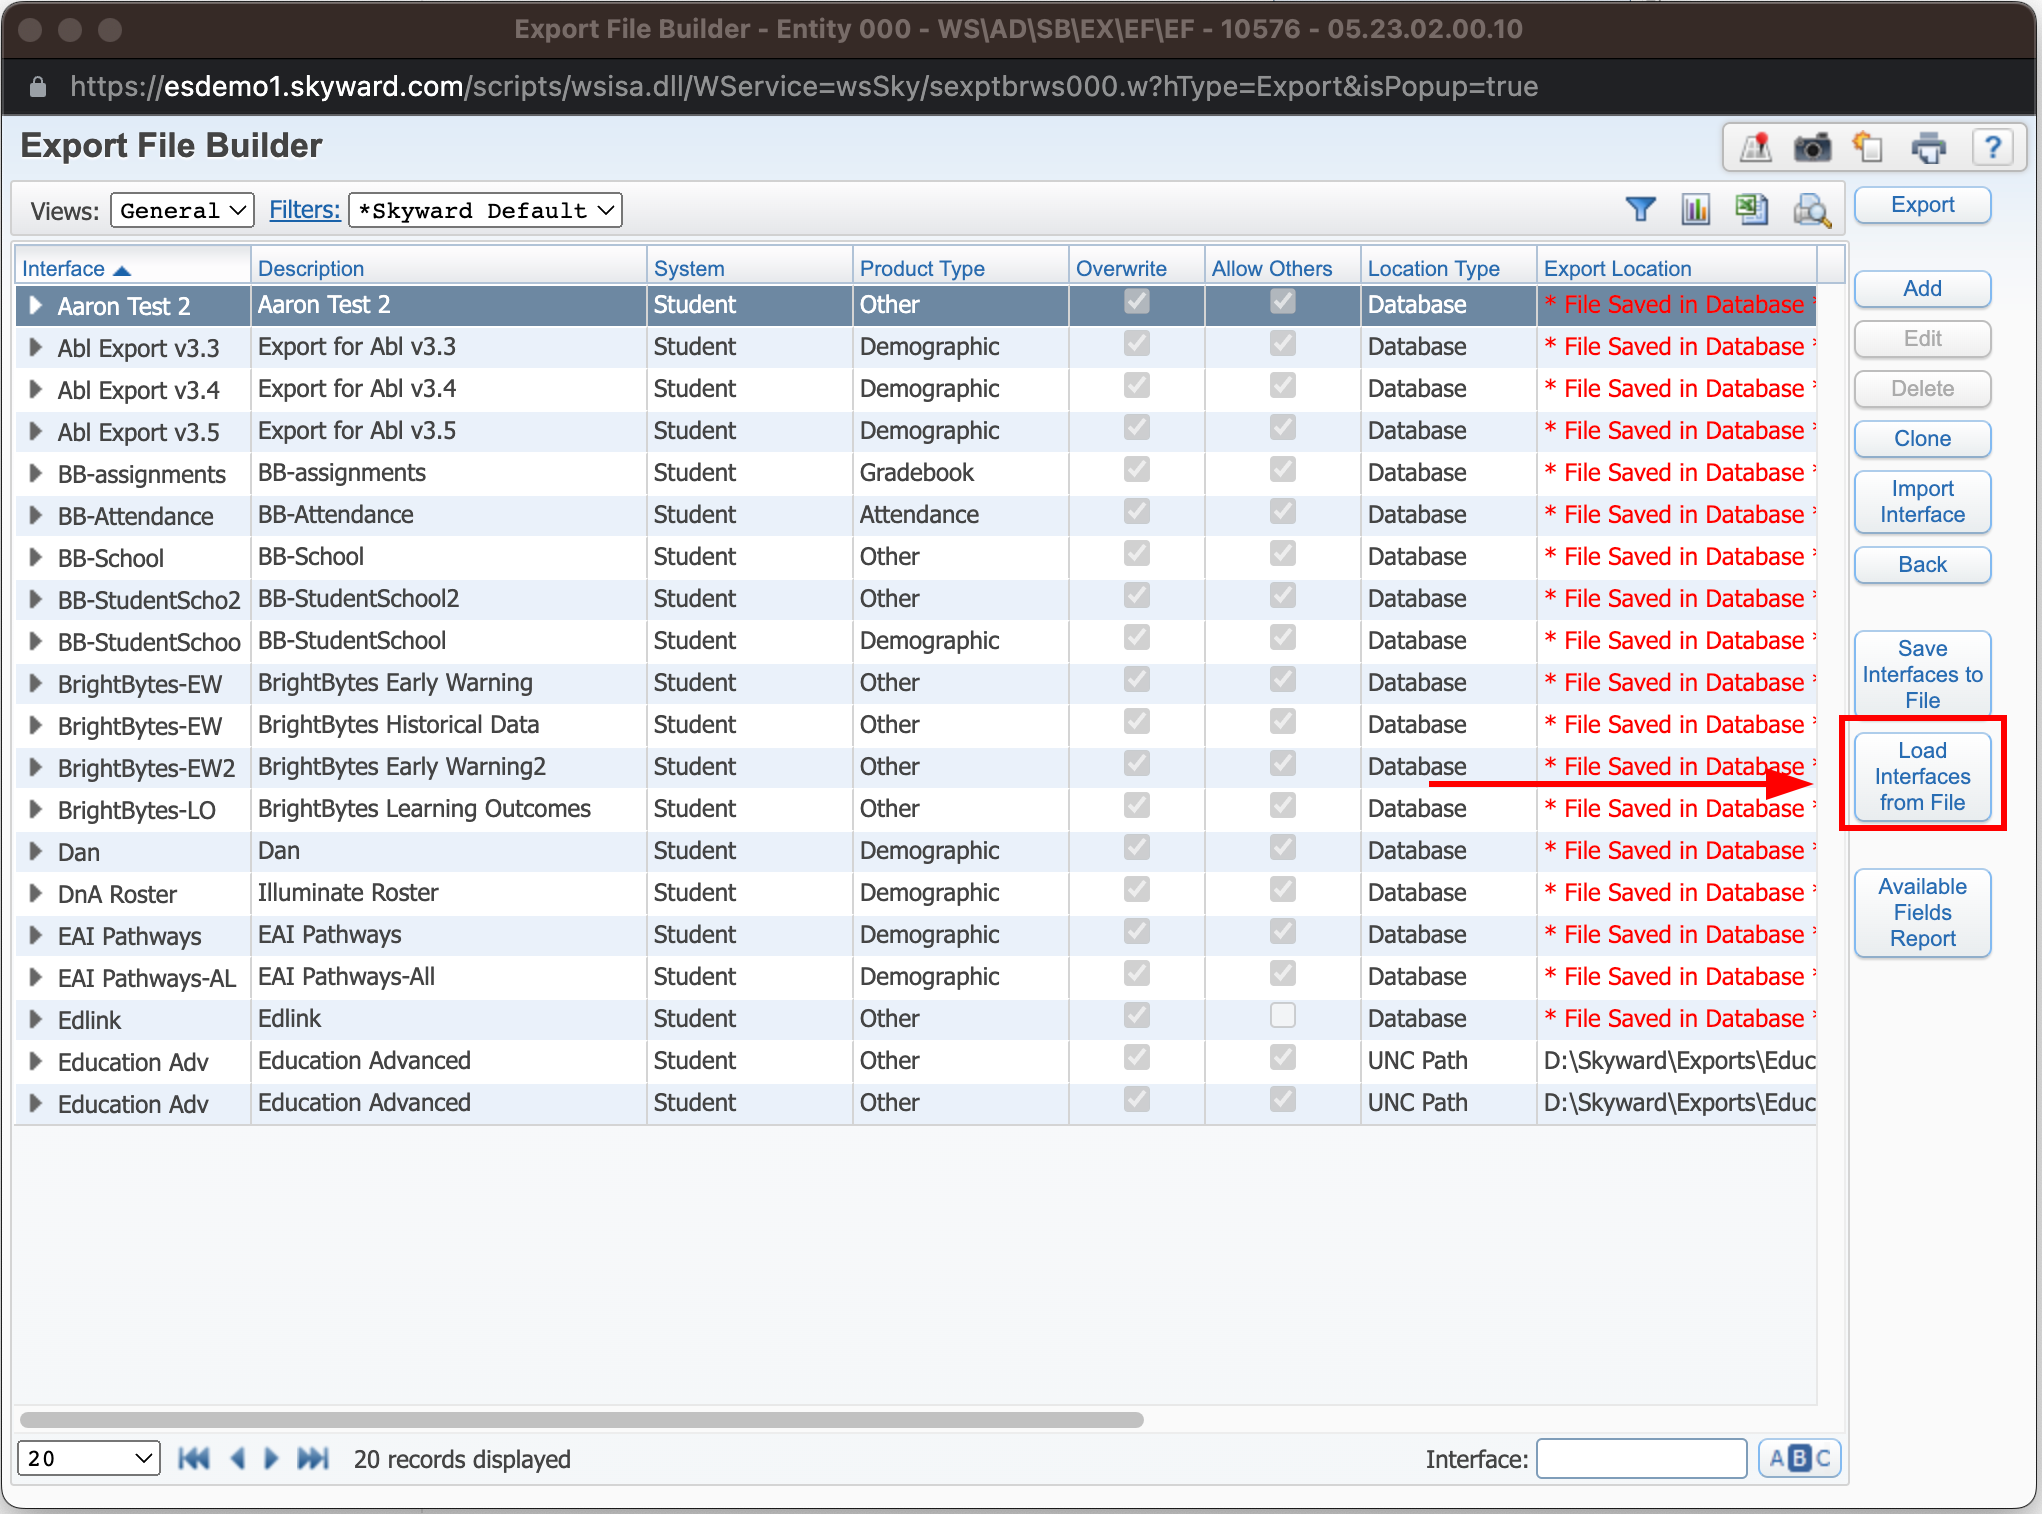
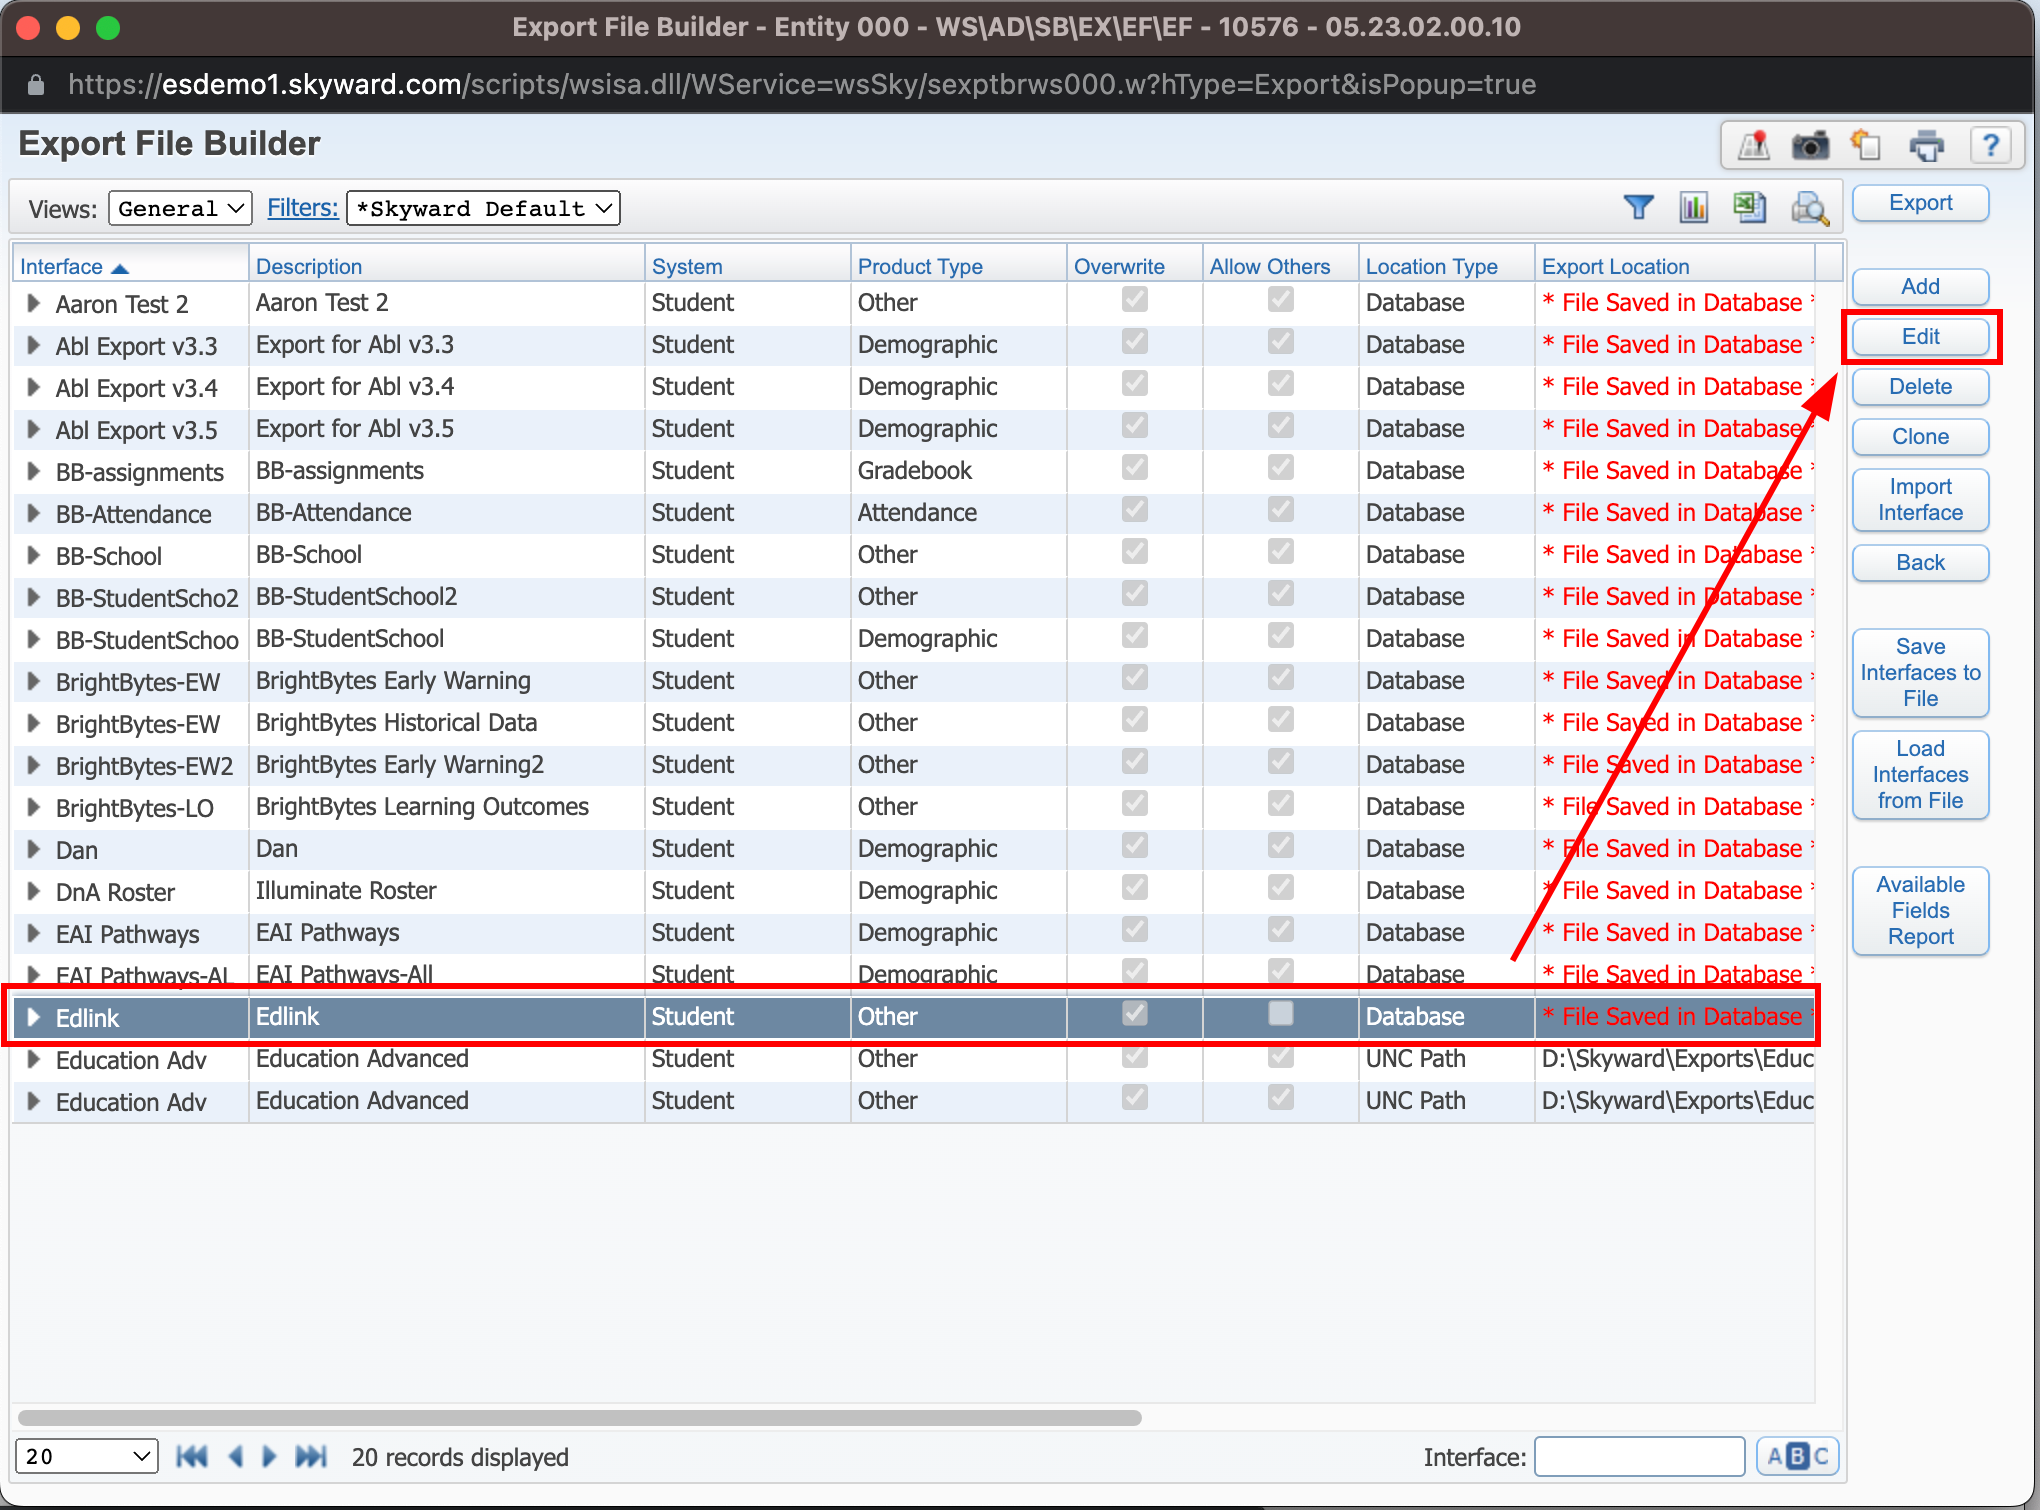
Step 2: Create an Export Interface in Skyward
- Download the Skybuild Interface from the Edlink Integration.
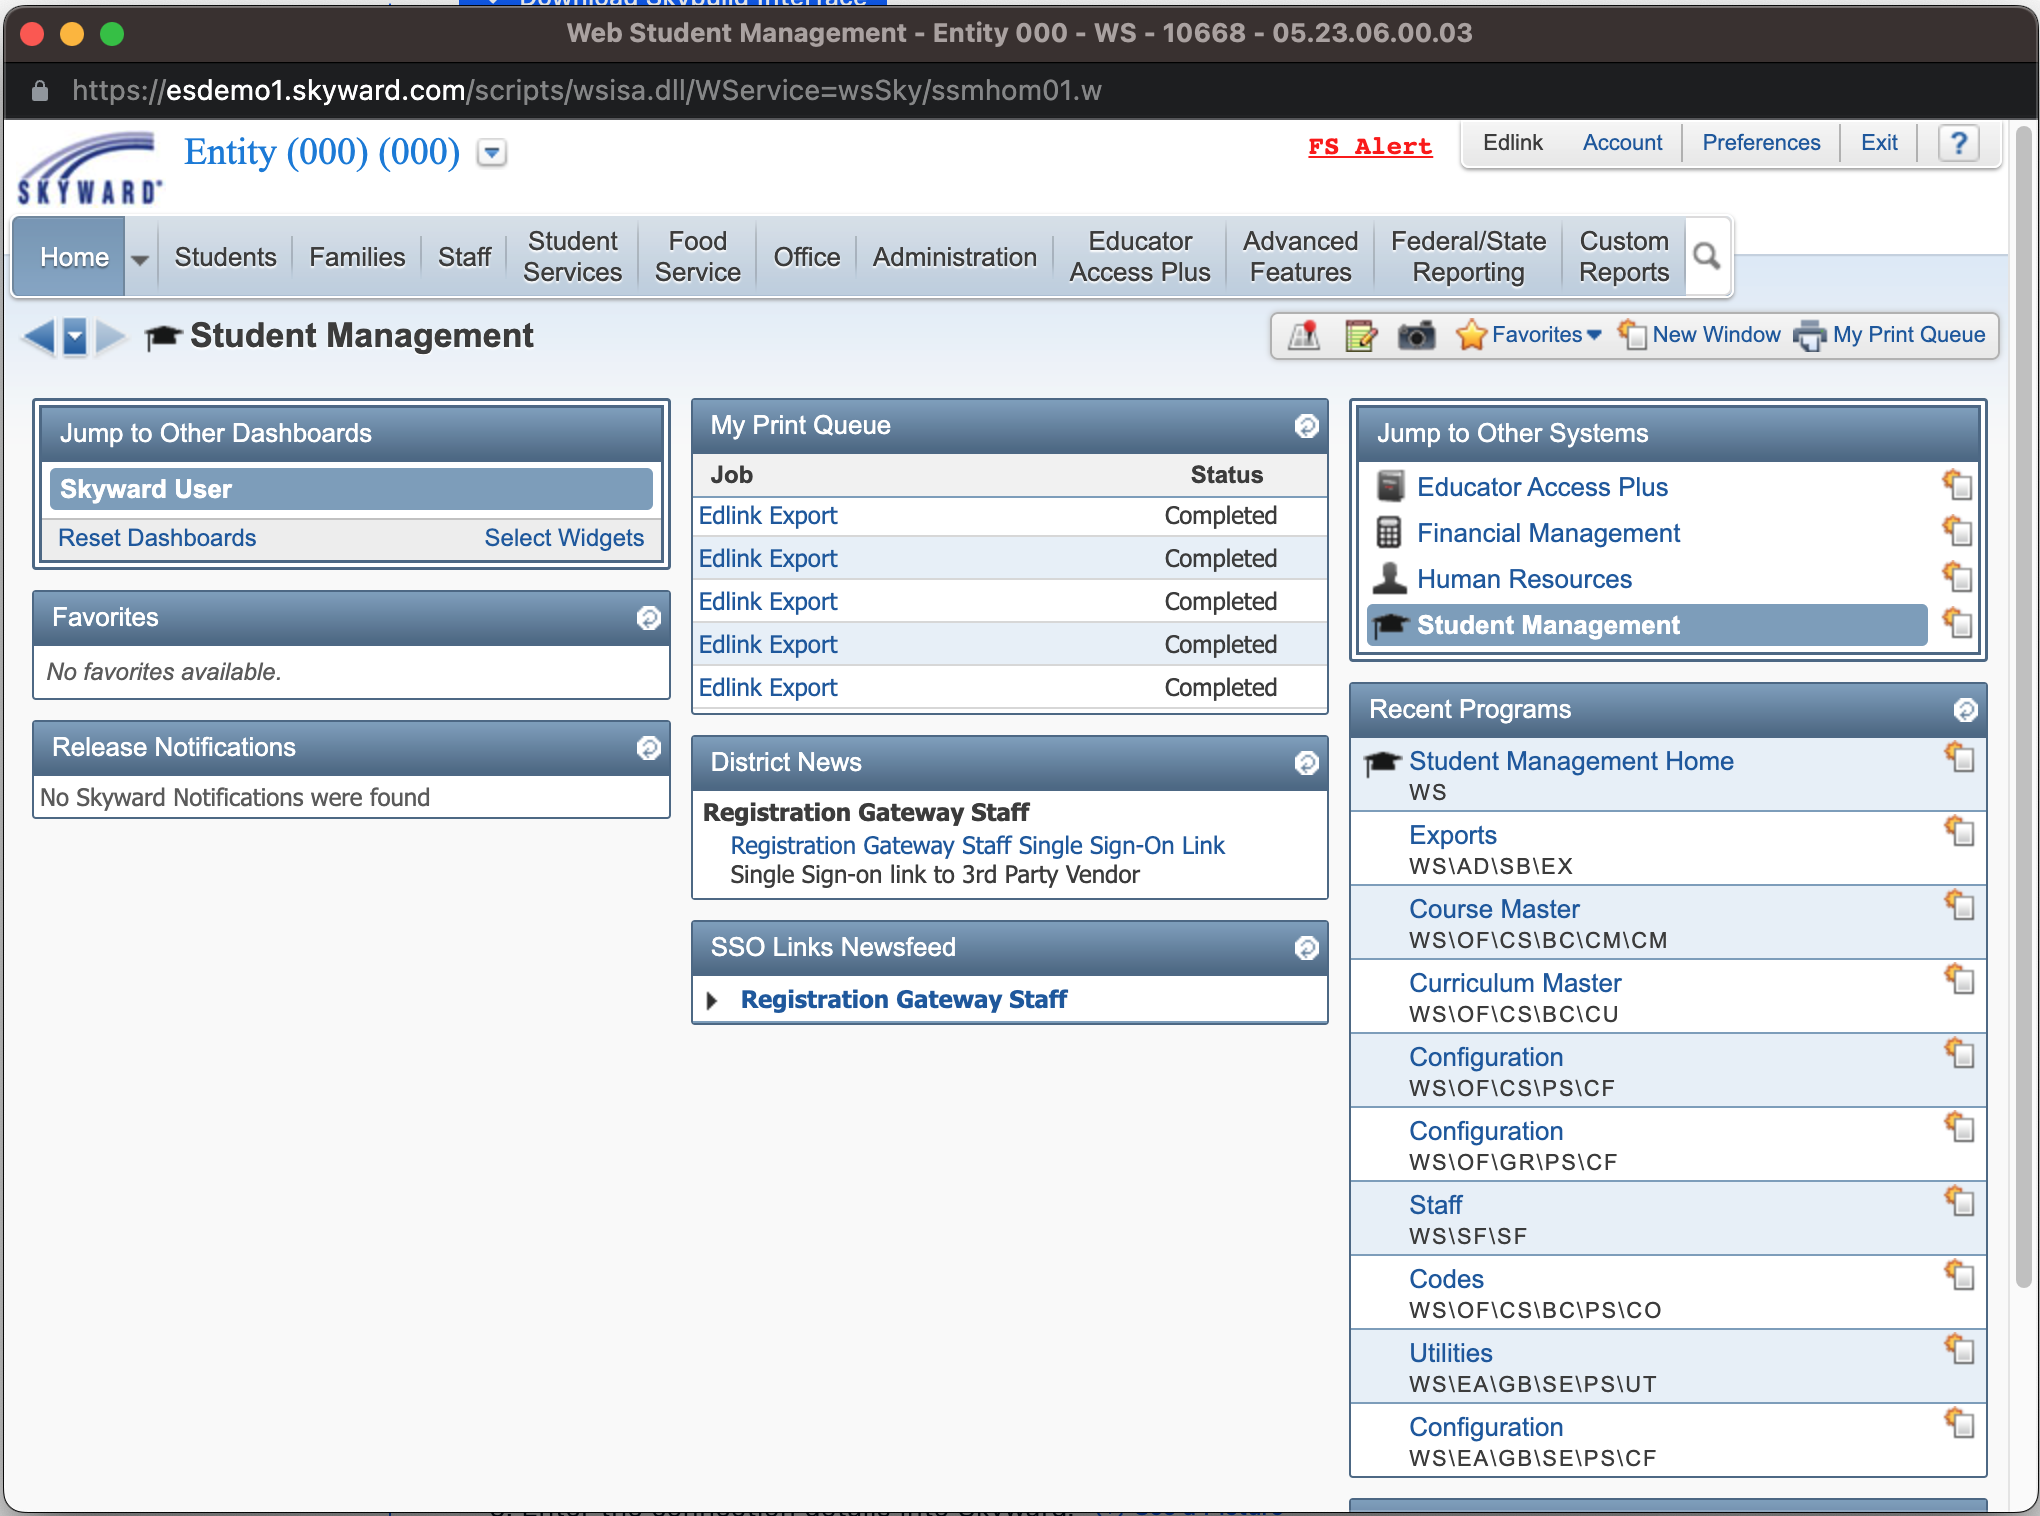
- Open Skyward SkyPort (Web Student Management).
- Navigate to Administration -> Exports - EX.
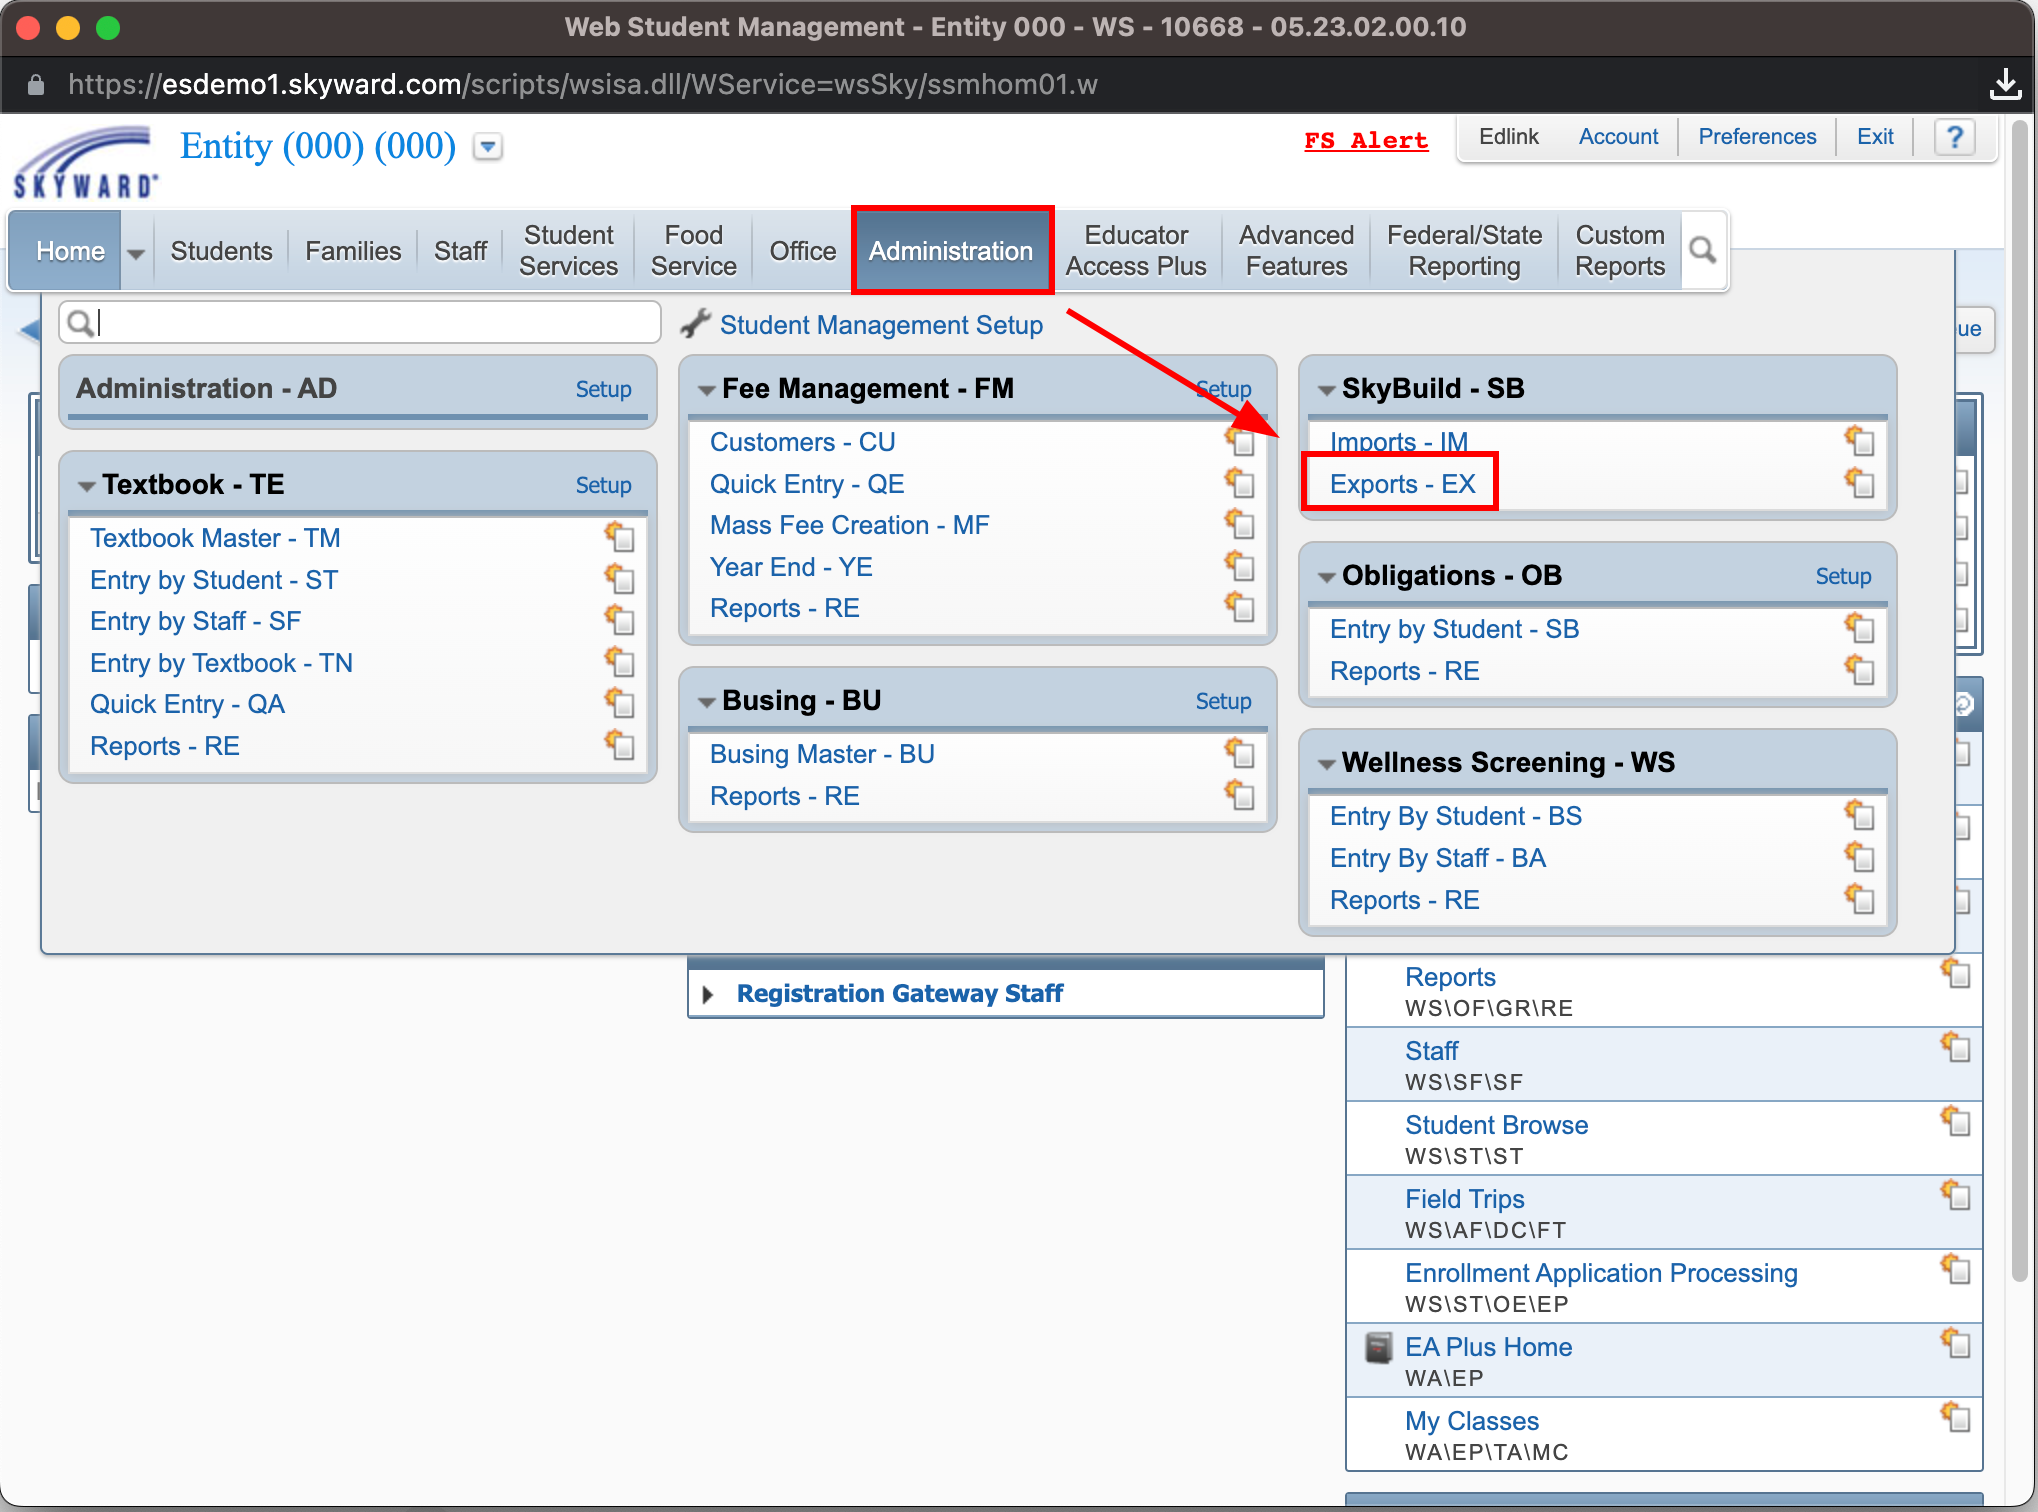
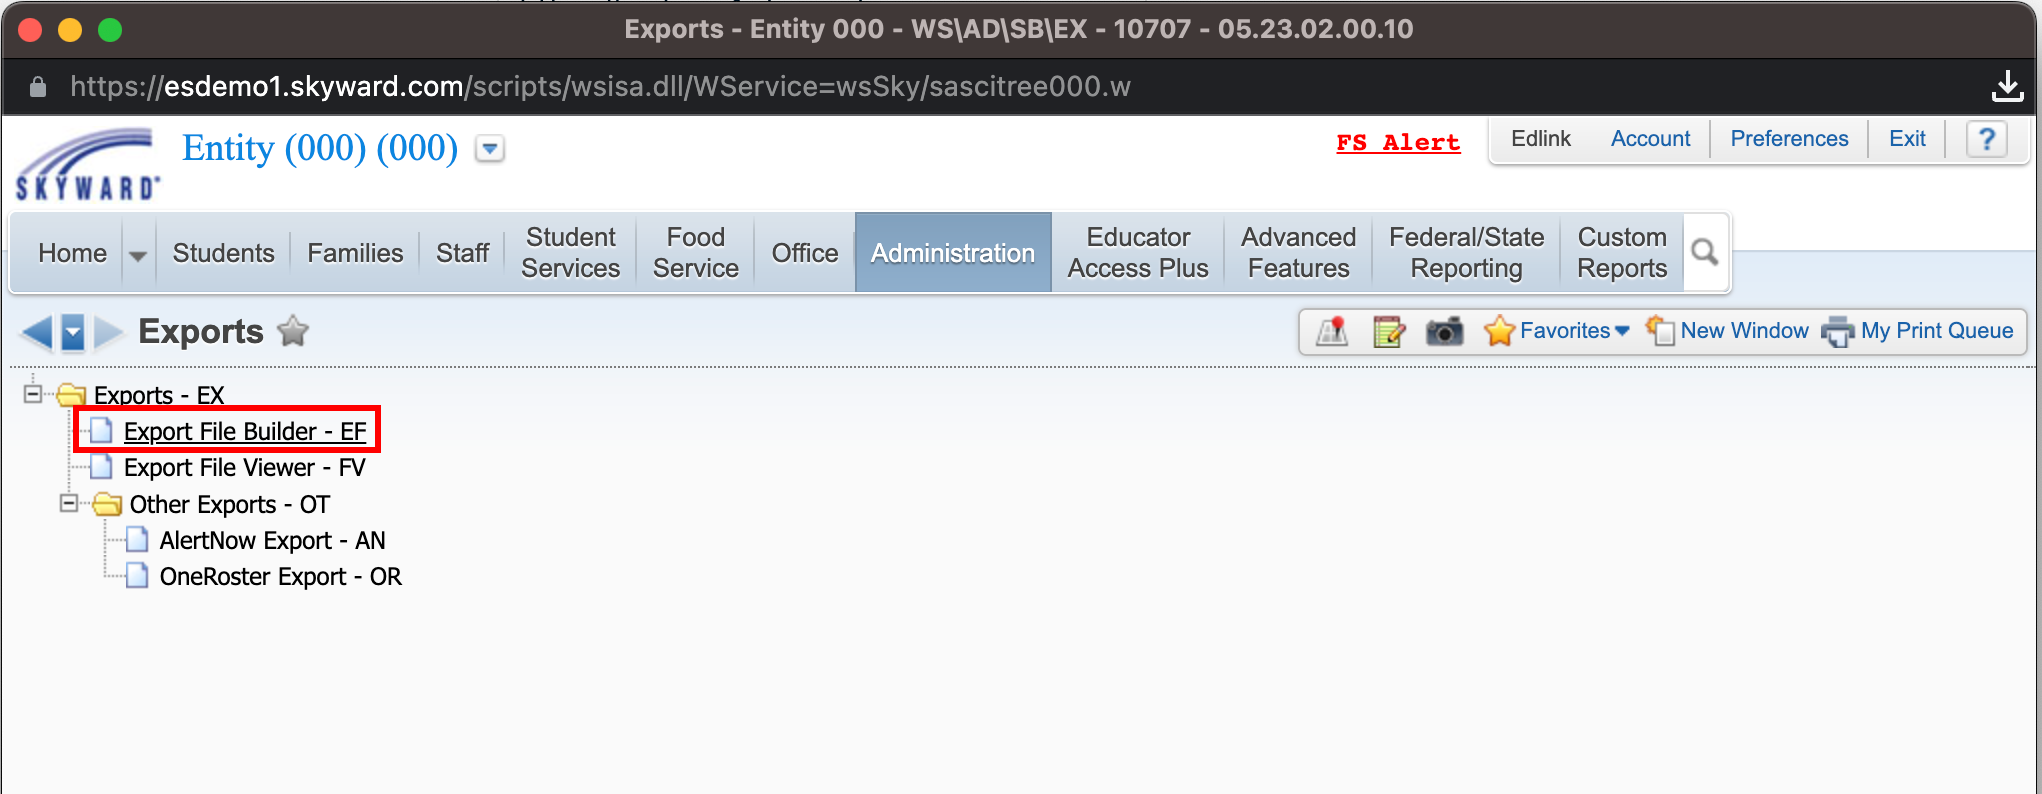
- Select Export File Builder - EF.
- Click the Load Interfaces from File button.
- Click Choose File.
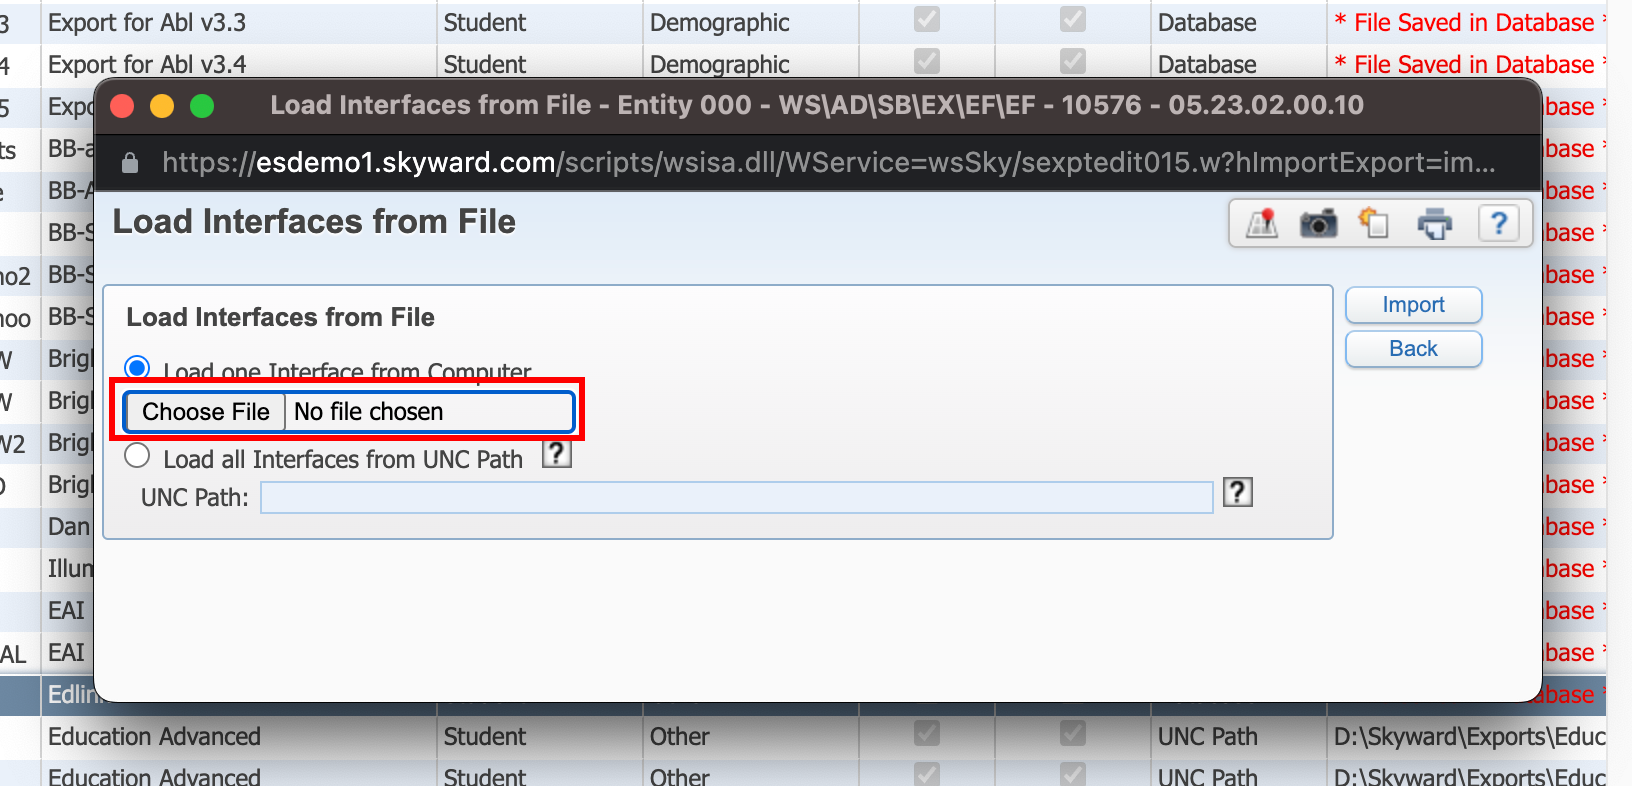
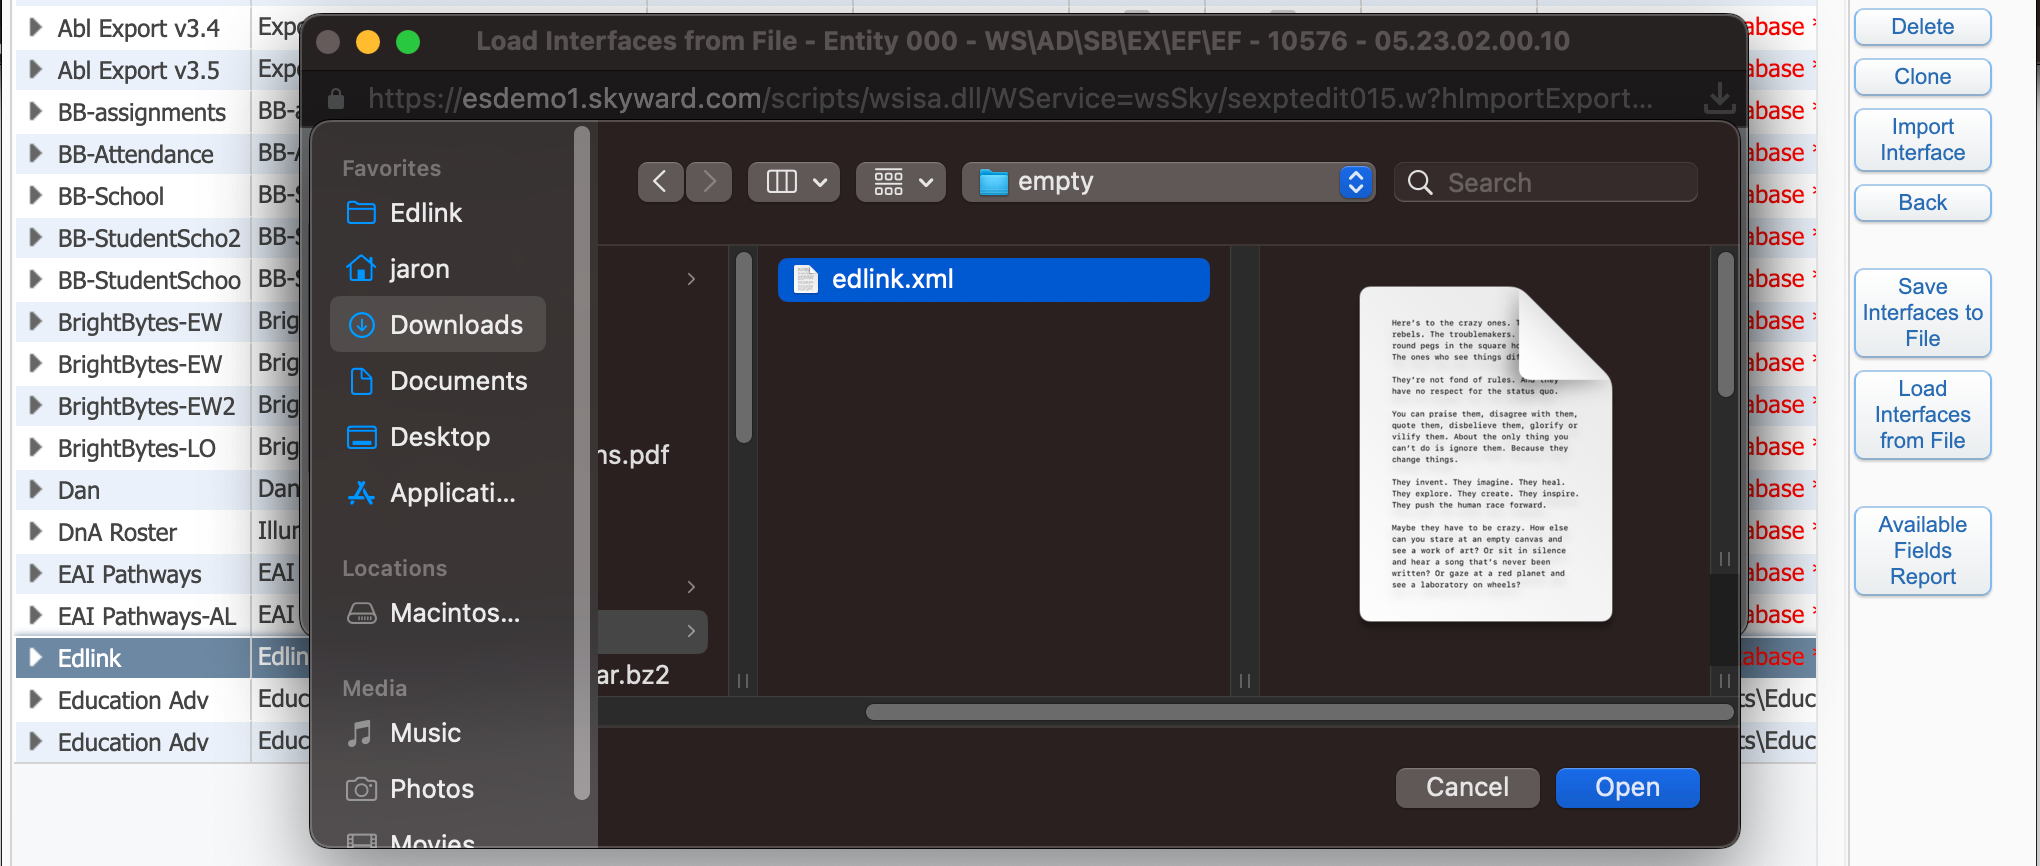
- Select the edlink.txt file you downloaded in Step 1.
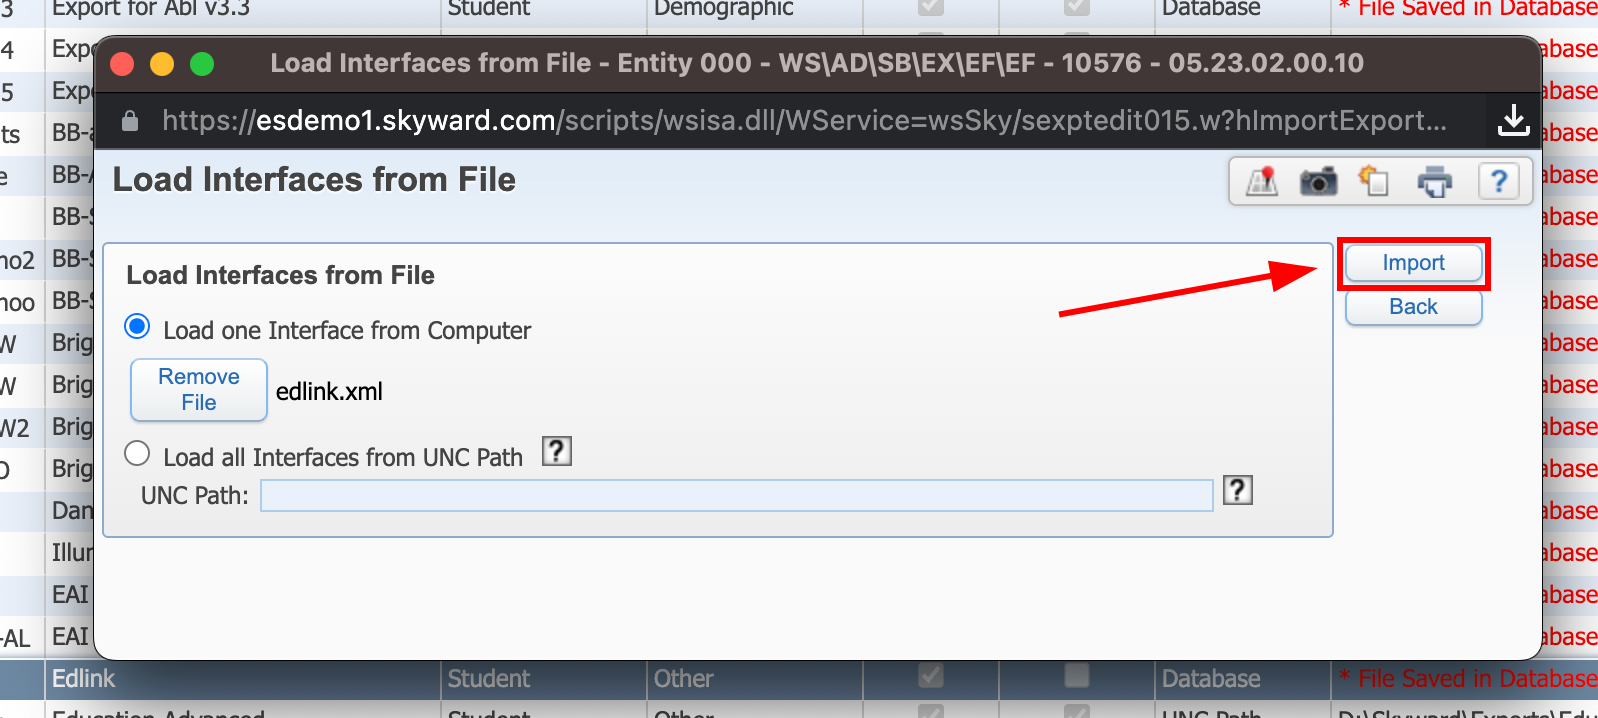
- Then click Import.
Step 3: Configure the Export Locations
- Select the export you just created and click the Edit button.
- Verify FTP Files is checked and SFTP (with SSH) is selected.
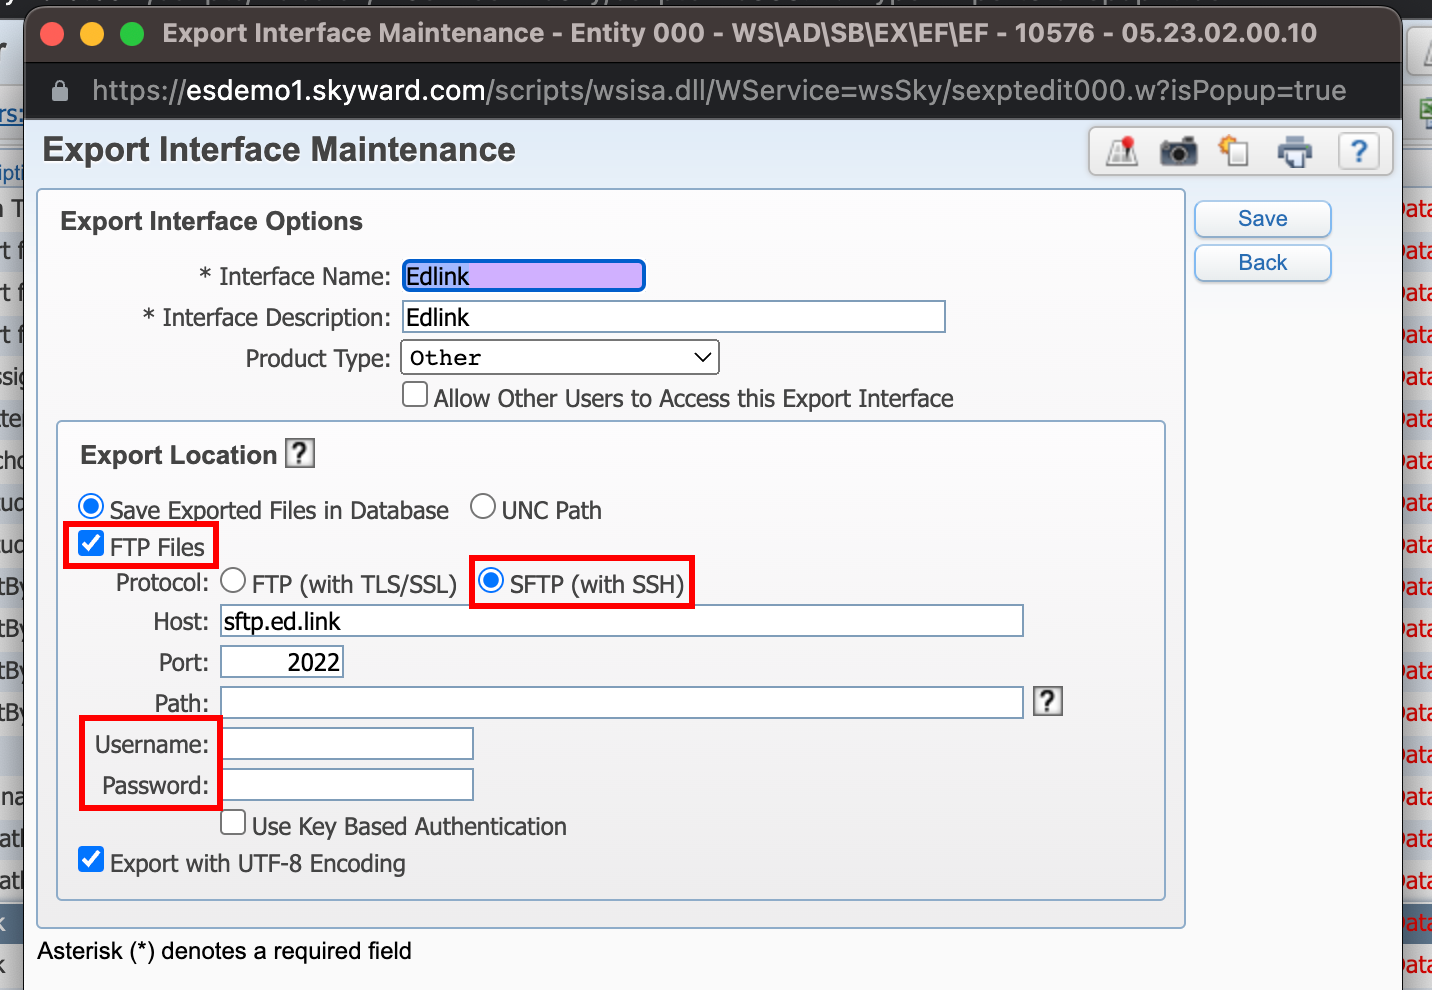
- Enter the connection details into Skyward:
Host:sftp.ed.link
Port:2022
Username:Generated in the Edlink onboarding flow
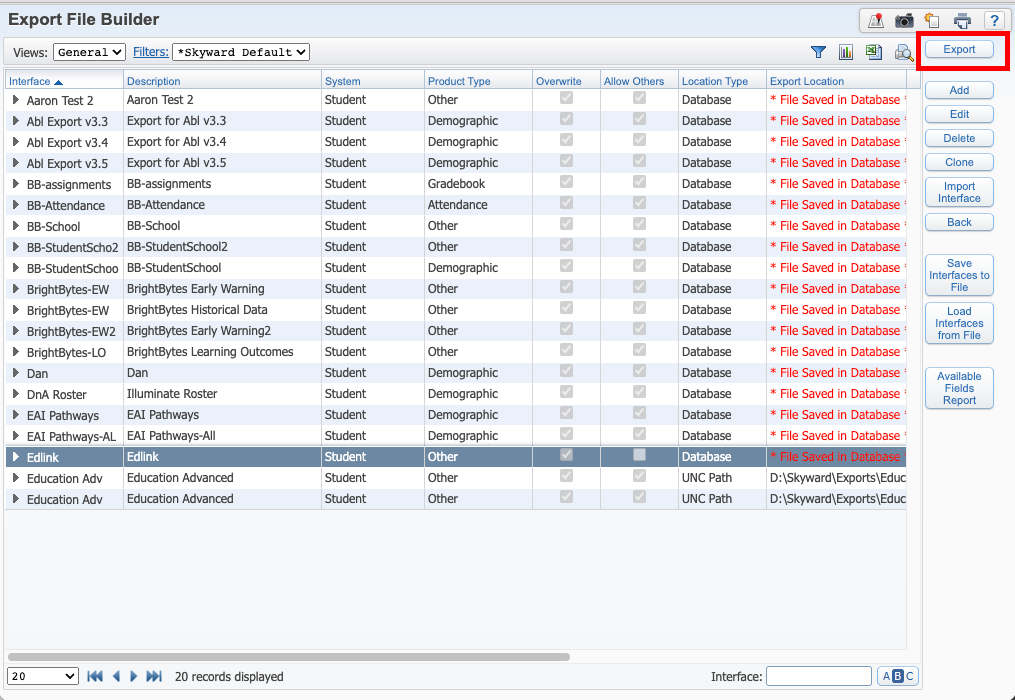
Password:Generated in the Edlink onboarding flow - Run the Export.
Step 4: Schedule the Task
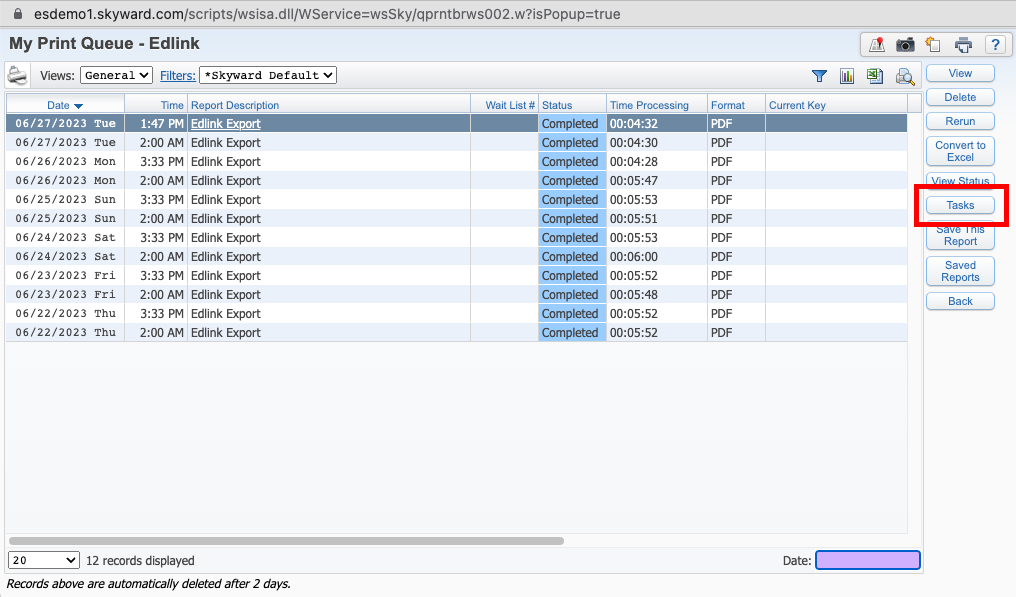
- Click the My Print Queue button.
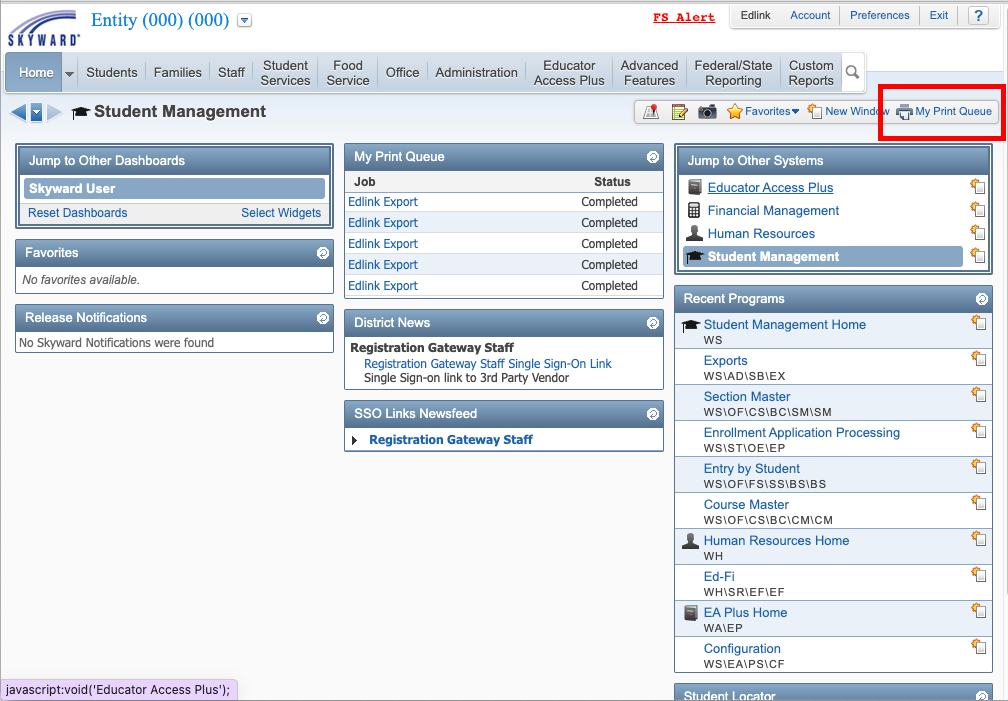
- Click the Tasks button.
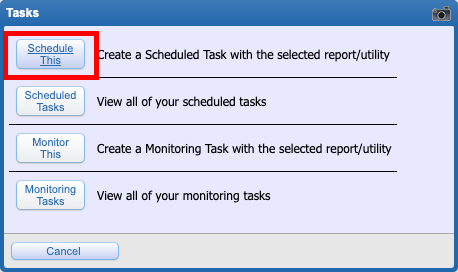
- Click the Schedule This button.
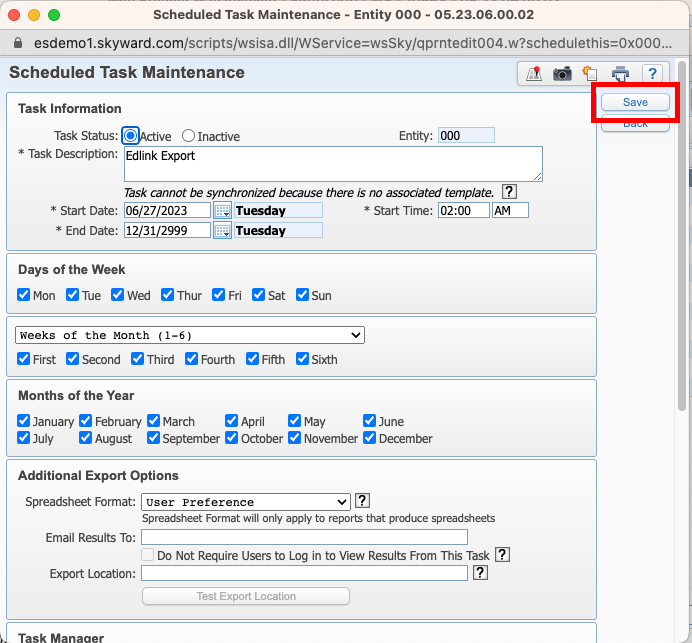
- Enter your desired export schedule then cick Save.
Step 5: Complete the Integration
- Enter your Skyward One Roster URL (This is the URL where your One Roster server for Skyward is hosted).
- Generate your OneRoster Keys. (You can find instructions for generating these keys in Skyward here). Enter the keys you generated in the Edlink integration.
- Select your timezone.
- Click Validate Configuration, then click Continue Setup once your configuration is validated.
Well Done!
Your Skyward source is now connected to Edlink. Once validated, your organization's data will sync with the Edlink dashboard within 24 hours.
Any Questions?
If you have any questions or encounter issues, please contact our support team. We'll respond within 24 business hours.