This guide will help you configure a Google Classroom add-on for your application. By setting up a Google Classroom add-on, teachers can create assignments with your application's content directly from Google Classroom, and students can view and complete those assignments within the Classroom interface.
Before Getting Started
Before setting up your Google Classroom add-on, you need to ensure the following prerequisites are met:
- Setup Google Branding: Review Configuring Google Branding to ensure your OAuth consent screen is properly branded.
- Setup Custom Google Client: Follow the instructions for Adding Your Google OAuth Client to configure your own Google client credentials.
- Understand Google Scopes: Make sure you know which scopes your application requires by reviewing the Google Scopes documentation.
Setting Up a Test Environment
The best way to test Google Classroom add-ons is to set up a demo domain for Google Classroom. You can follow Google's guide here, but we'll also walk you through it below.
- Make sure you have a domain in the following format:
gedu.demo.<your-domain>. Create a Google Workspace account for this domain. - Verify the domain in the Google Admin Console.
- Register for Google Workspace for Education using the demo domain. This starts a two-week trial period.
- Fill out this form to notify Google of your domain registration.
- Request an upgrade to Fundamentals or Teaching and Learning by filling out this form. You will need this to install Google Classroom add-ons in your domain.
From here, you can set up test accounts for a teacher and students. We recommend creating at least one of each type of account. You can then sign in as the teacher, create a class, and add your student(s).
What are we going to do?
- Copy the Attachment Setup URI from the Edlink dashboard
- Enable the Classroom Add-ons API and Google Workspace Marketplace SDK
- Configure the Google Workspace Marketplace SDK
- Provide Scopes and App Configuration
- Set up the Store Listing
- Test the Add-on Installation and Usage
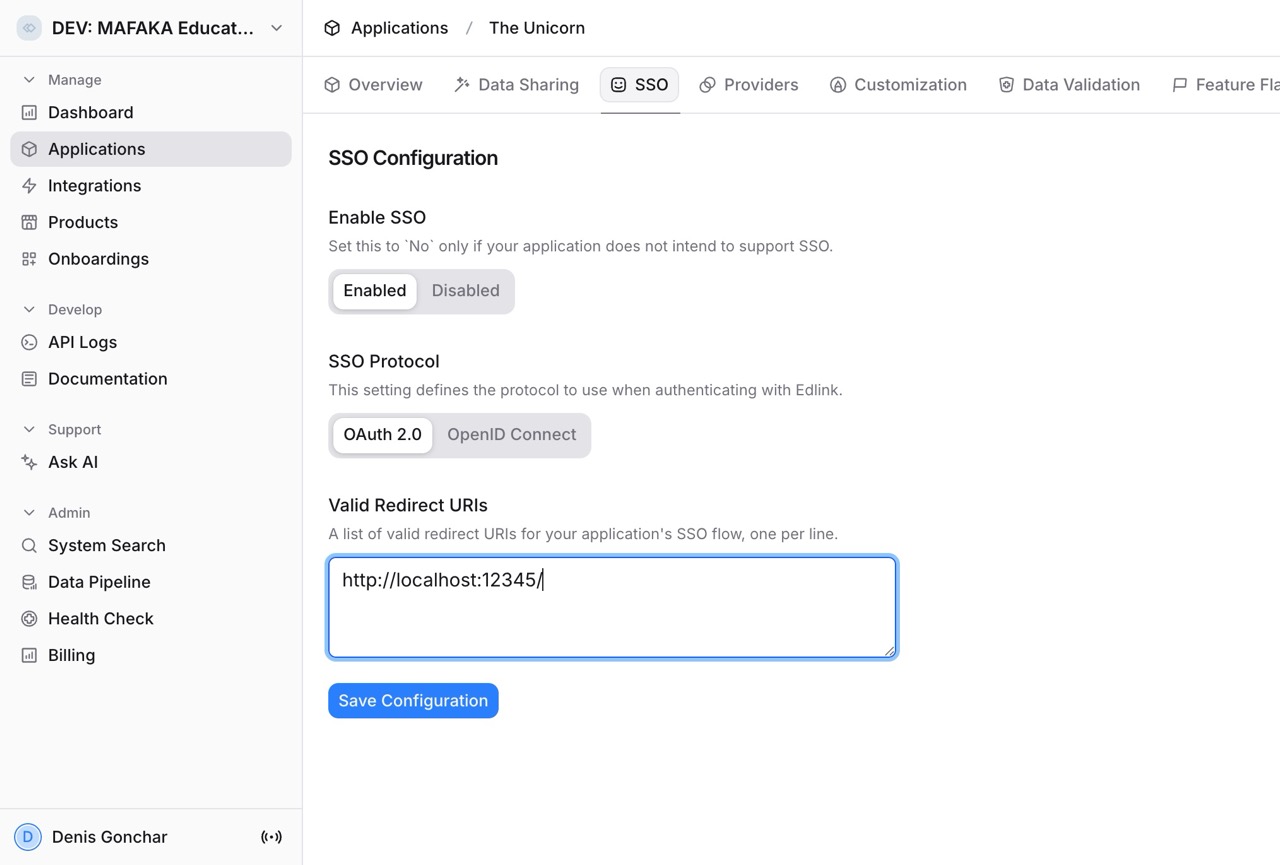
Step 1: Get the Setup URI from Edlink
- On the Edlink dashboard, go to Applications -> Click on your Application -> Providers (tab).
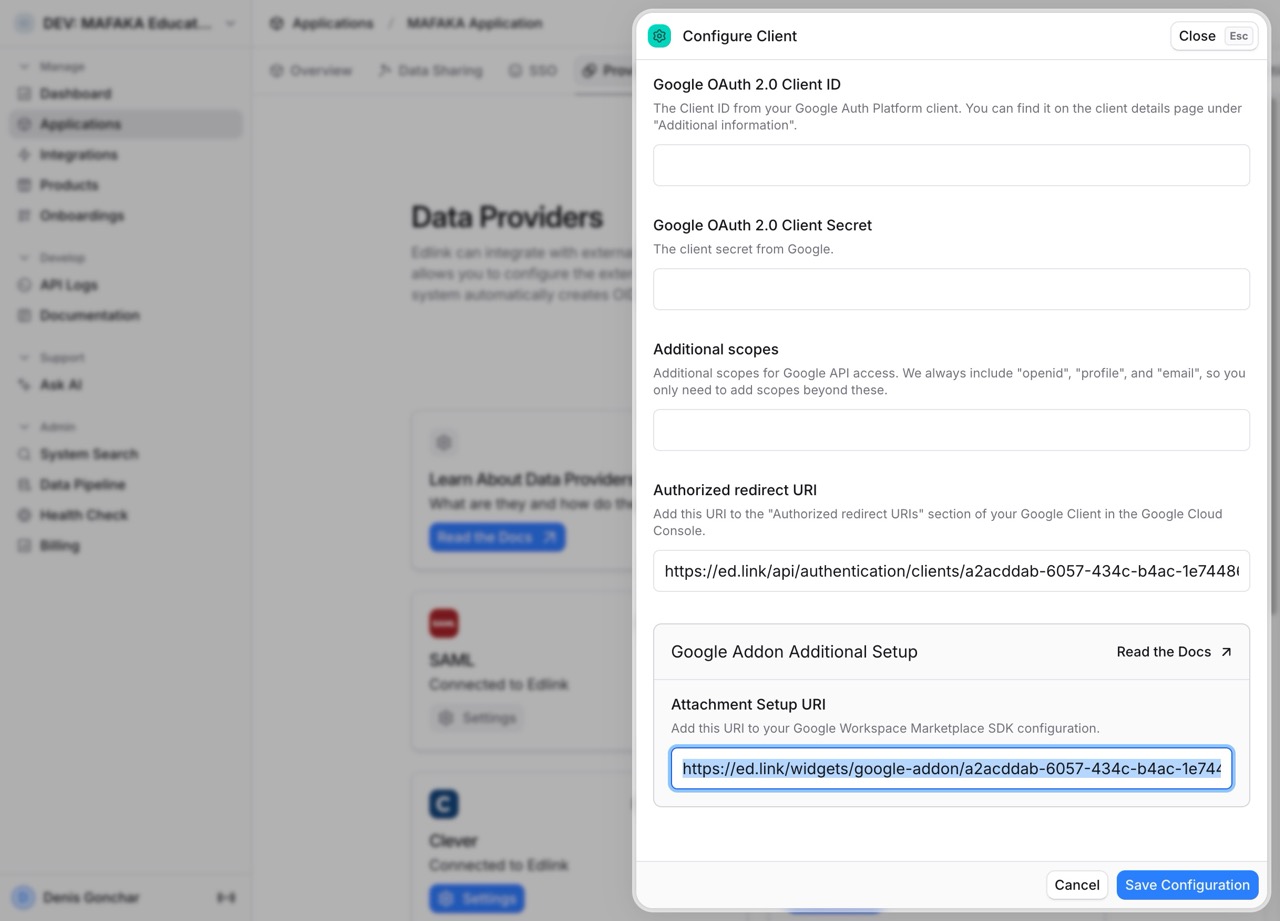
- Find the "Setup URI" under the Google provider settings and copy it. This will be used to configure the Google Add-on later.
Step 2: Enable Google APIs
- Go to your Google Cloud Console. Make sure you are using the same project where your Google OAuth client is configured.
- Navigate to APIs & Services -> Enabled APIs & services.
- Click on the + Enable APIs and Services button at the top.
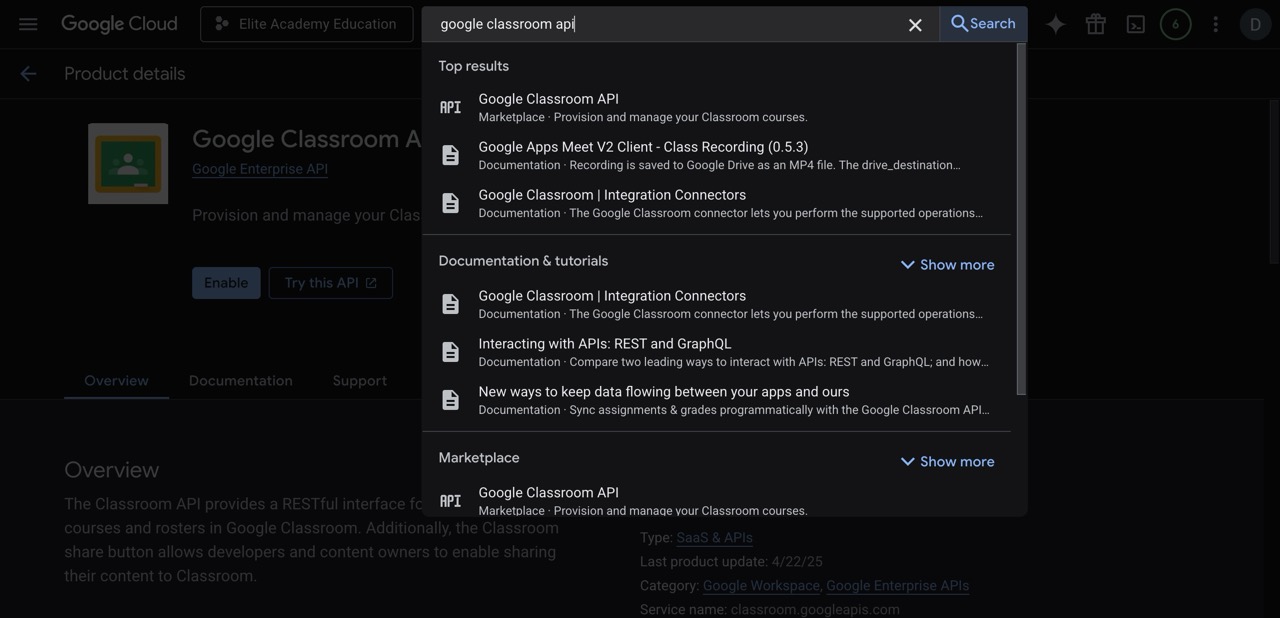
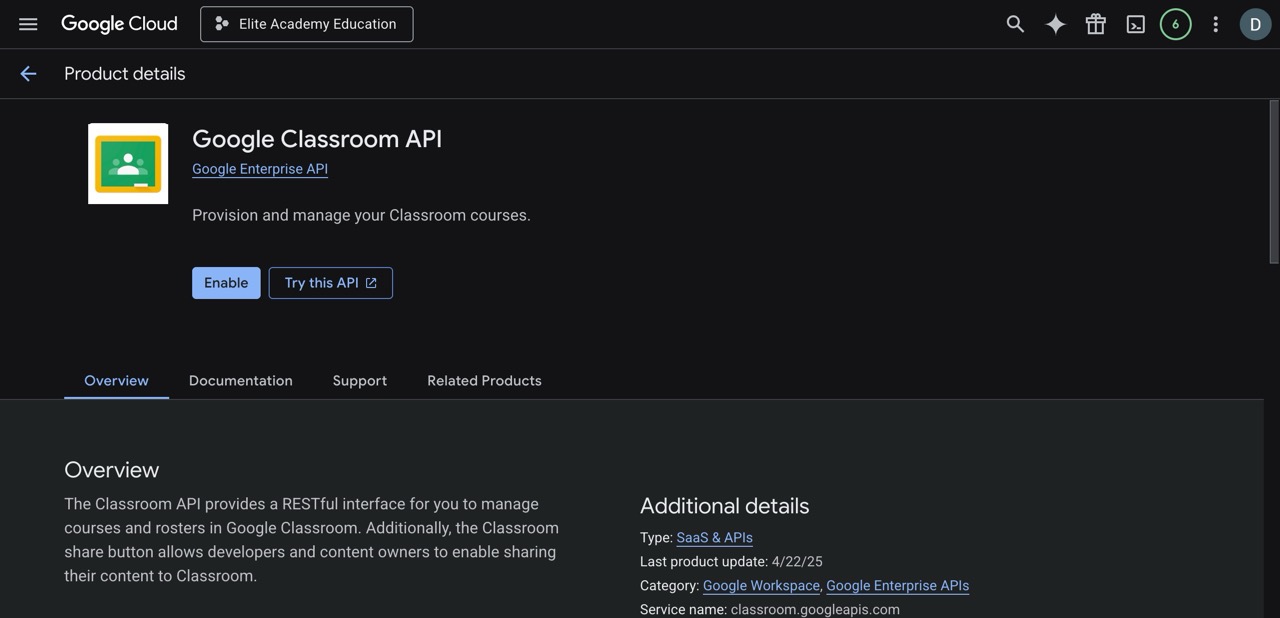
- Search for
Google Classroom APIand click on it. Click Enable.
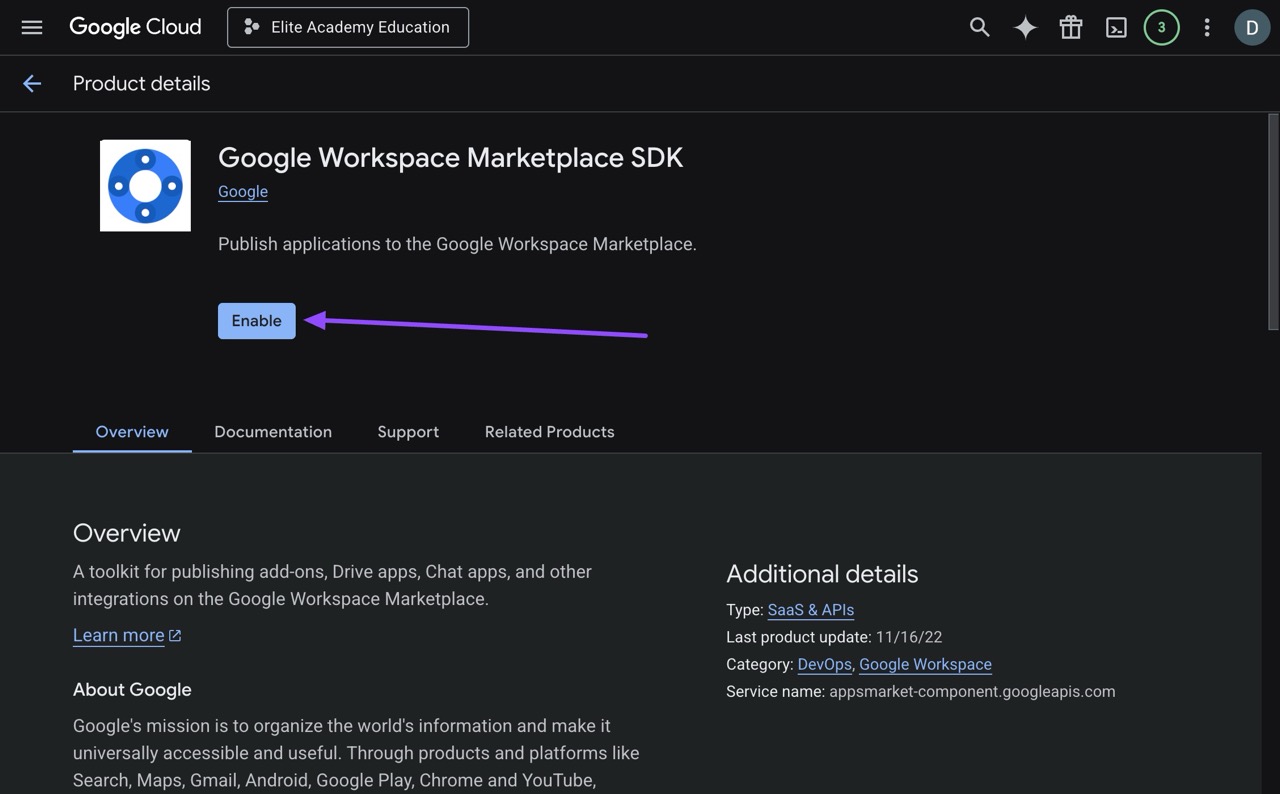
- Go back to the API Library, search for
Google Workspace Marketplace SDK, and click on it. Click Enable.

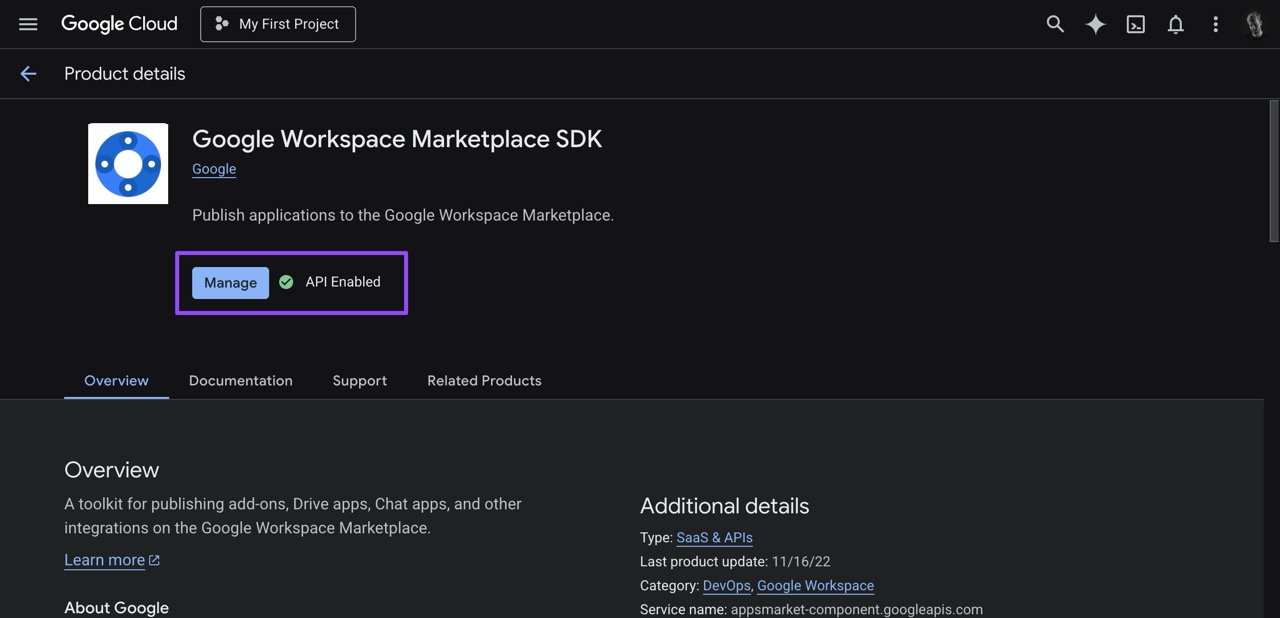
Step 3: Configure the Google Workspace Marketplace SDK
- After enabling the Marketplace SDK, click on the Manage button (or navigate to APIs & Services -> Google Workspace Marketplace SDK).
- If you haven't set up the OAuth Consent Screen branding yet, you will be prompted to do so. Make sure to review Configuring Google Branding for more information.
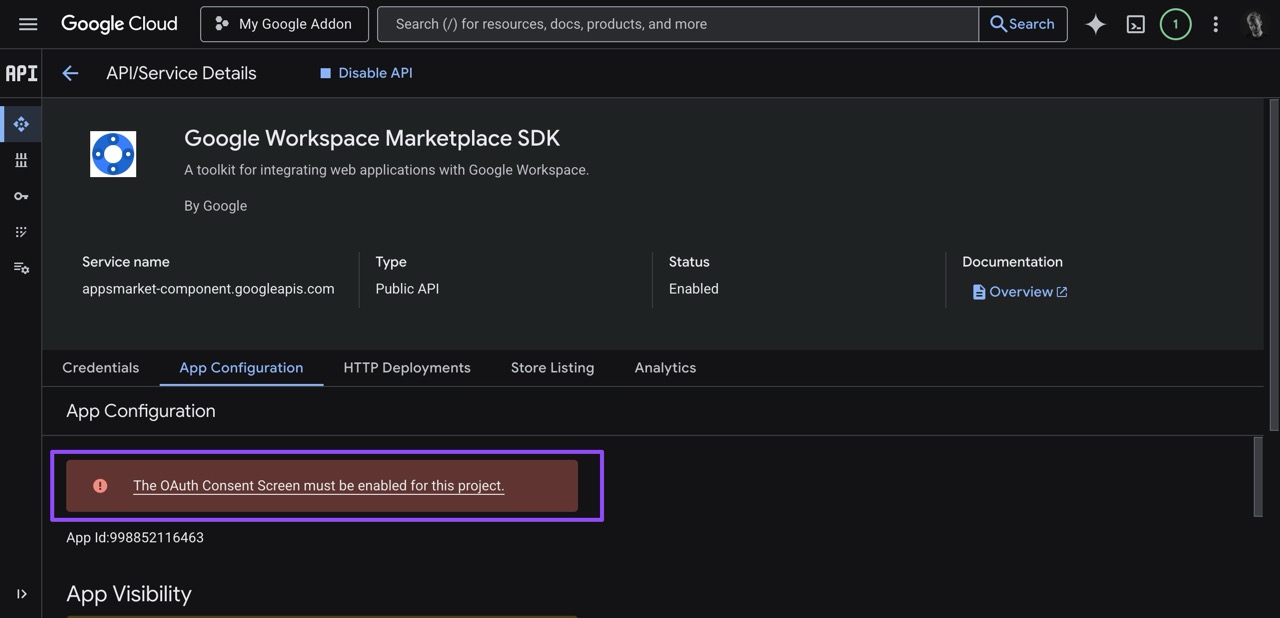
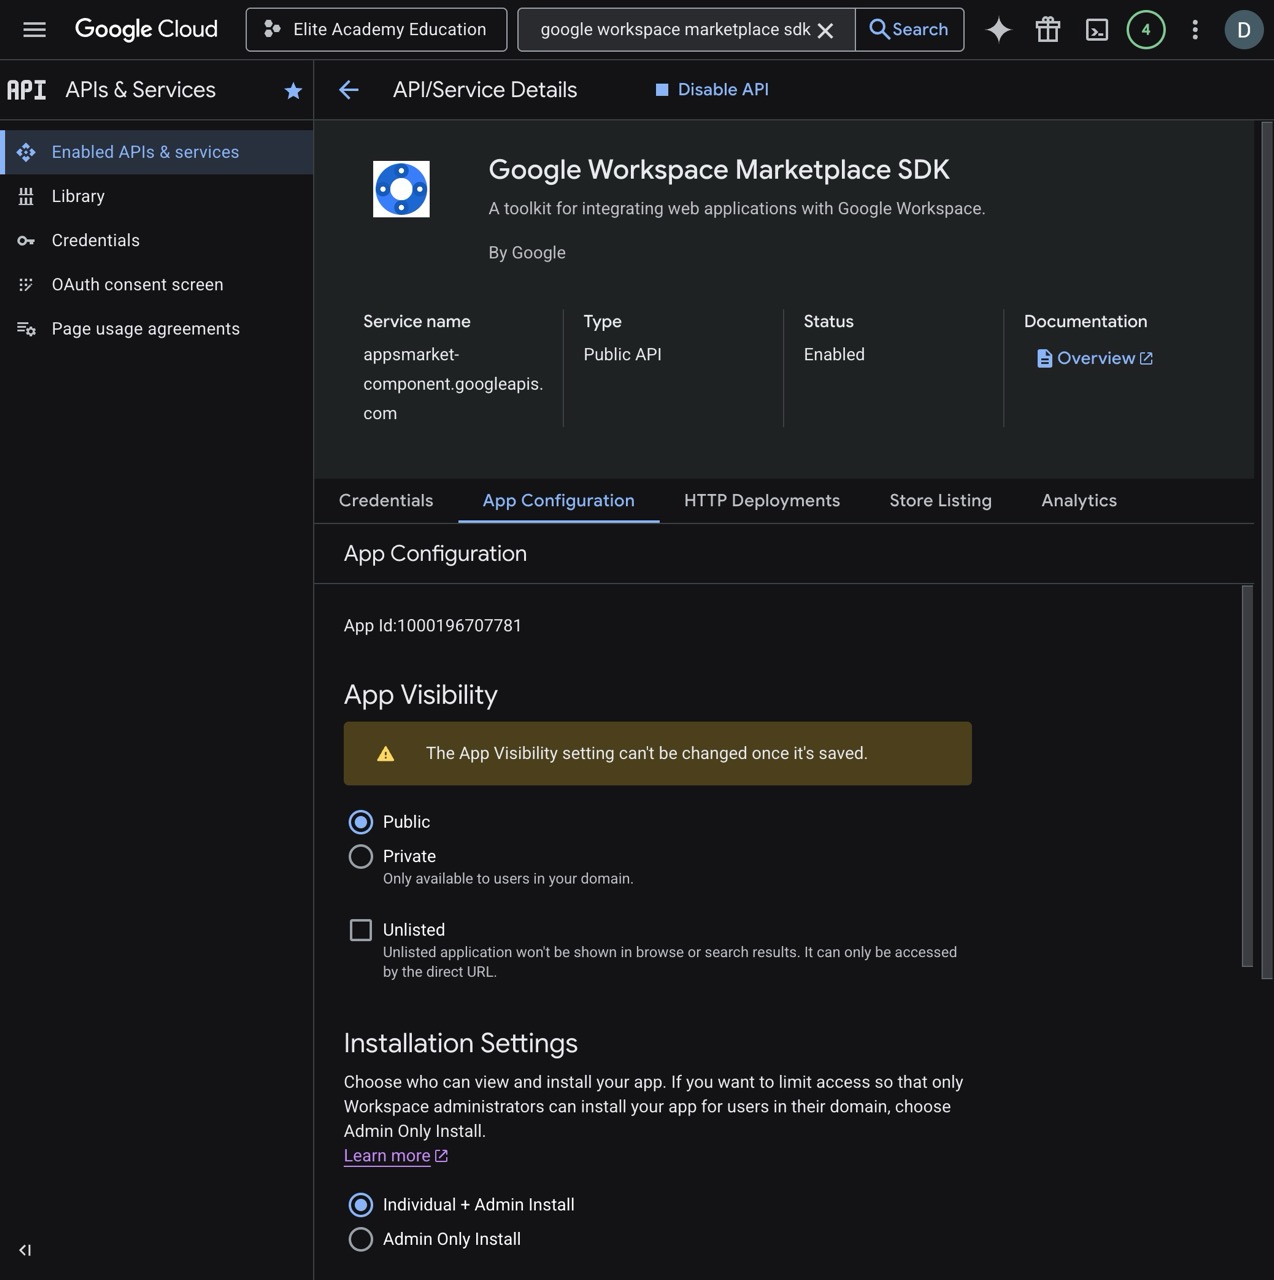
- Once branding is set up, go to the App Configuration tab on the left menu.
- Set the App Visibility (e.g., Private or Public) and Installation Settings based on your needs.
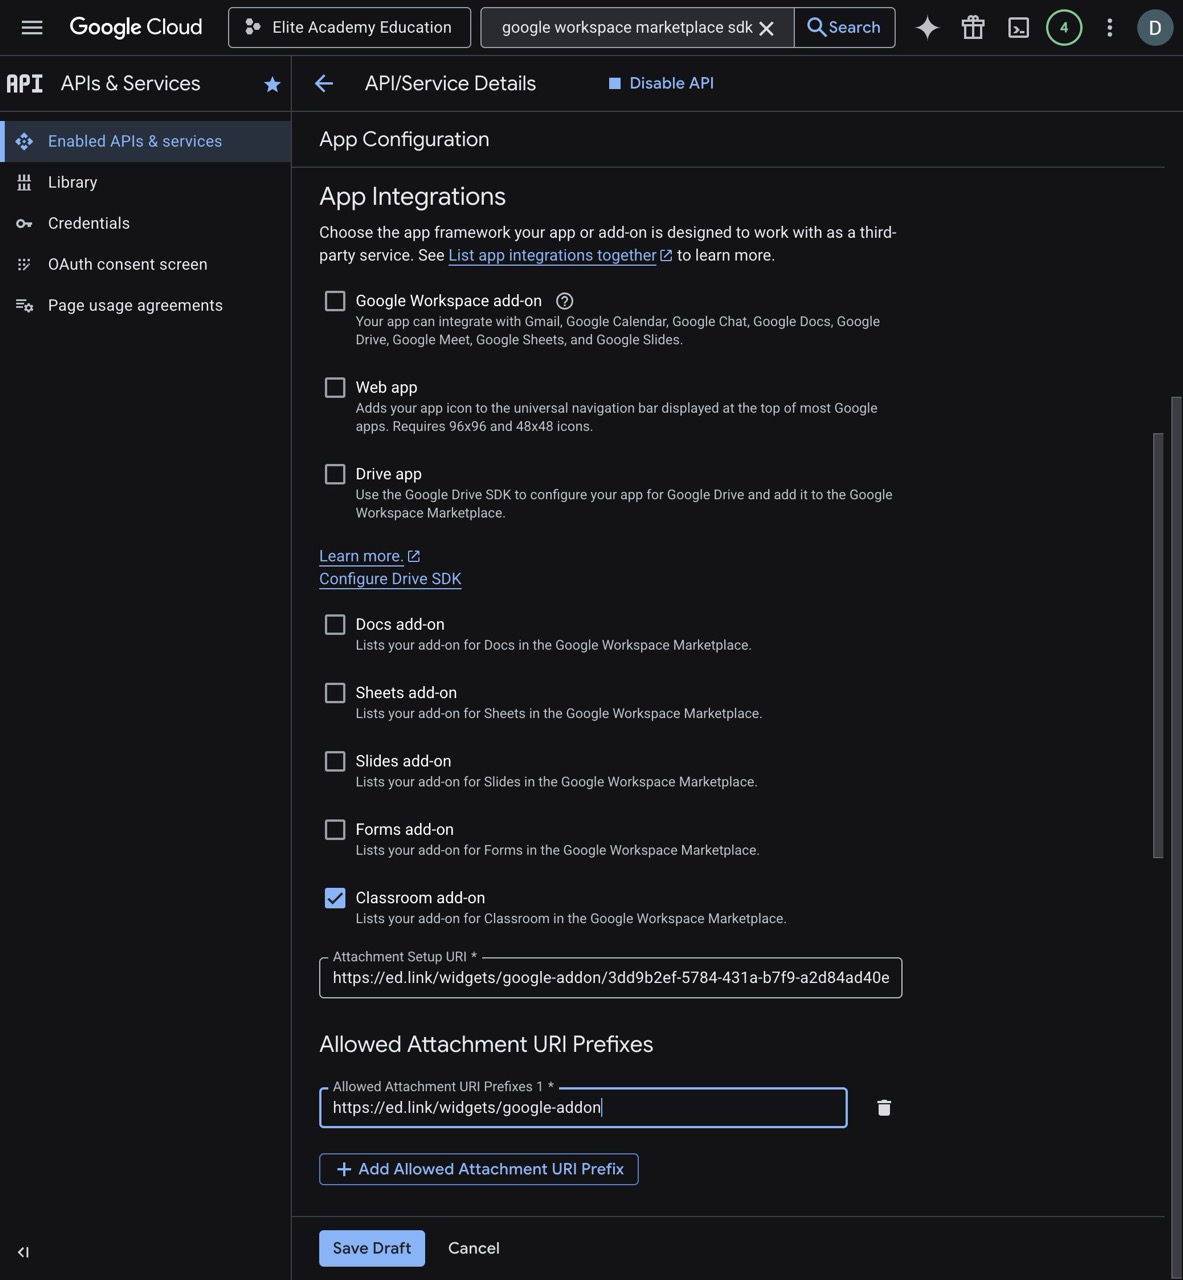
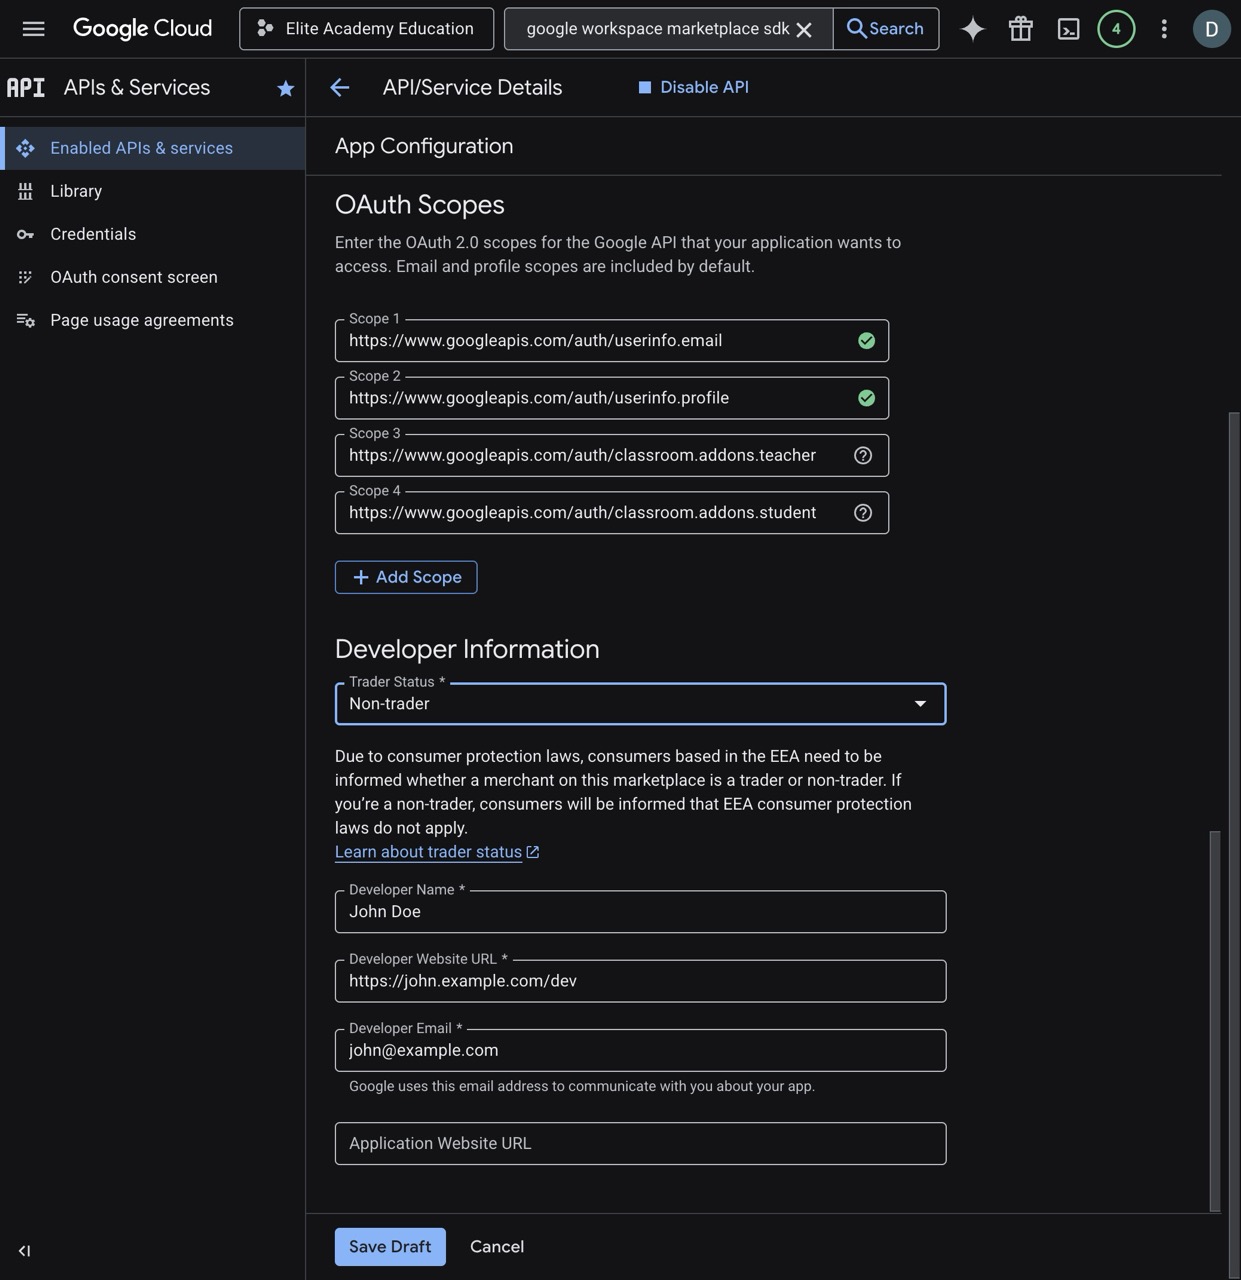
Step 4: Configure Google Classroom Add-on Integration
- Still in the App Configuration tab, scroll down to the Integrations section and check the box for Google Classroom add-on.
- You will need to provide the URIs for the Google Classroom add-on.
- Use the Setup URI you copied from Edlink in Step 1 to fill in the Attachment Setup URI field
- Allowed Attachment URIs Prefixes must include
https://ed.link/widgets/google-addon(Make sure NOT to include a trailing/).
- Under the Scopes section, ensure the following scopes are added:
https://www.googleapis.com/auth/classroom.addons.teacherhttps://www.googleapis.com/auth/classroom.addons.student(Note: The first two scopes on the image might already be added automatically by the Google Cloud Console).
- Fill in the required Developer Information and click Save.
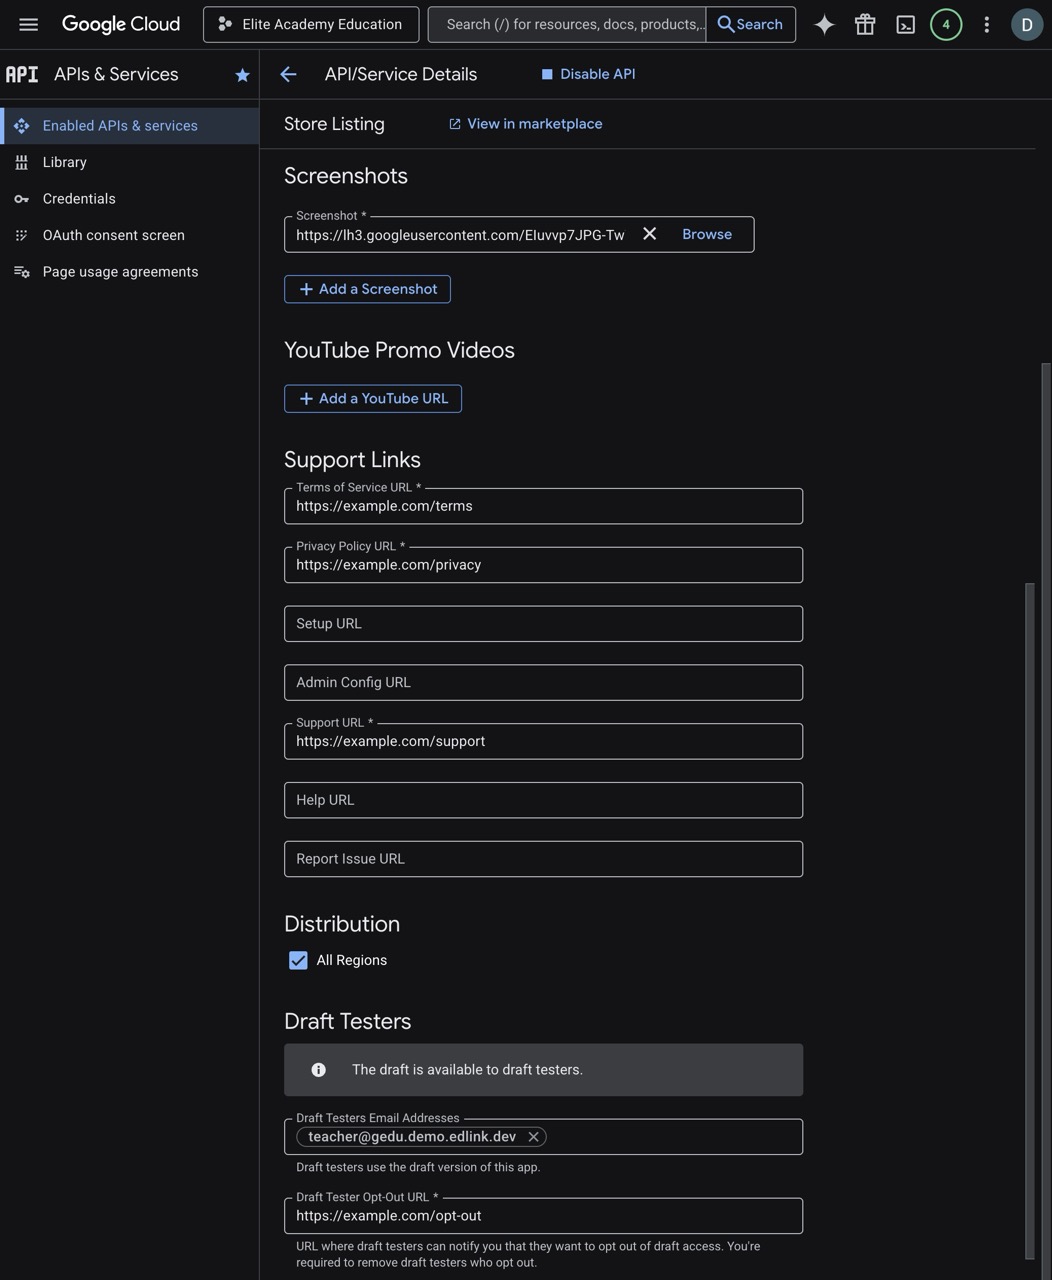
Step 5: Store Listing Configuration
- Go to the Store Listing tab on the left menu.
- Fill out the application details (Language, App Name, Short Description, Detailed Description).
- Upload your App Icons (32x32, 220x220, and 400x400 banners) and an App Banner.
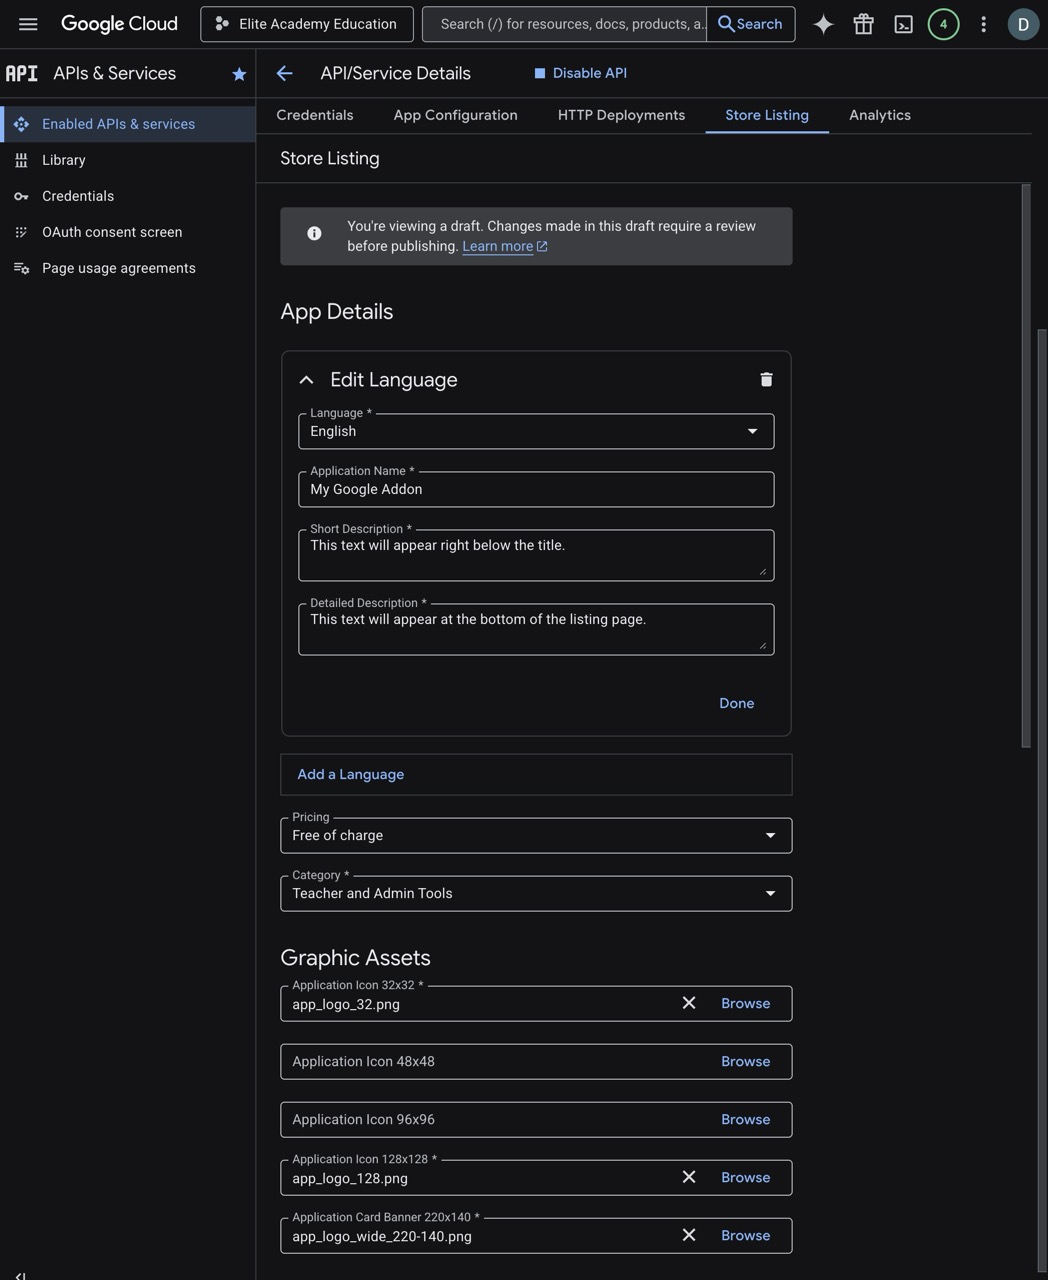
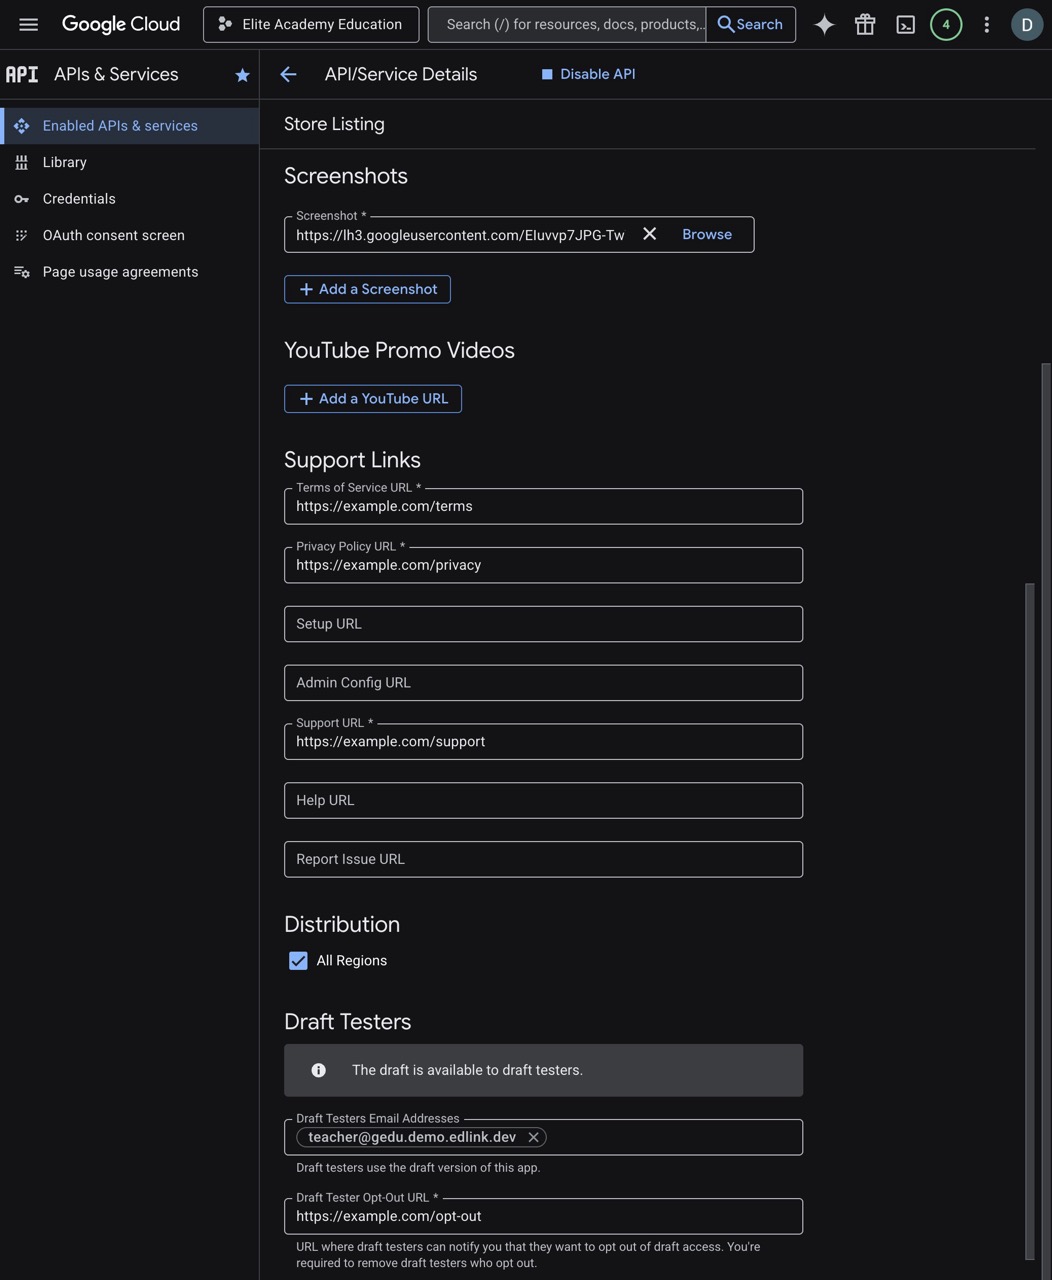
- Add screenshots of your application and Provide Support links (Terms of Service, Privacy Policy, Support URL).
- Under Tester information, add the Google accounts that will test the Add-on before it's published.
- Click Save Draft.
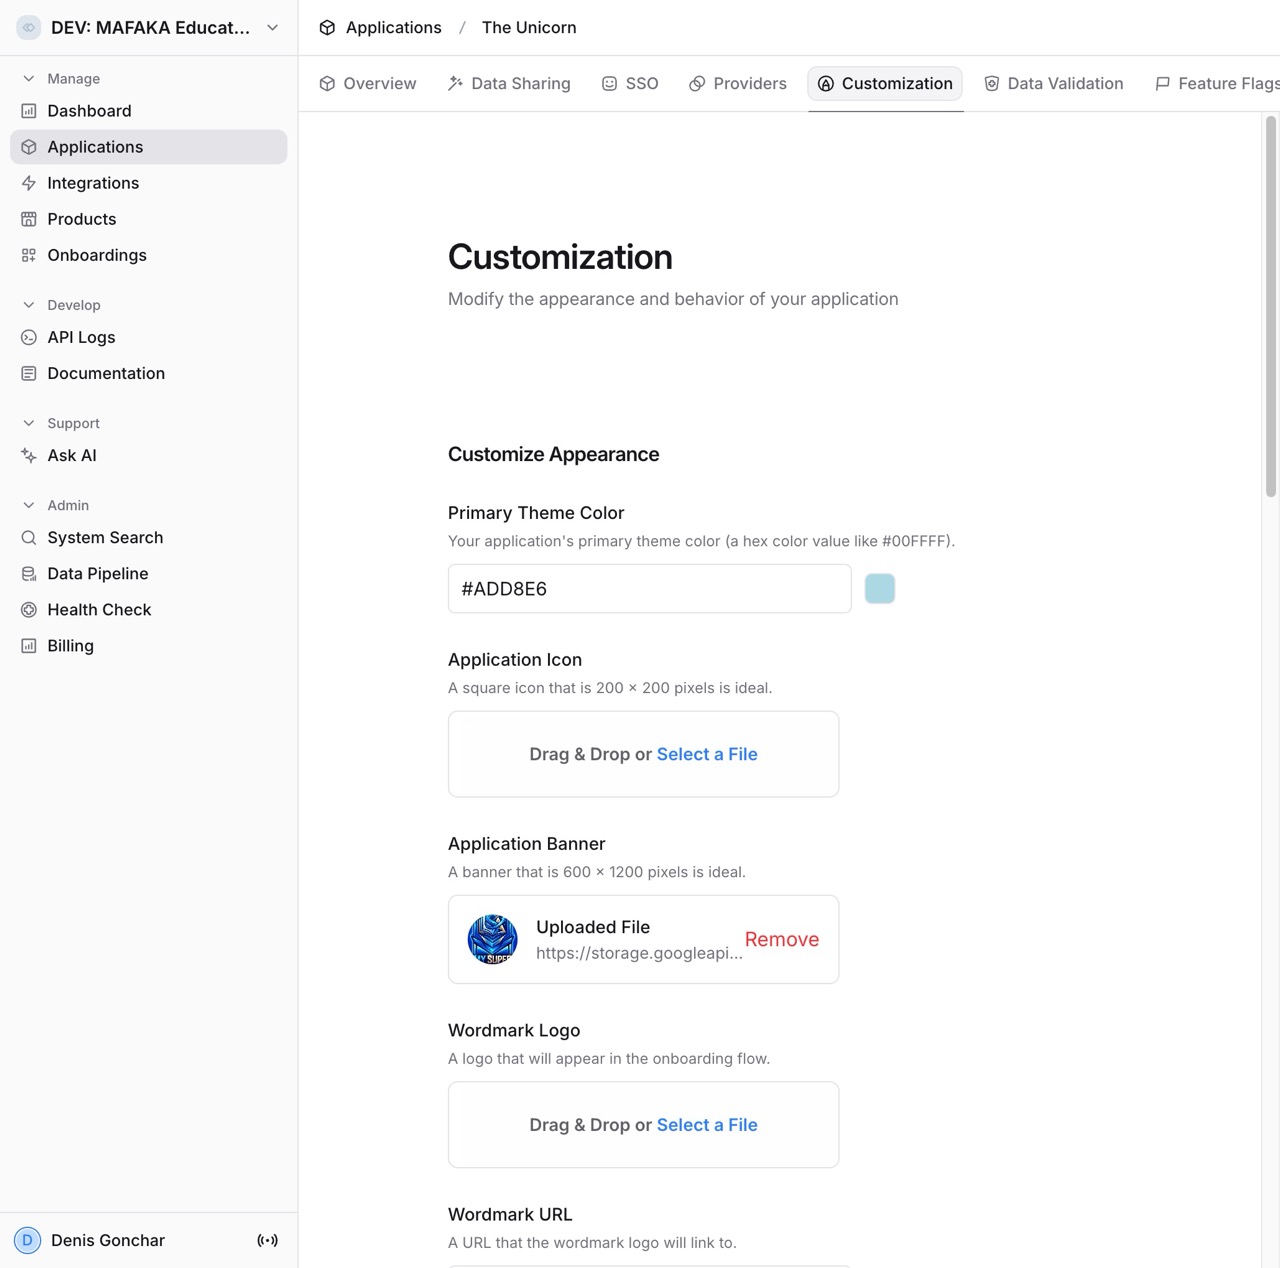
Step 6: Customizing the Sign-in Page
Before testing, you may want to customize the Edlink Sign-in page that users will see when they first launch the Google Classroom add-on.
- On the Edlink Dashboard, go to Applications -> Click on your Application -> Customizations (tab).
- Here, you can set the Primary Theme Color and upload an Application Banner to make the sign-in experience match your brand.
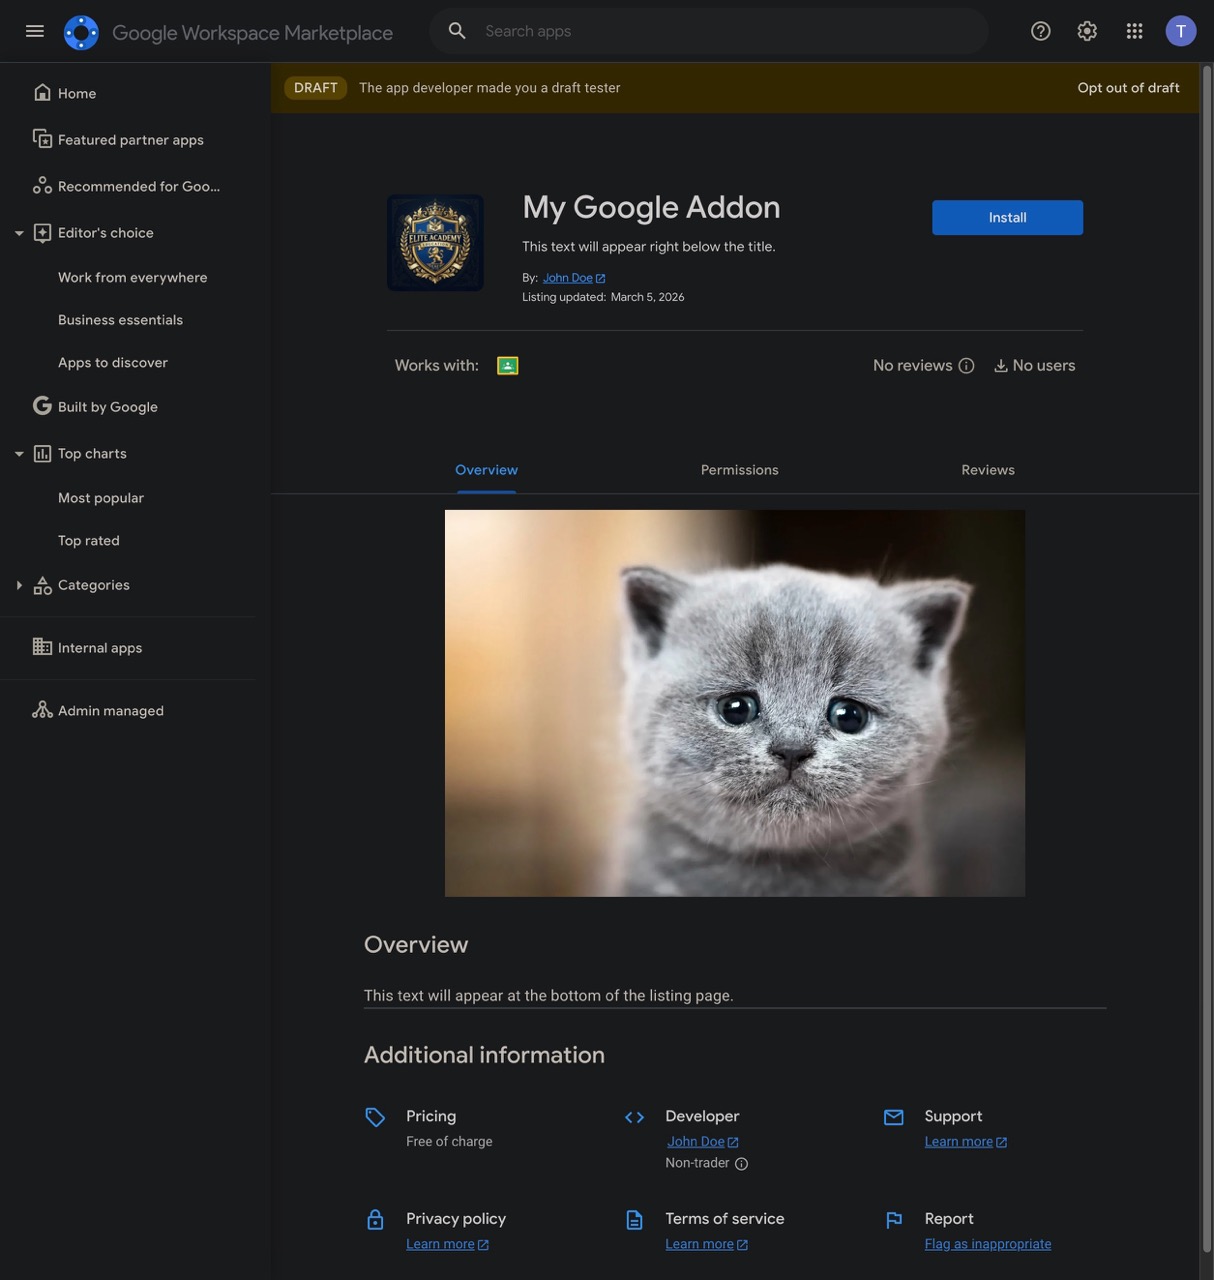
Step 7: Testing the Google Classroom Add-on (Teacher Flow)
Now that the Google Classroom add-on is configured, you can test it from a teacher's perspective.
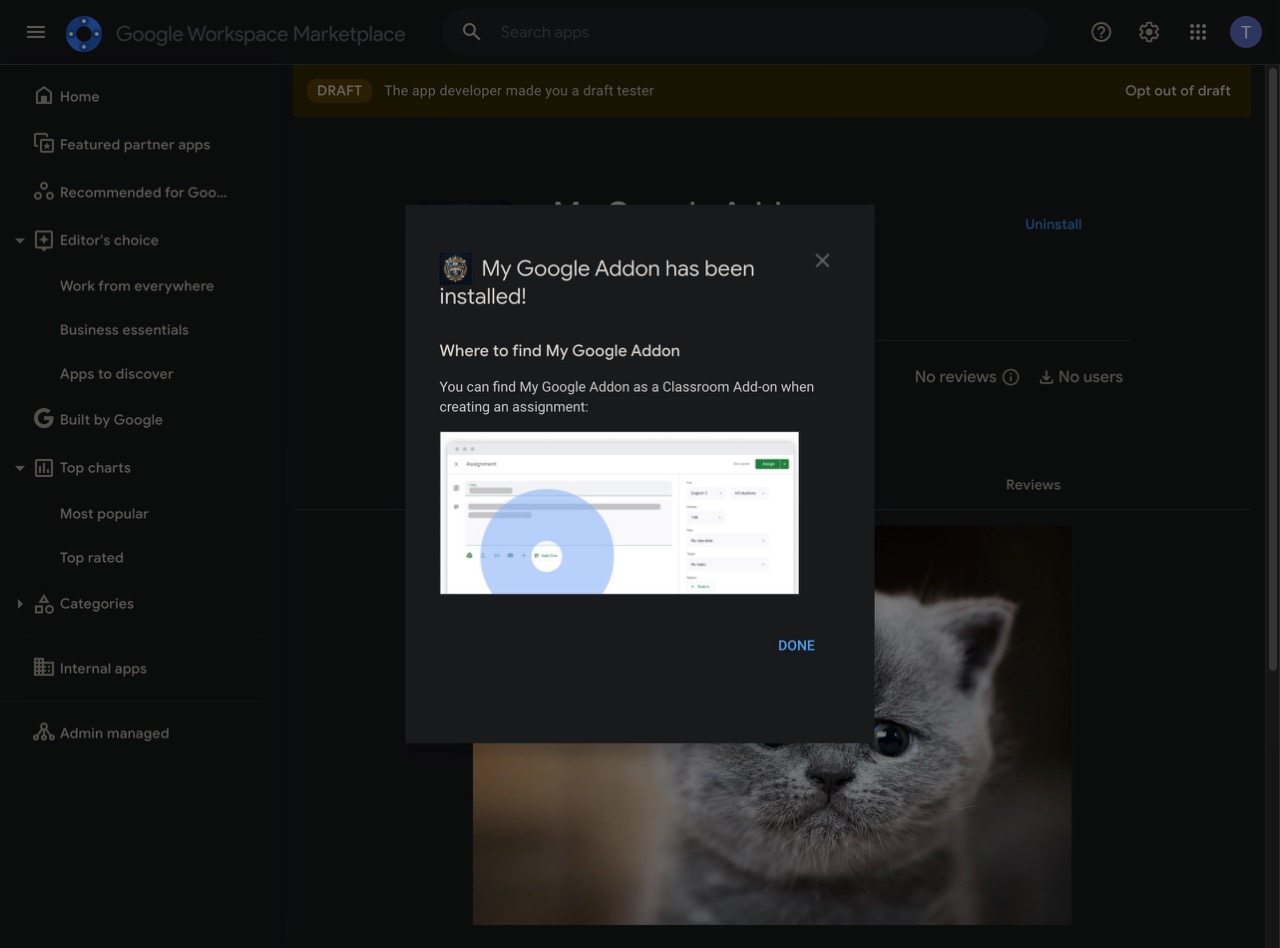
- Open your Store Listing and click the link to View it in the Marketplace. (Note: you should have at least one tester added to your app in the Draft Testers Email Addresses field).
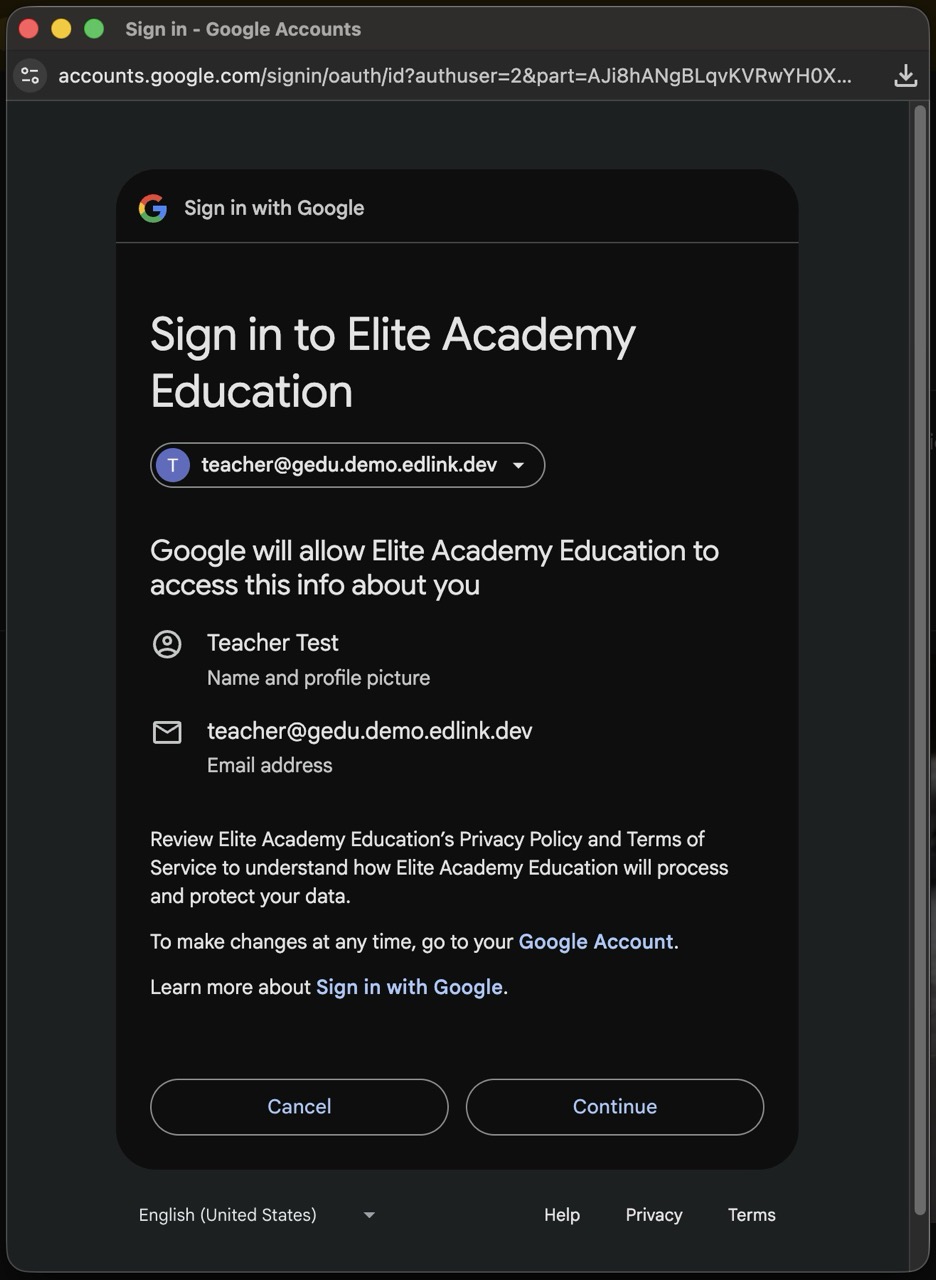
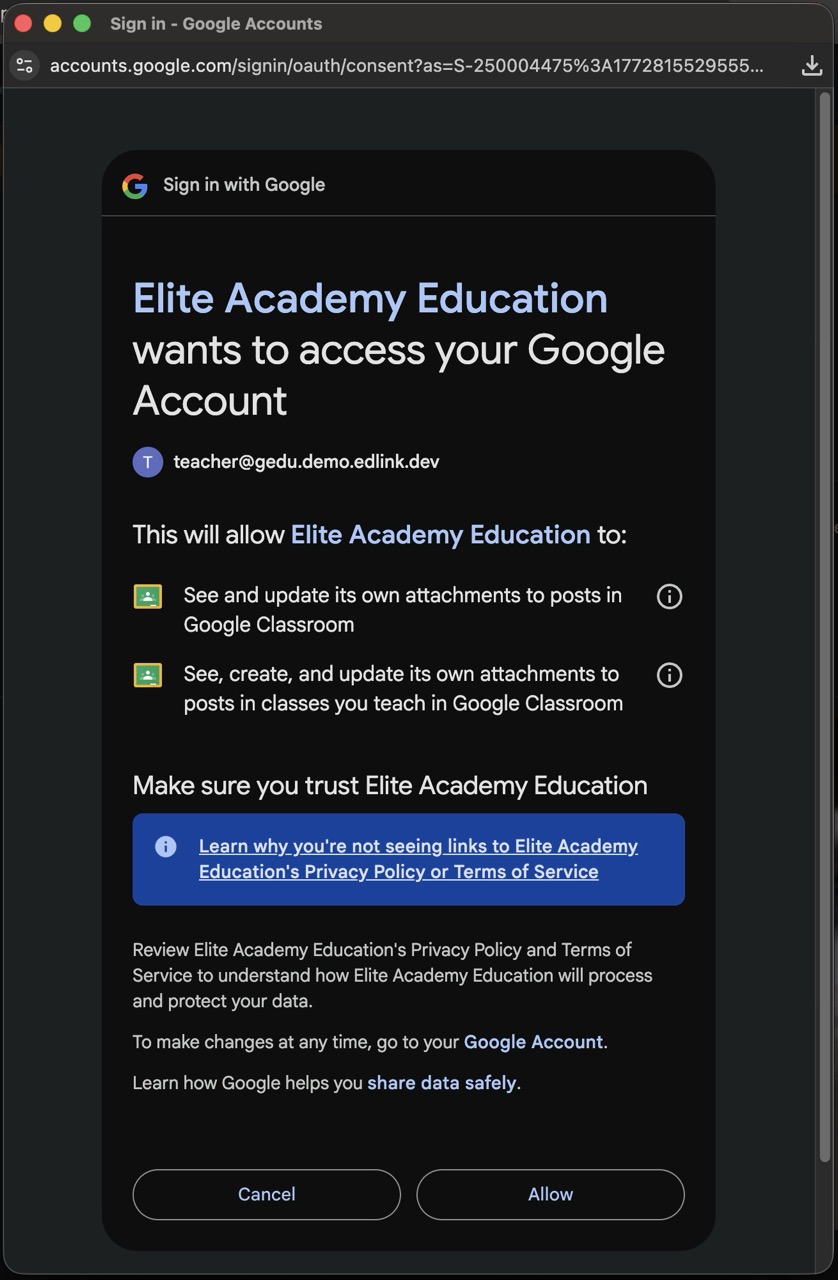
- Log in as a teacher (make sure this account was added to the testers list earlier) and click Install or Admin install.
- Go through the Google Sign-in and Consent screens.
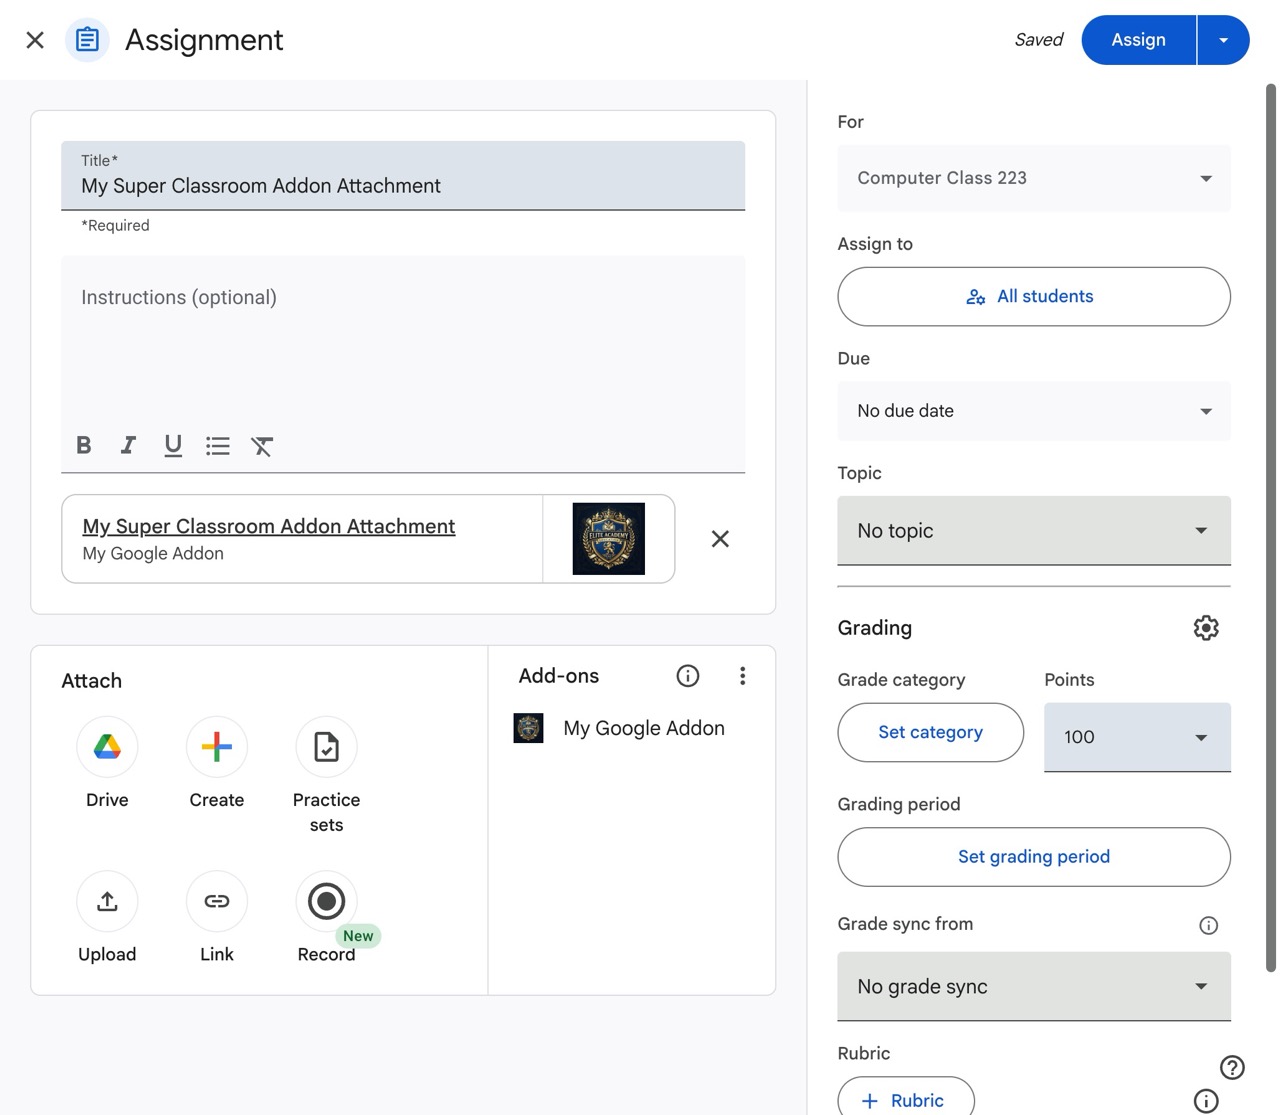
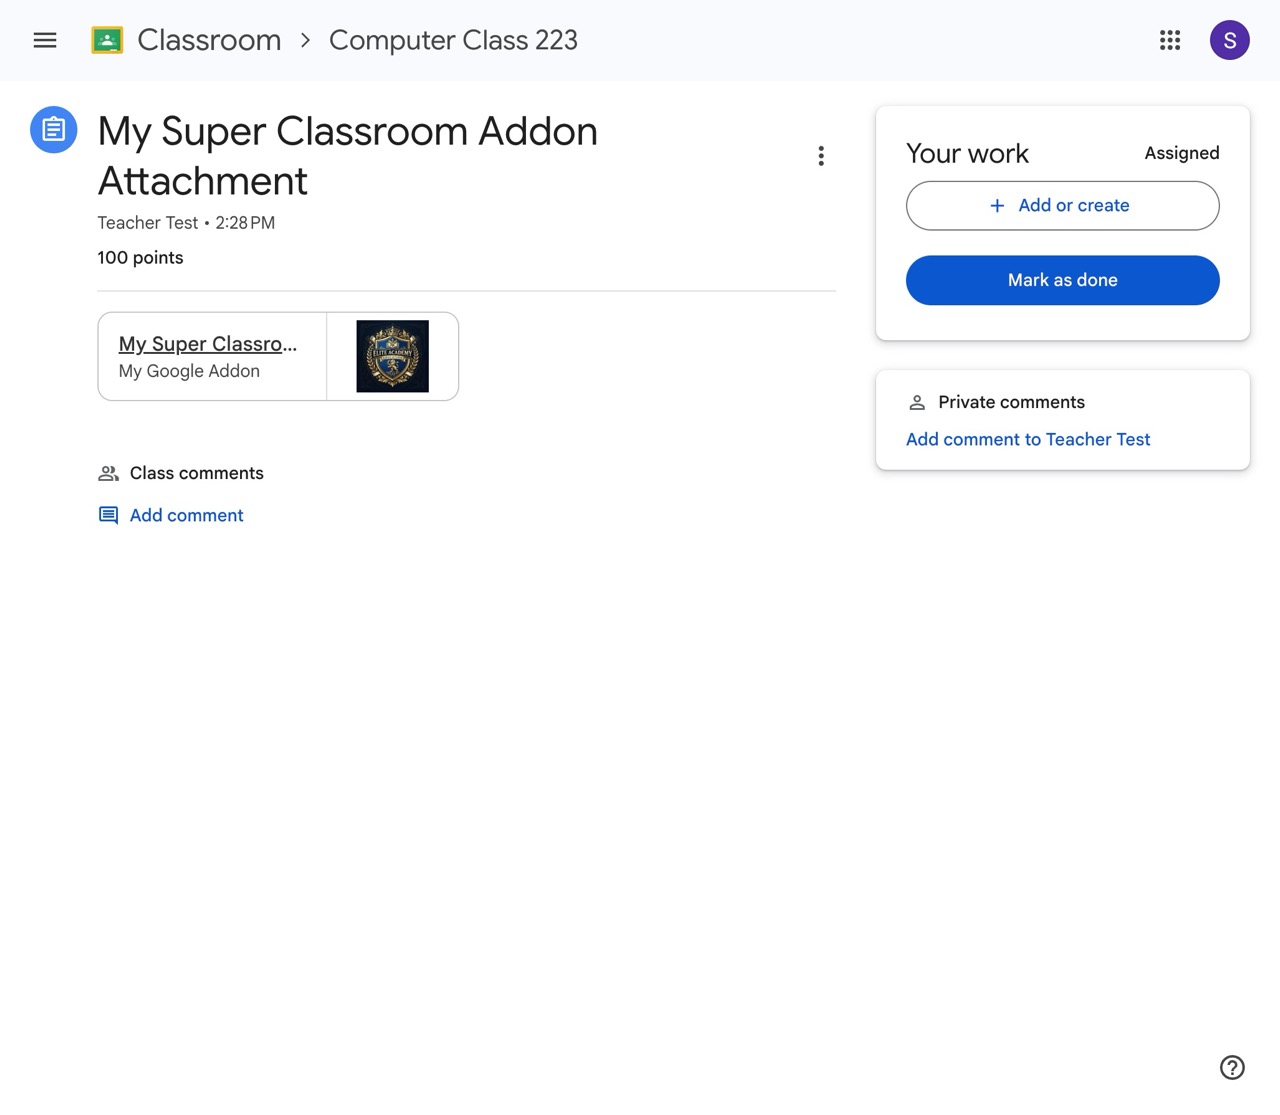
- Once installed, go to Google Classroom and create a new Assignment.
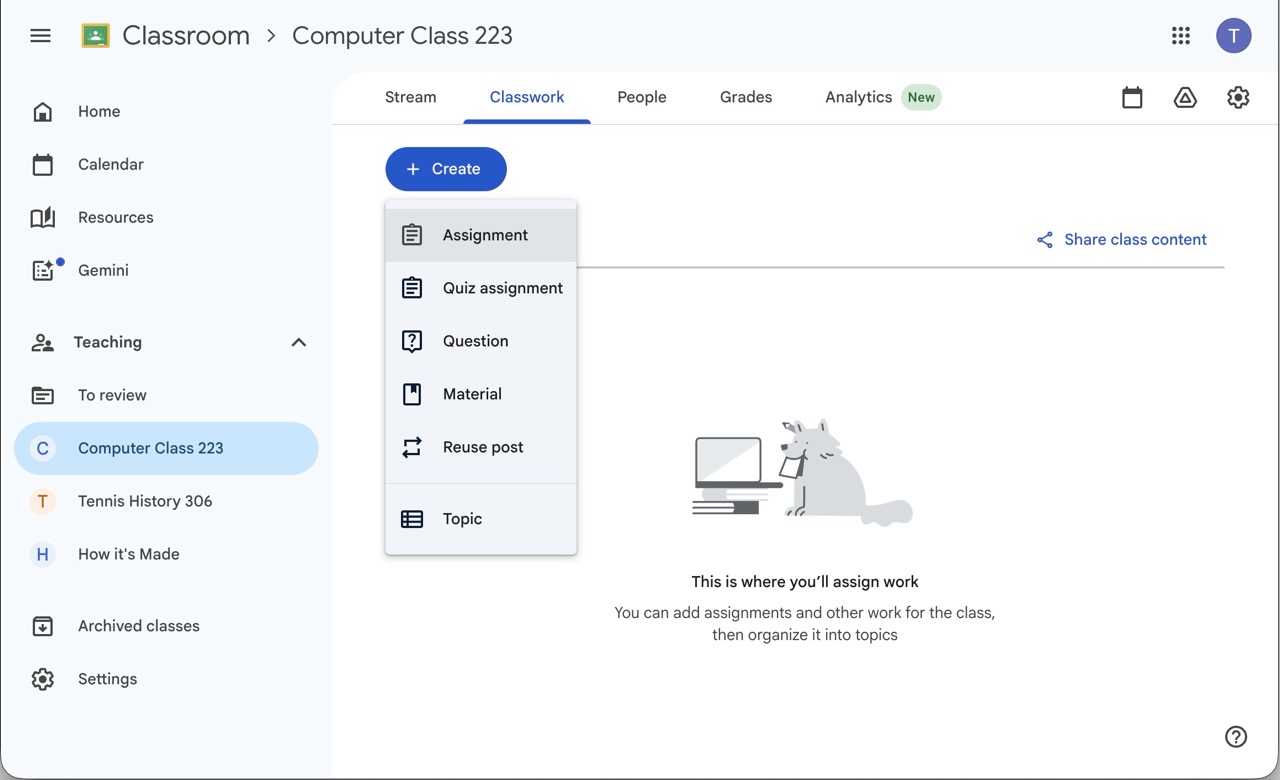
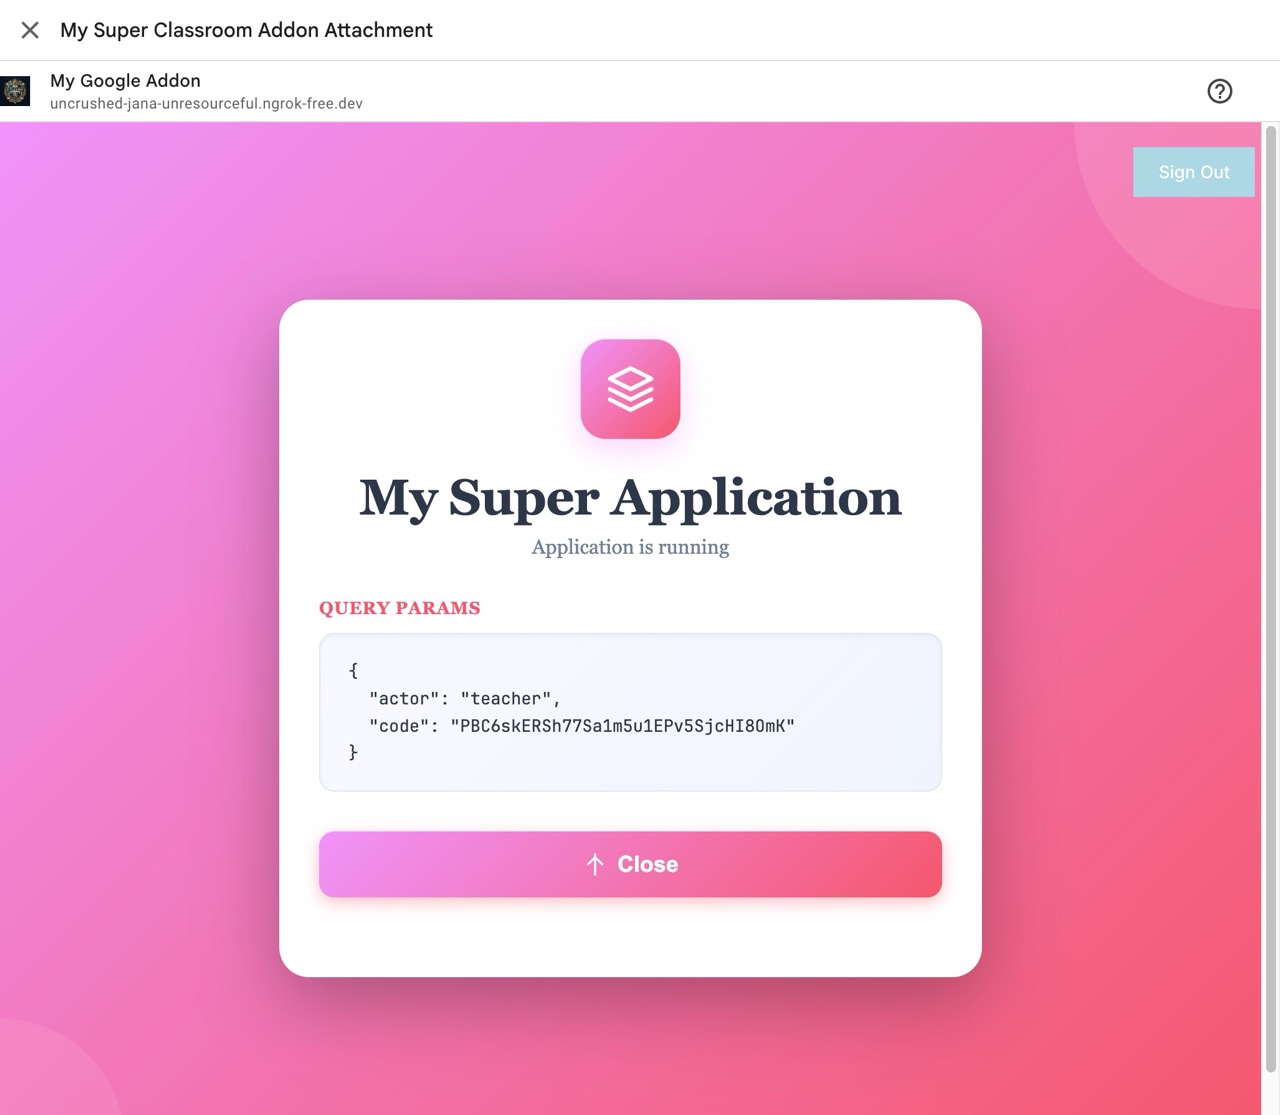
- At the bottom of the assignment creation window, you should see your Google Classroom add-on under the Add-ons section. Click on it.
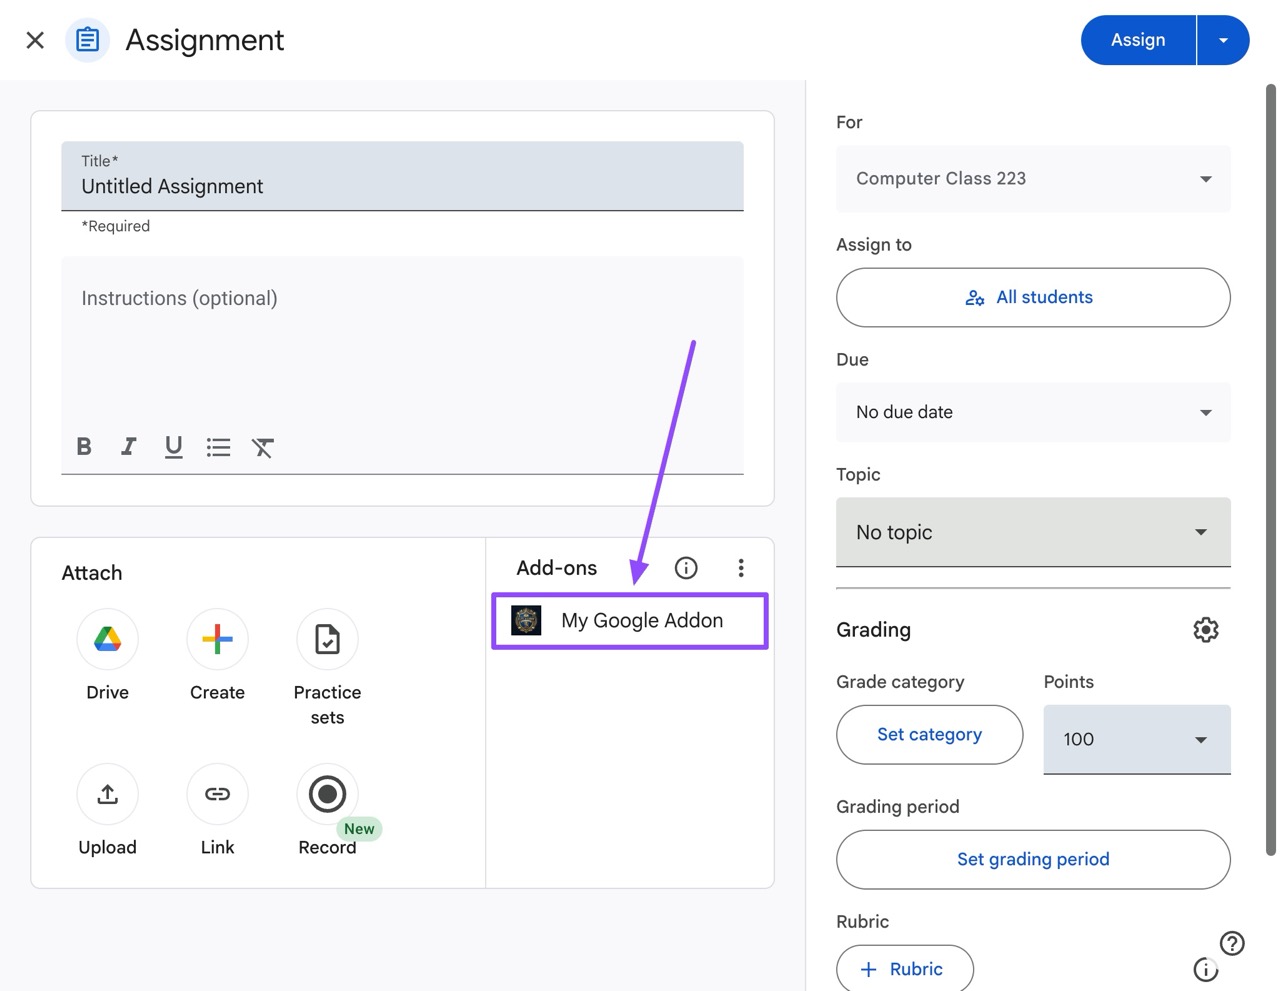
- The Google Classroom add-on iframe will open, showing a Sign-in button (customized with your branding if you set it up).
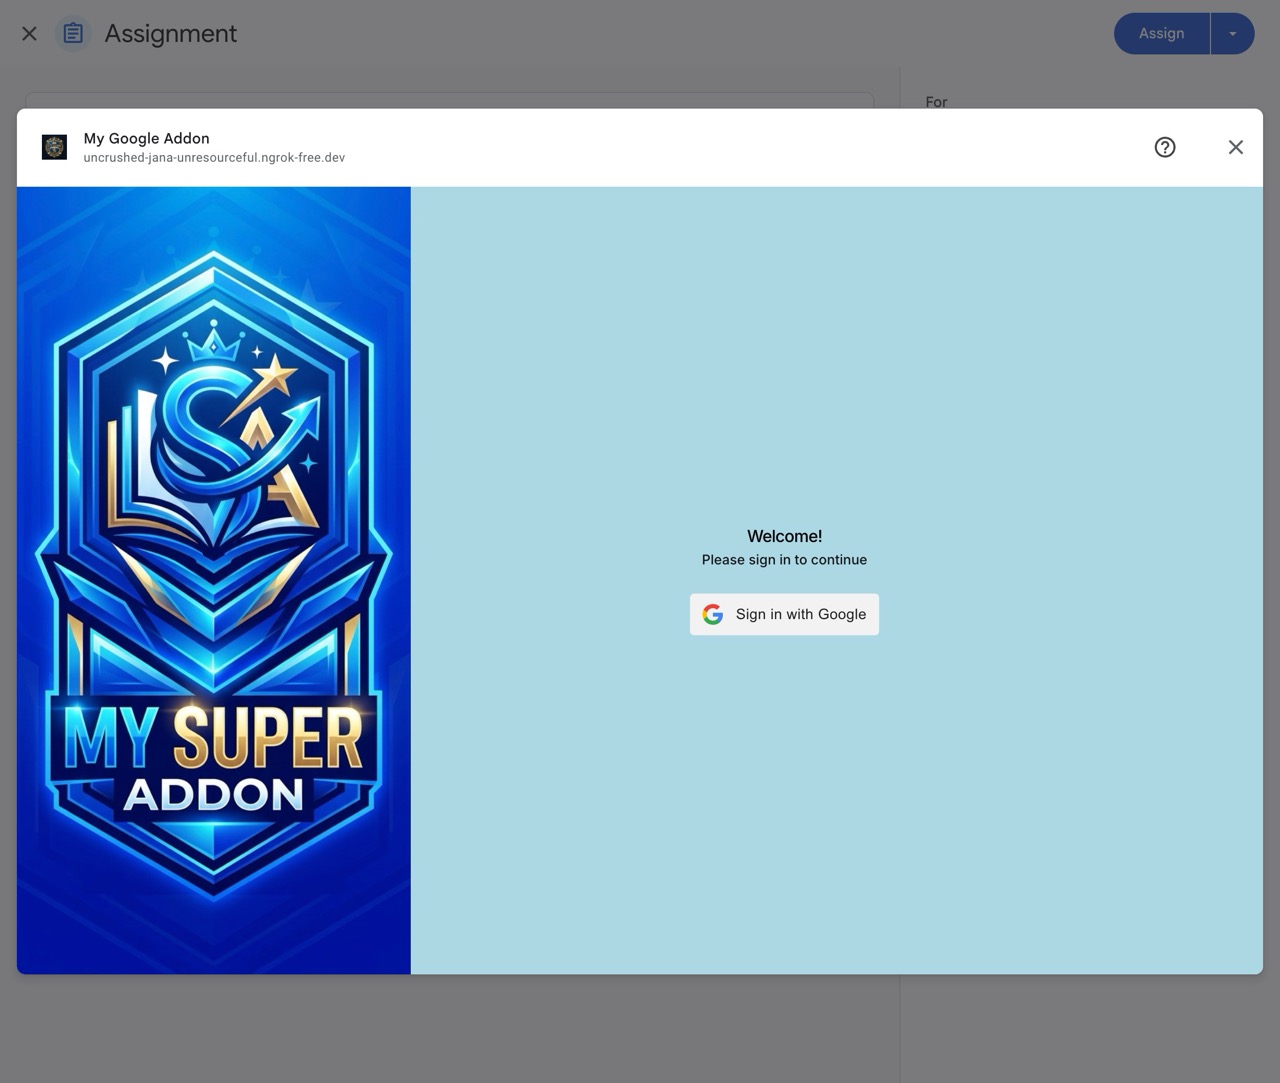
- Upon clicking Sign In, the teacher will authenticate via Google Classroom Sign-in. Afterward, they will be redirected to the developer's redirect URI (the first URI configured in your Edlink Google Provider settings).
For example, if your redirect URL is https://example.com/auth-redirect, the teacher will be sent to https://example.com/auth-redirect?code=<the_code>.
You can then exchange this code for an access token using this snippet:
// Exchange the authorization code for an access token
const response = await $fetch(
  "https://ed.link/api/authentication/token",
  {
    method: "POST",
    body: {
      code: "<get_the_code_from_the_query_string>",
      client_id: edlinkClientId,
      client_secret: edlinkClientSecret,
      redirect_uri: edlinkRedirectUri,
      grant_type: "authorization_code",
    },
  },
);
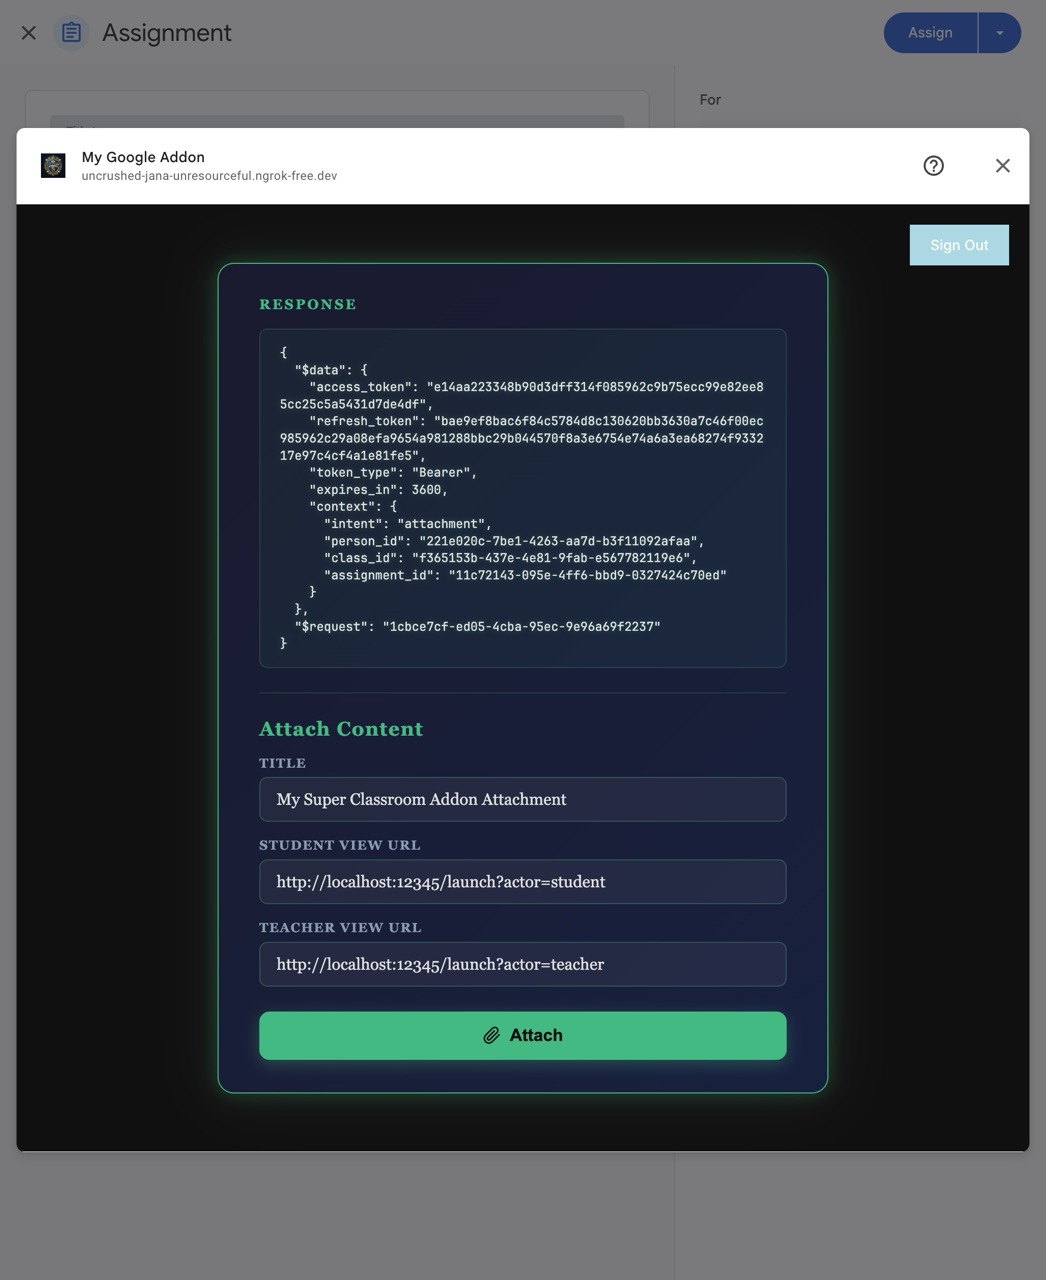
You will receive the following response:
{
  "$data": {
    "access_token": "token",
    "refresh_token": "token",
    "token_type": "Bearer",
    "expires_in": 3600,
    "context": {
      "intent": "attachment",
      "person_id": "221e020c-7be1-4263-aa7d-b3f11092afaa",
      "class_id": "f365153b-437e-4e81-9fab-e567782119e6",
      "assignment_id": "11c72143-095e-4ff6-bbd9-0327424c70ed"
    }
  },
  "$request": "1cbce7cf-ed05-4cba-95ec-9e96a69f2237"
}
intentis what the current user is doing (eitherattachorlaunch).person_idis the internal person ID on Edlink.class_idis the internal class ID.assignment_idis the internal assignment ID of the Google Classroom assignment.
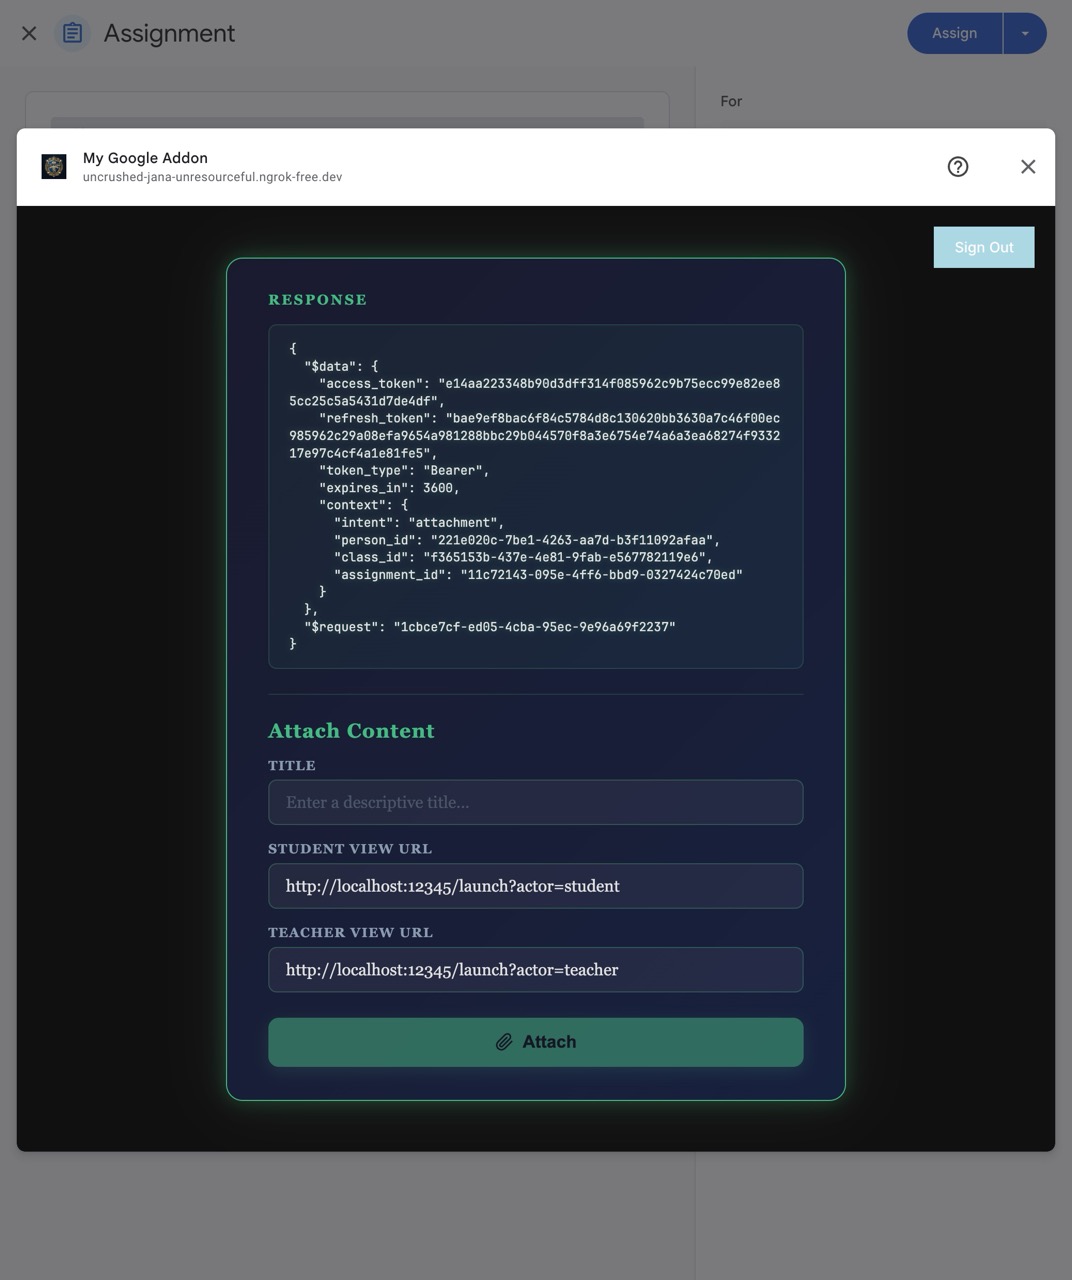
- The teacher can now select content from your application to attach to the assignment. When the teacher clicks your "Attach" button, your client-side application must post a message to Edlink with the attachment details:
window.parent.postMessage(
  {
    type: "attach",
    title: "Title of the Attachment",
    student_view_url: "https://your.app.com/path/for/student",
    teacher_view_url: "https://your.app.com/path/for/teacher",
  },
  "https://ed.link",
);
Once the message is posted, Edlink will handle attaching it to the Google Classroom assignment.
Note on URL query parameters: You are free to include your own query parameters in the teacher_view_url and student_view_url. When a user launches the attachment, Edlink will merge the authorization code parameter with your existing query string. For example, if your URL is https://your.app.com/path/for/student?lesson=123, the user will be redirected to https://your.app.com/path/for/student?lesson=123&code=<the_code>.
- The teacher can launch the attachment to verify it works correctly. (Note: Like the initial attach flow, when a teacher "launches" the attachment, they will also be redirected to the URL you specified (e.g.,
teacherViewUri) and appended with the standardcodequery parameter which can be exchanged for context).
Step 8: Testing the Google Classroom Add-on (Student Flow)
Finally, verify that students can access the content attached by the teacher.
- Log in as a student in the test class.
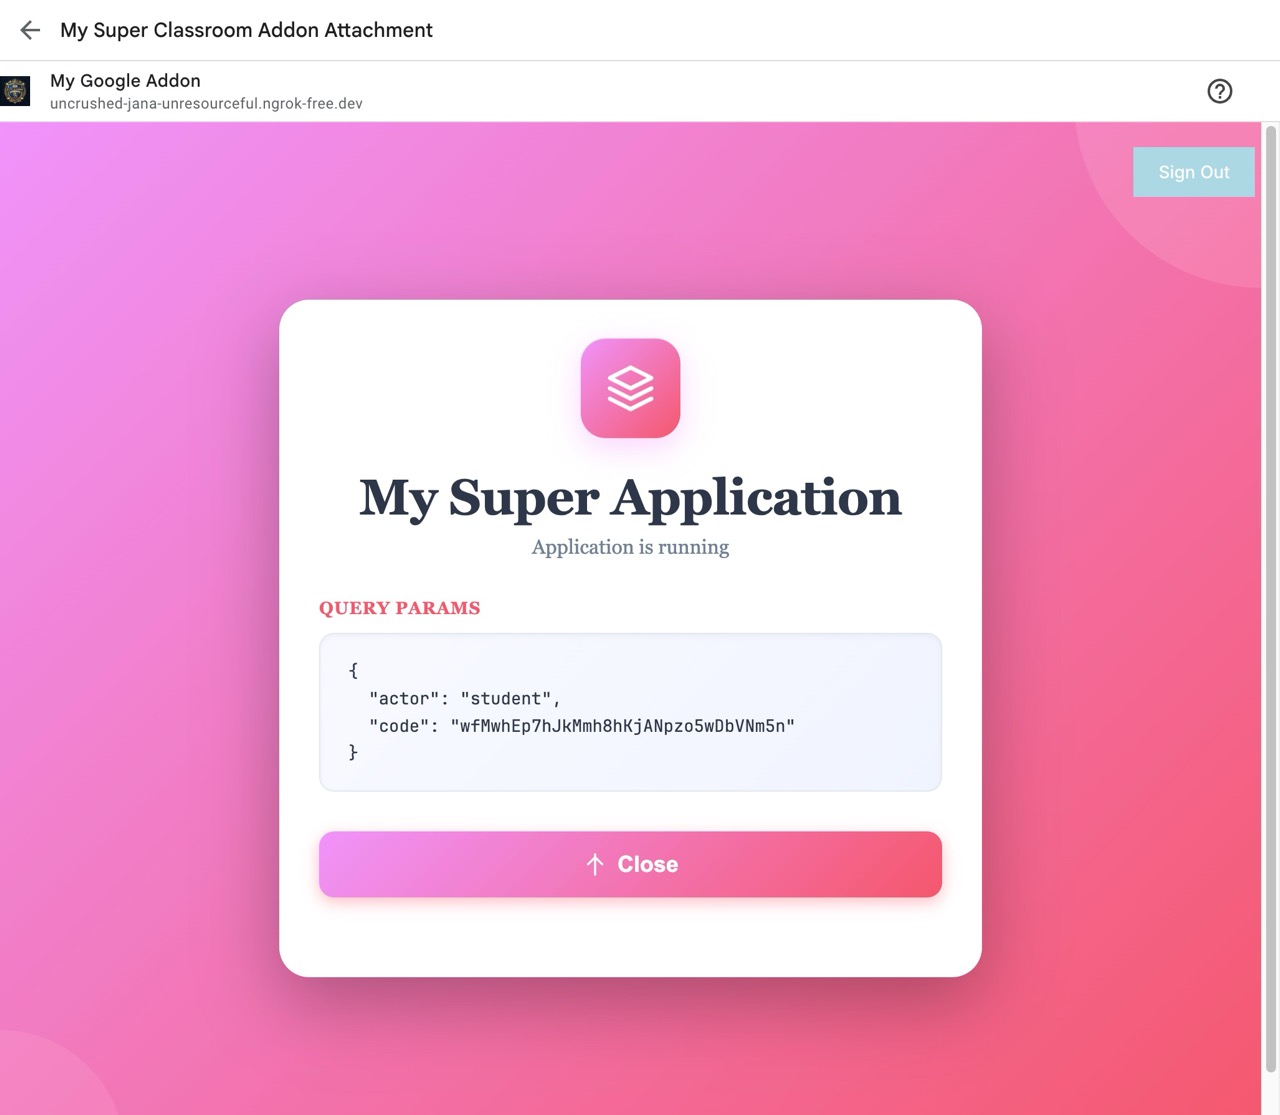
- Open the assignment created by the teacher. The student will see the Google Classroom add-on attachment.
- Click on the attachment. The student will be prompted to sign in via Google Classroom Sign-in.
- After signing in, Edlink will redirect the student to the URL that you specified when creating the attachment (e.g., your
studentViewUriorteacherViewUri). - Just like in Step 7, Edlink will append a
codequery parameter to the URL. If the URL used when creating the attachment washttps://example.com/student-view?lesson=123, Edlink will redirect the student tohttps://example.com/student-view?lesson=123&code=<the_code>. - You can then use the same
authentication/tokenendpoint (shown in Step 7) to exchange the code for an access token to identify the student and the context (intent,person_id,class_id, etc.).
Pro Tip: Even though you can use the same base URL with different query parameters (like ?actor=student or ?actor=teacher), you can use completely distinct URLs for your studentViewUri and teacherViewUri! Furthermore, because Edlink provides the context during the token exchange, you can precisely identify what assignment the student is launching and direct them to the correct content.
Well done!
You've successfully configured your Google Classroom add-on. Teachers and students can now easily access your application's content directly from Google Classroom!
Any Questions?
If you still have questions, please contact our support team and we'll get back to you within 24 business hours.