This guide will help you configure your own Google OAuth client to customize the Google consent screen experience. By setting up your own OAuth client, your users will see your application's title and logo on the Google consent screen instead of Edlink's branding, providing a more seamless and branded experience.
Before Getting Started
Creating a Google OAuth client goes hand-in-hand with Google Branding. If your Branding hasn't been set up yet, please go to Configuring Google Branding to see the instructions on how to do that first.
What are we going to do?
- Get the Redirect URI for the custom Google Client
- Create a custom Google Client in Google Cloud Console
- Get the Client ID and secret and provide them to Edlink
- Enable the Google Provider
Getting the Redirect URI
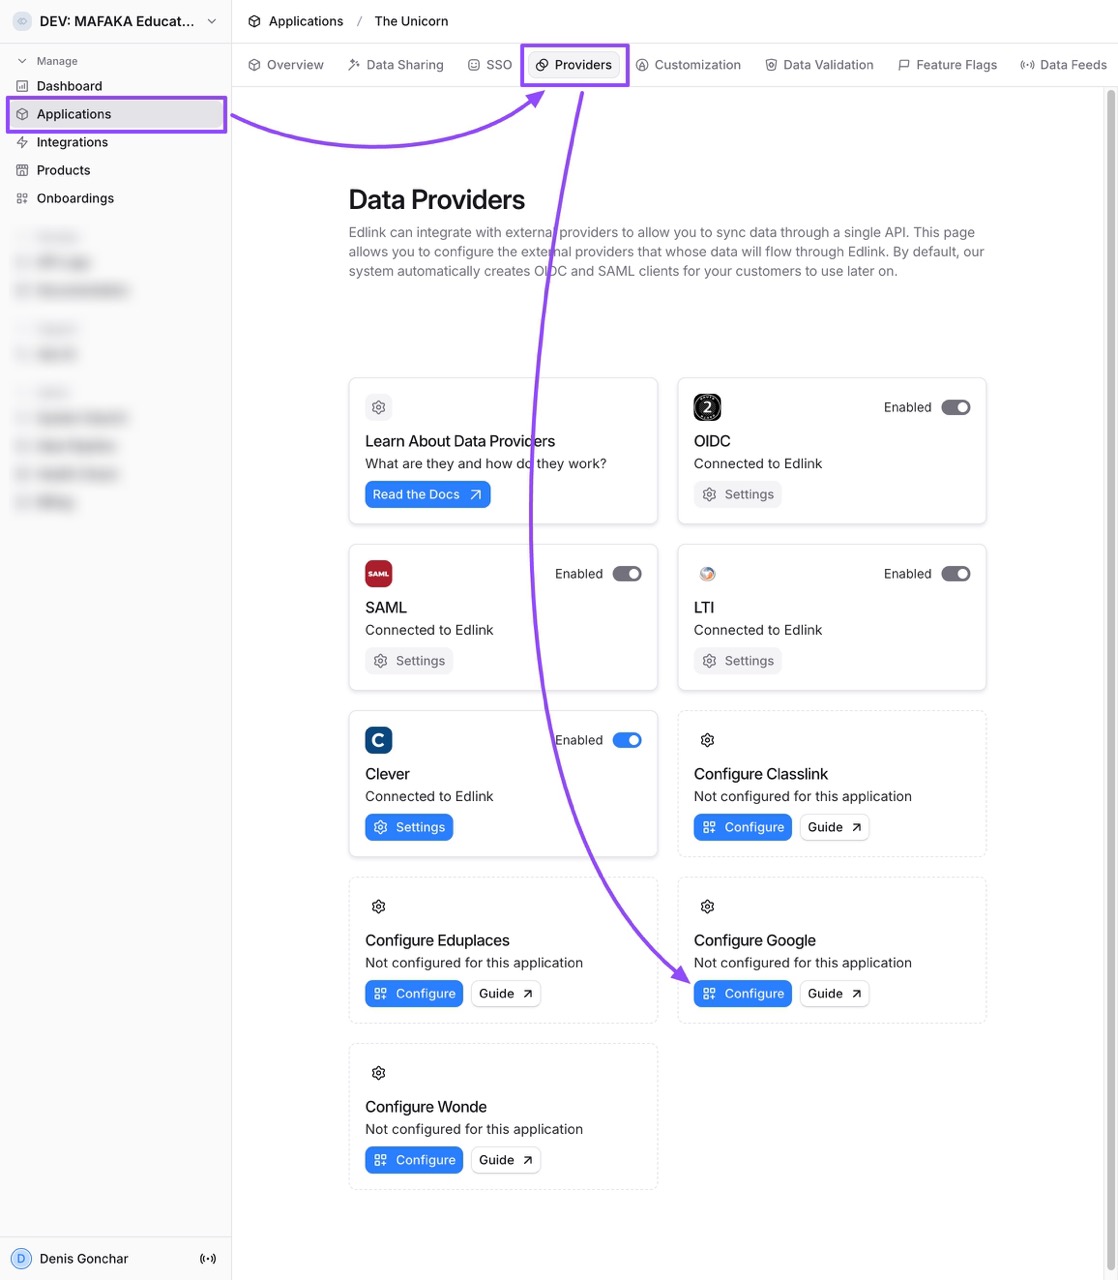
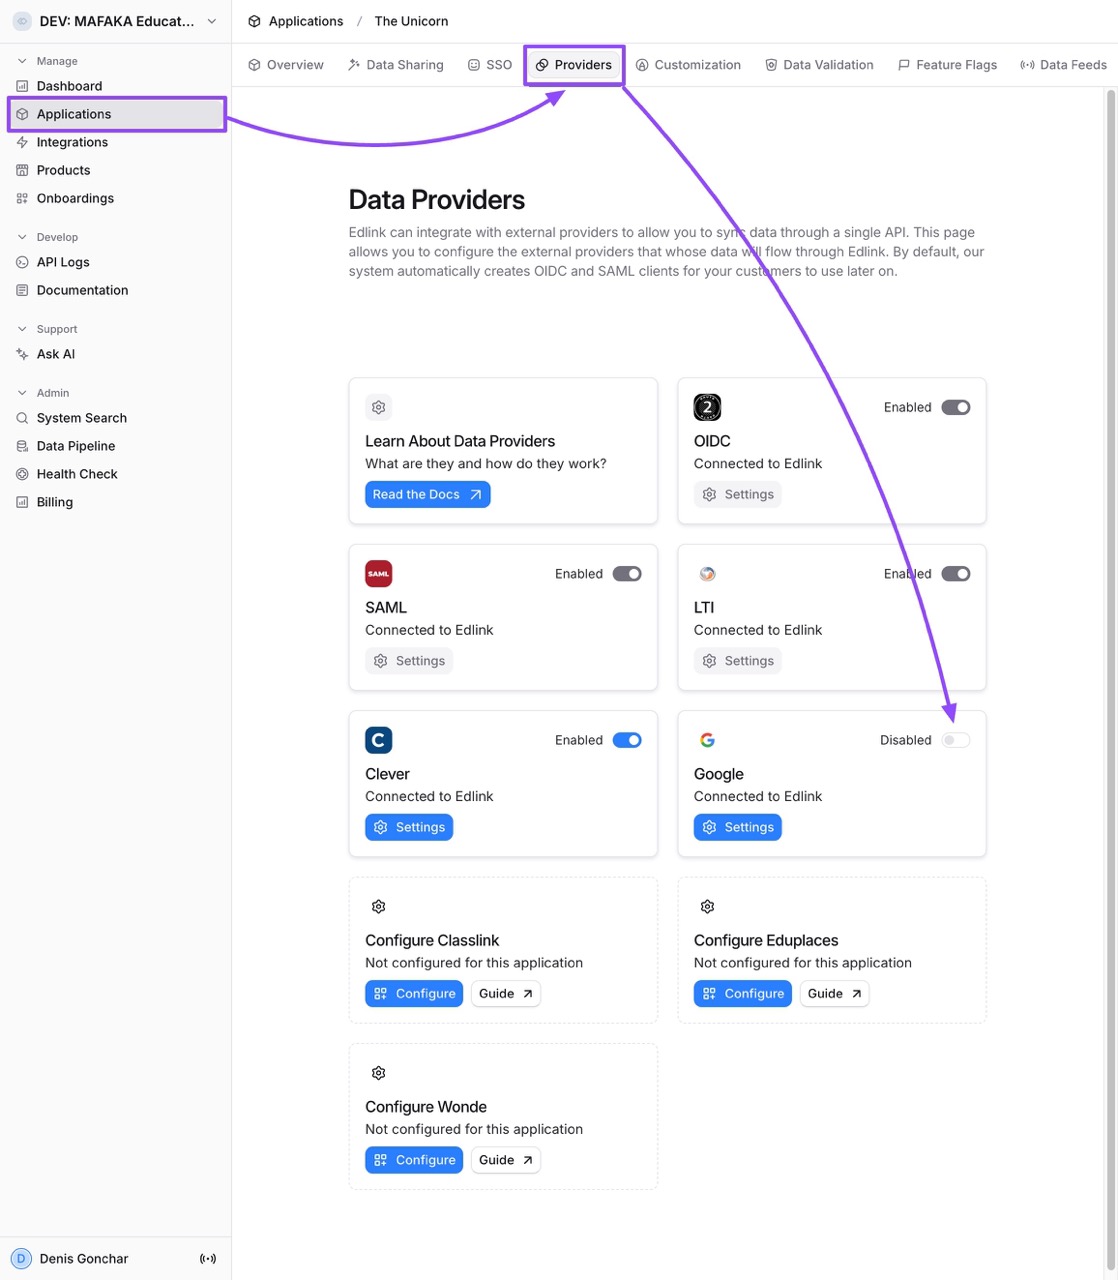
- On Edlink, go to Applications -> Your Applications -> Providers (tab). Click on Configure under the Google provider.
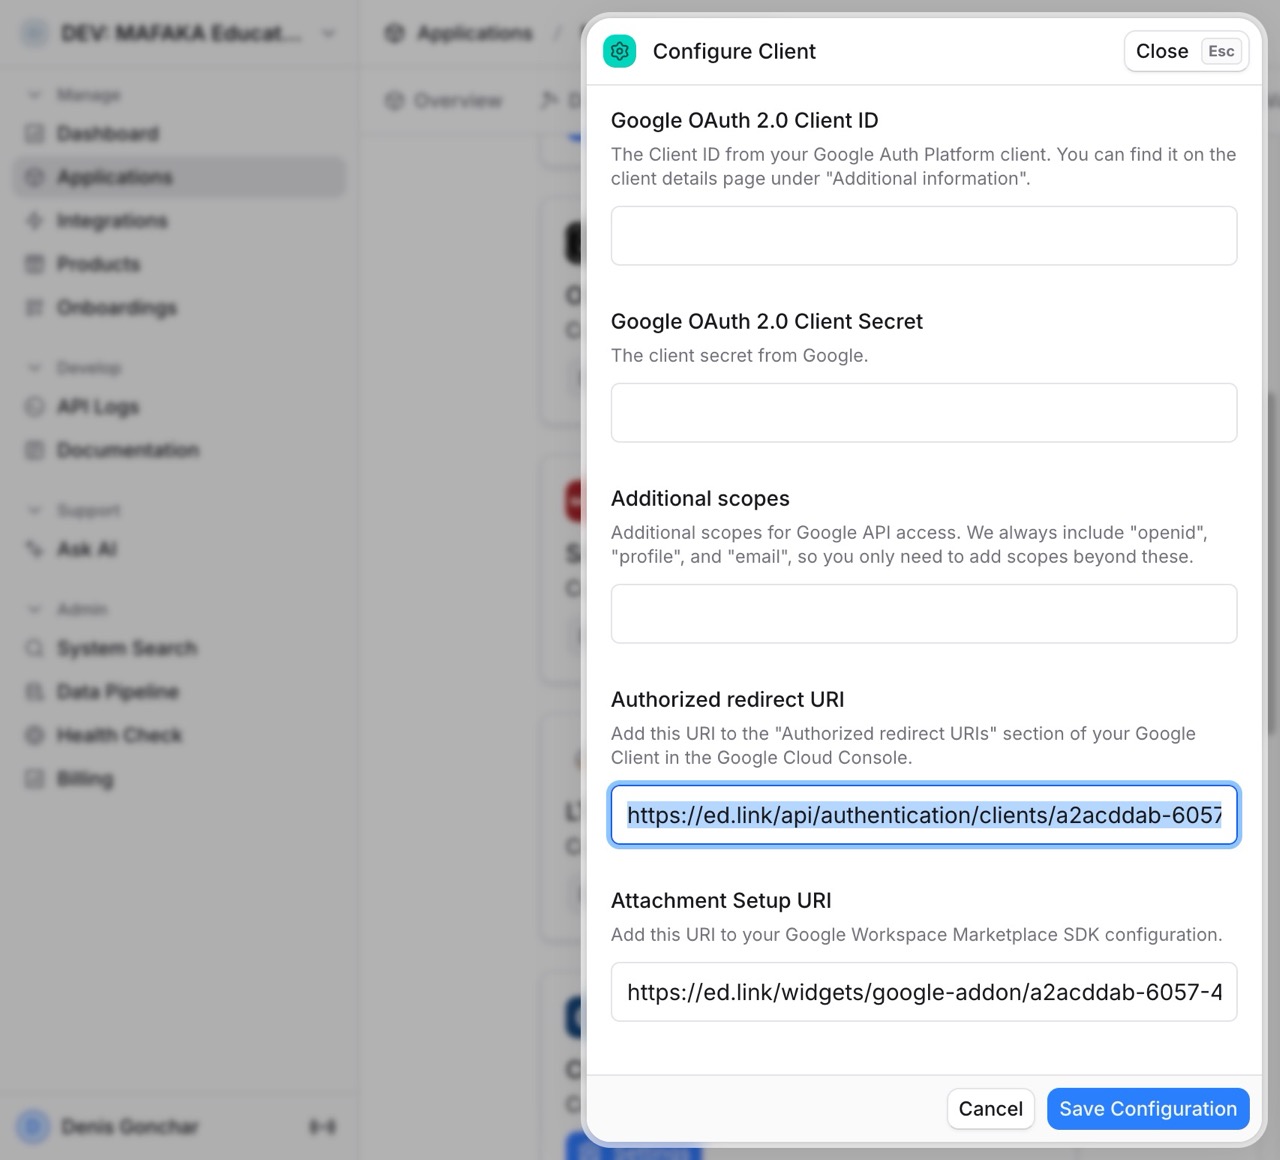
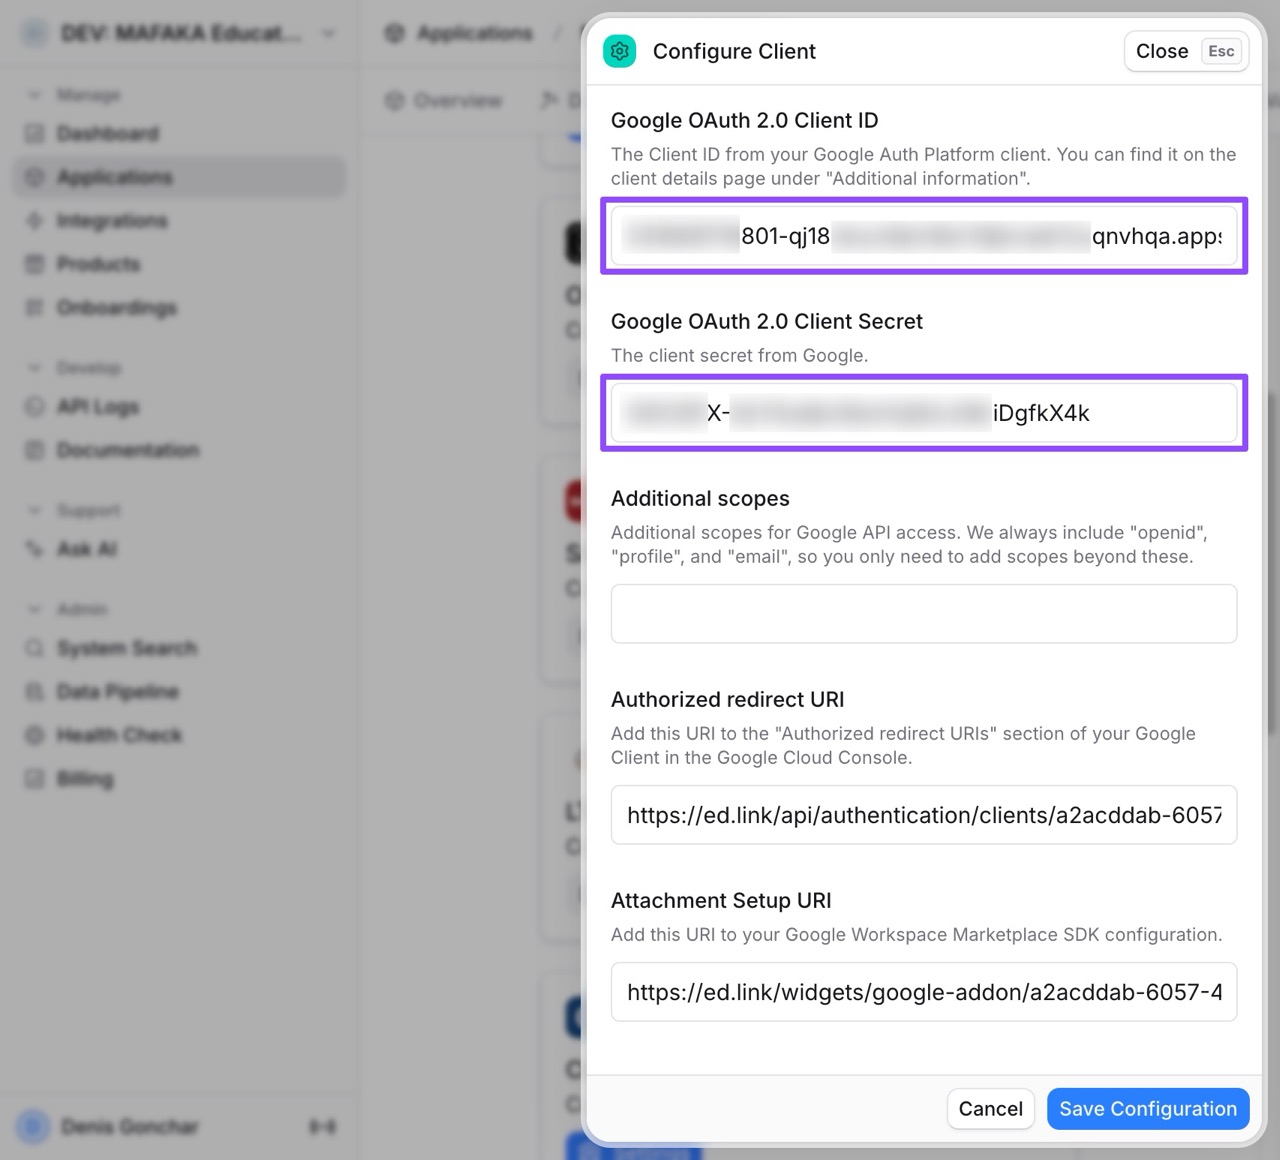
- The Configure Client modal will open. Find the "Authorized redirect URI" field and copy the URL from there.
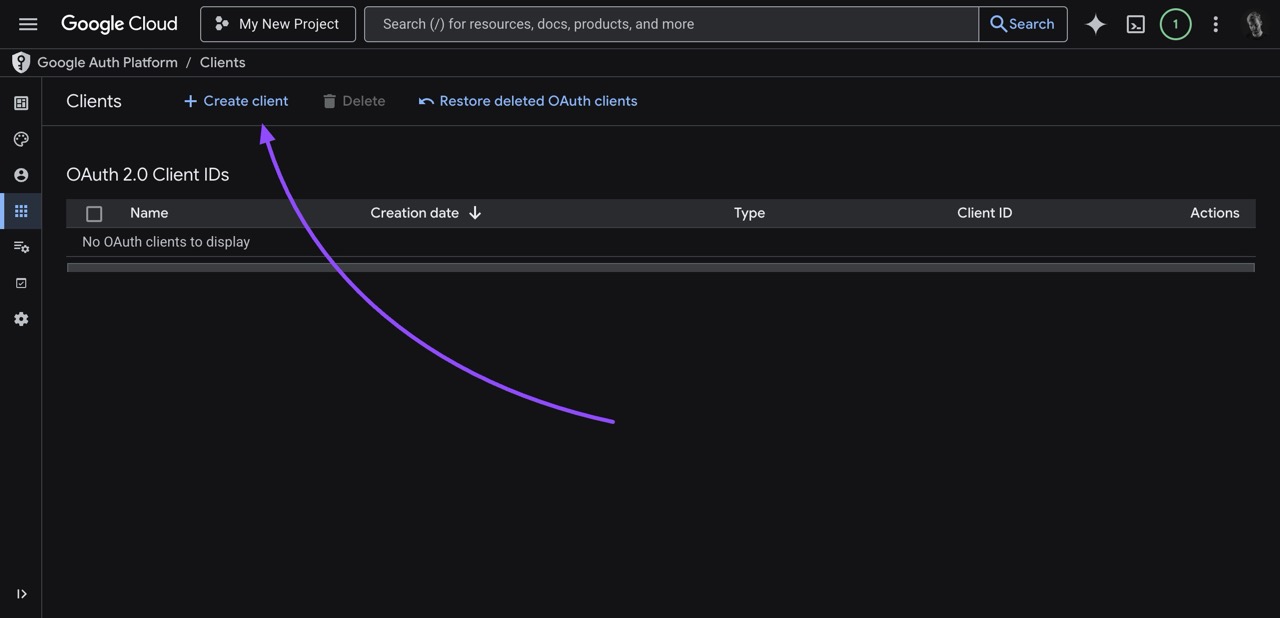
- Go to Google Auth Platform / Clients. Click on the + Create client button.
- For the Application type, select
Web application.

- Enter a Name for your client (e.g.,
My Super Client).
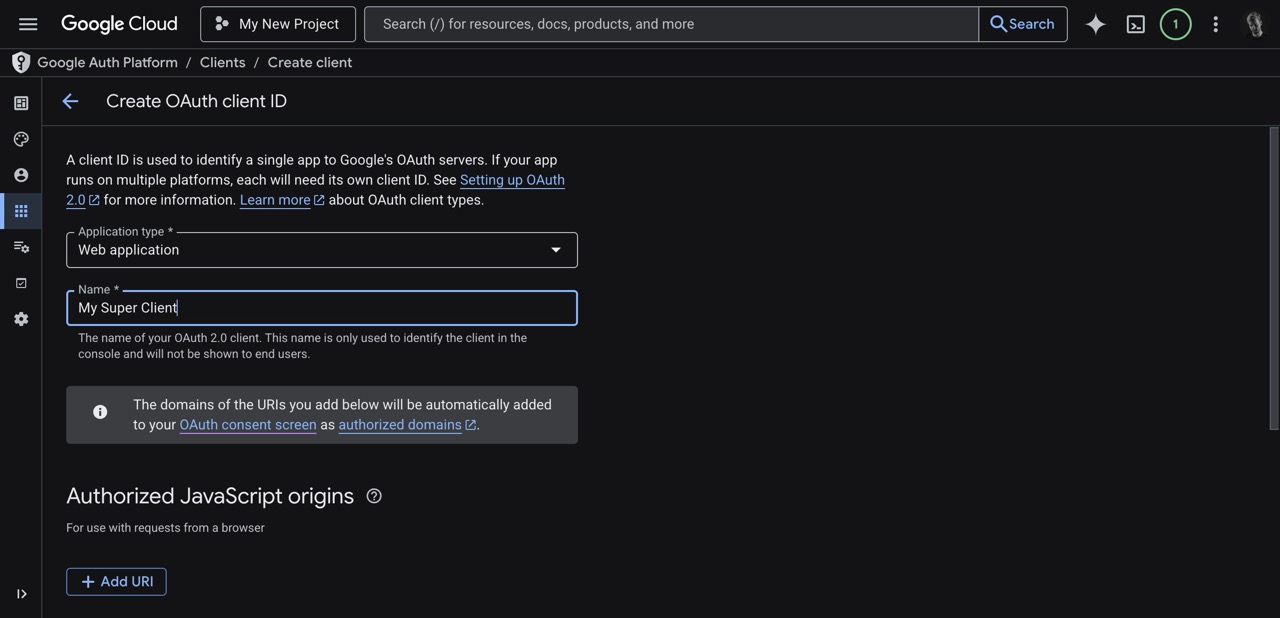
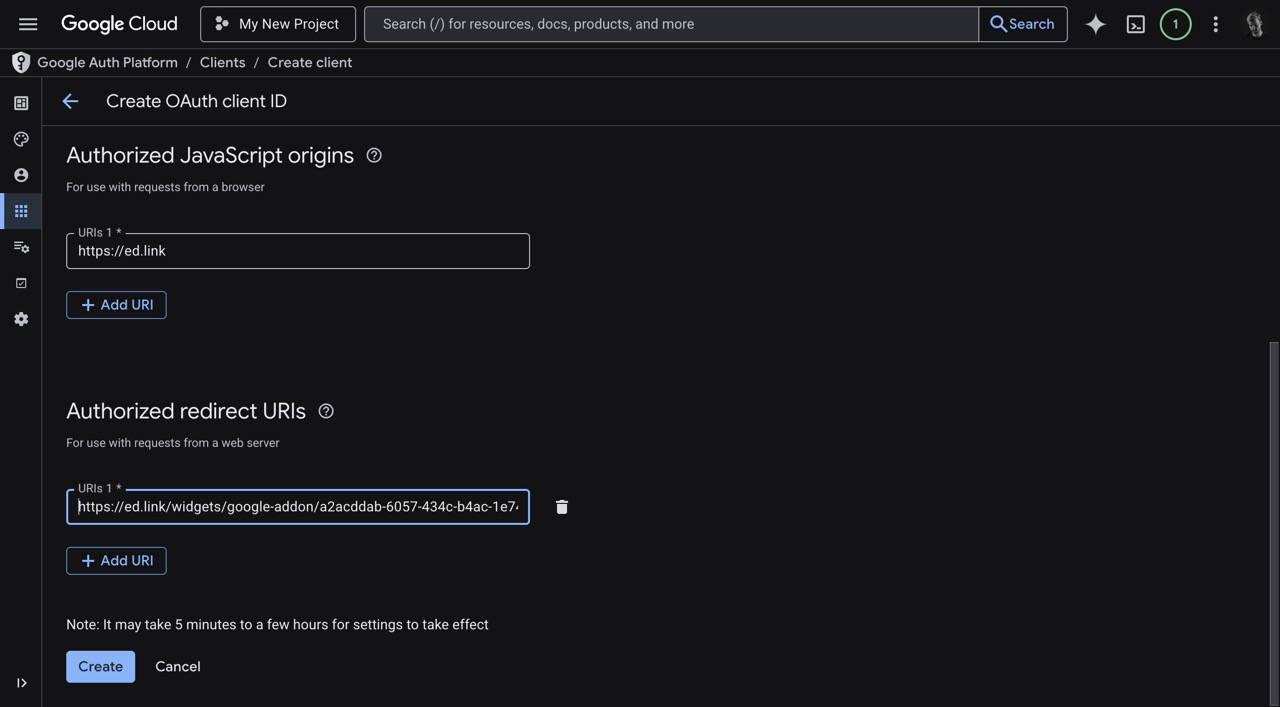
- Scroll down to fill out the URIs:
- Click on Add URI in the "Authorized JavaScript origins" section and add
https://ed.link. - Click on Add URI in the "Authorized redirect URIs" section, and paste the URL you copied from Edlink.
- Click on the Create button at the bottom of the form.
- Click on Add URI in the "Authorized JavaScript origins" section and add
- An "OAuth client created" window will pop up. Copy the Client ID and the Client secret, and store them in a secure place. DO NOT share them with anyone. You can also use "Download JSON" to store all the credentials.
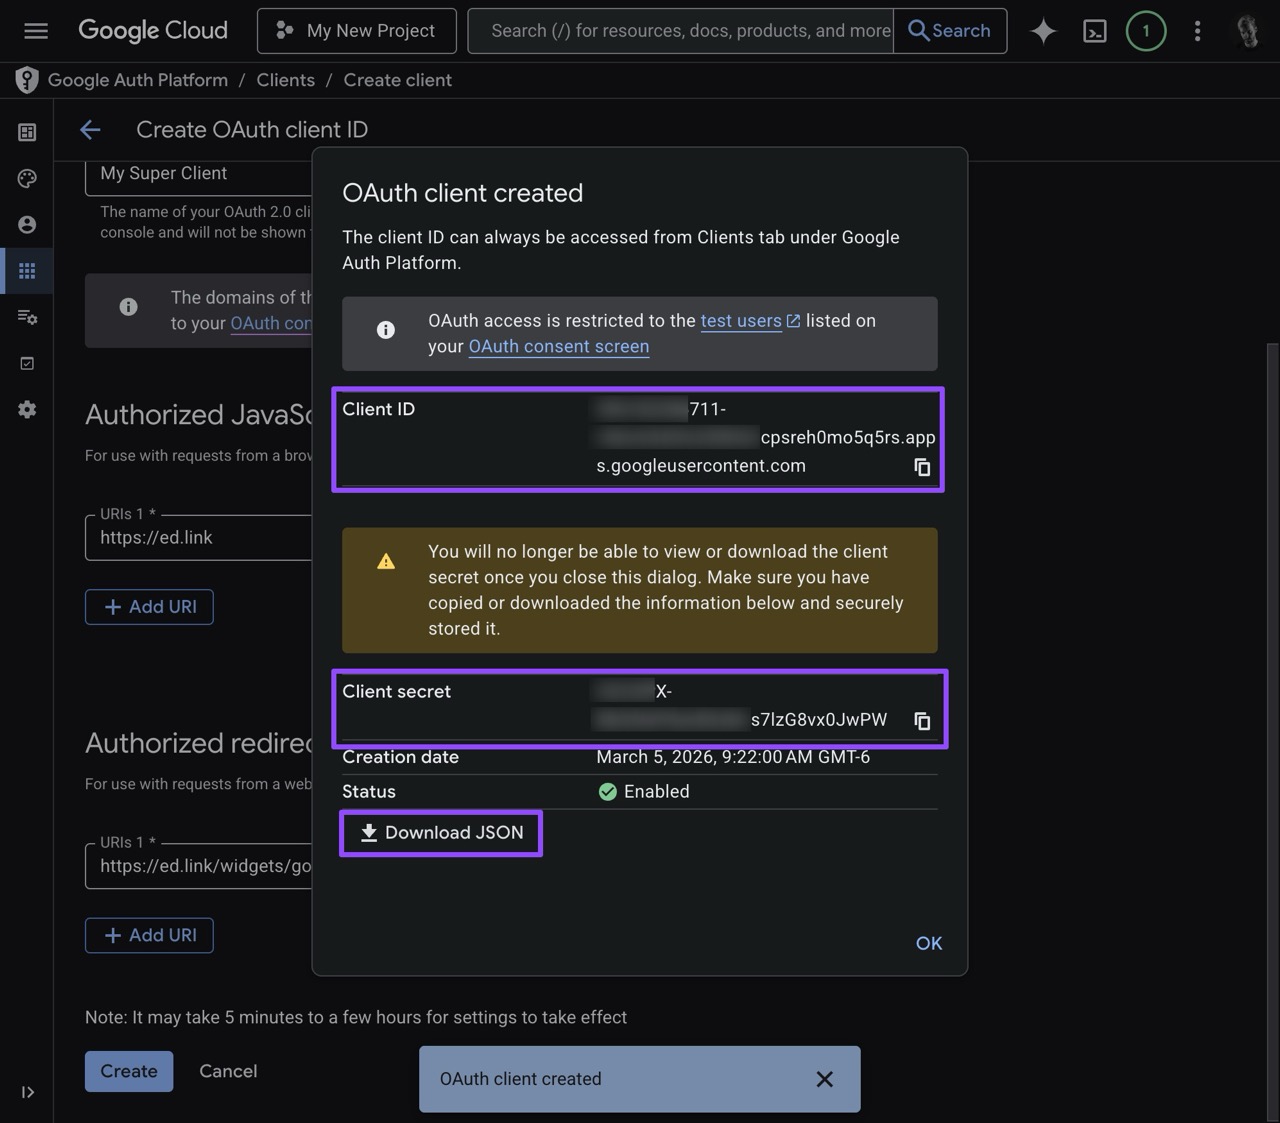
If you lost your secrets, or they were exposed, you can always revoke the exposed secrets and create new ones on the Client's details page in the "Additional information" section. Do not forget to update credentials on the "Configure" page on Edlink.
- Go back to your Edlink dashboard. Paste your Client ID and Client Secret into the "Configure Client" modal, then click on the Save Configuration button.
- Once the configuration is saved, do not forget to toggle the Google provider to Enabled.
Well done!
You've successfully set up your custom Google client. You can further customize your Google consent screen here: Google Auth Platform / Branding.
Any Questions?
If you still have questions, please contact our support team and we'll get back to you within 24 business hours.