
This guide is intended to help Schoology administrators add an Edlink-connected app as an LTI 1.1 application in Schoology.
Before Getting Started
Make sure your organization's Schoology account is connected to Edlink.
Step 1: Logging in to Schoology
Log into your Schoology admin account.
Step 2: Accessing your App Center
Click on the "waffle button" (four small squares) on the top right side of the screen.
Select App Center from the drop-down menu.
Click on My Developer Apps near the top of the screen.

Click Add App.

Step 3: Filling out the LTI Configuration Form
You should now see the LTI configuration screen, which will look like a short form.
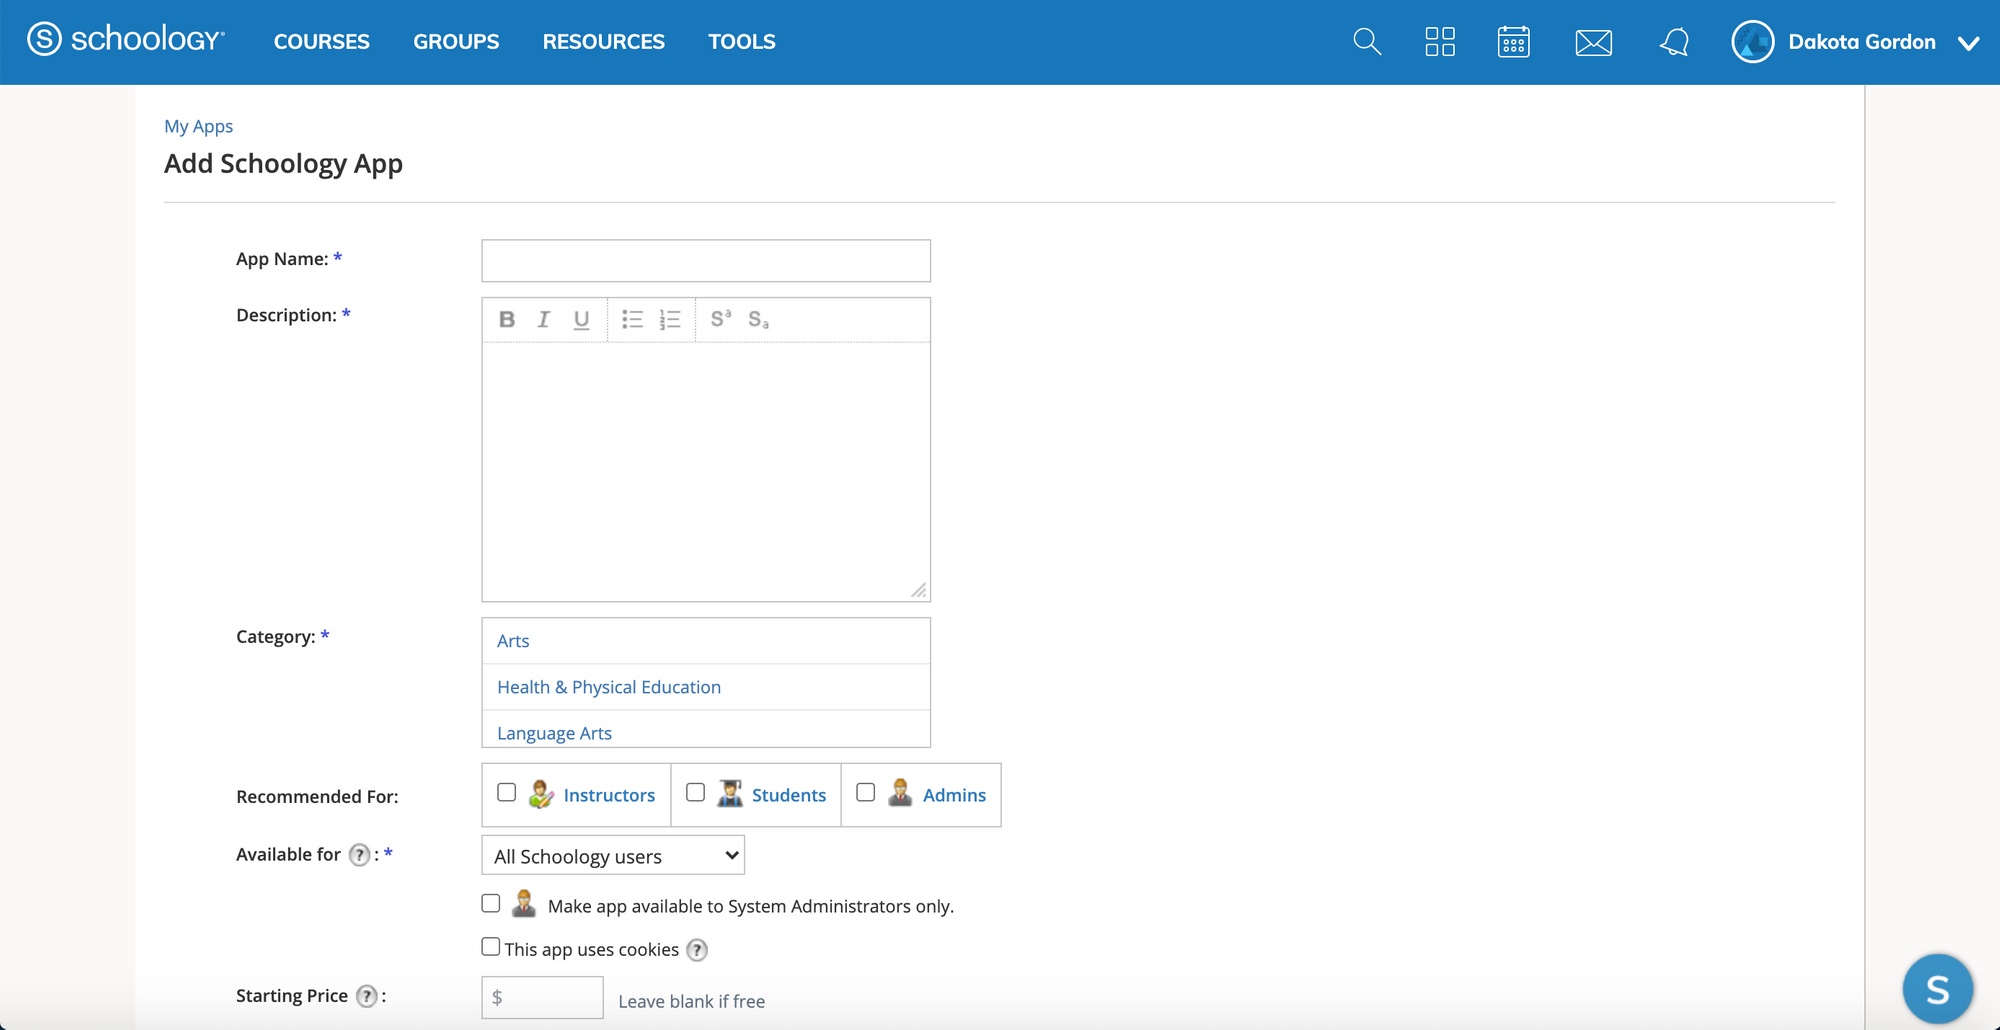
Fill in the following fields:
- App Name: Name of the app
- Description: Short app description
- Category: Select a subject
- Recommended for: Choose Instructors, Students, Admins, or all three
- Available for: Choose "All Schoology users" or "Only people in my school"
You may upload an App Logo and Feature Graphic.
Leave all other boxes unchecked/unfilled.
Select LTI App 1.1 — this will expand more fields.
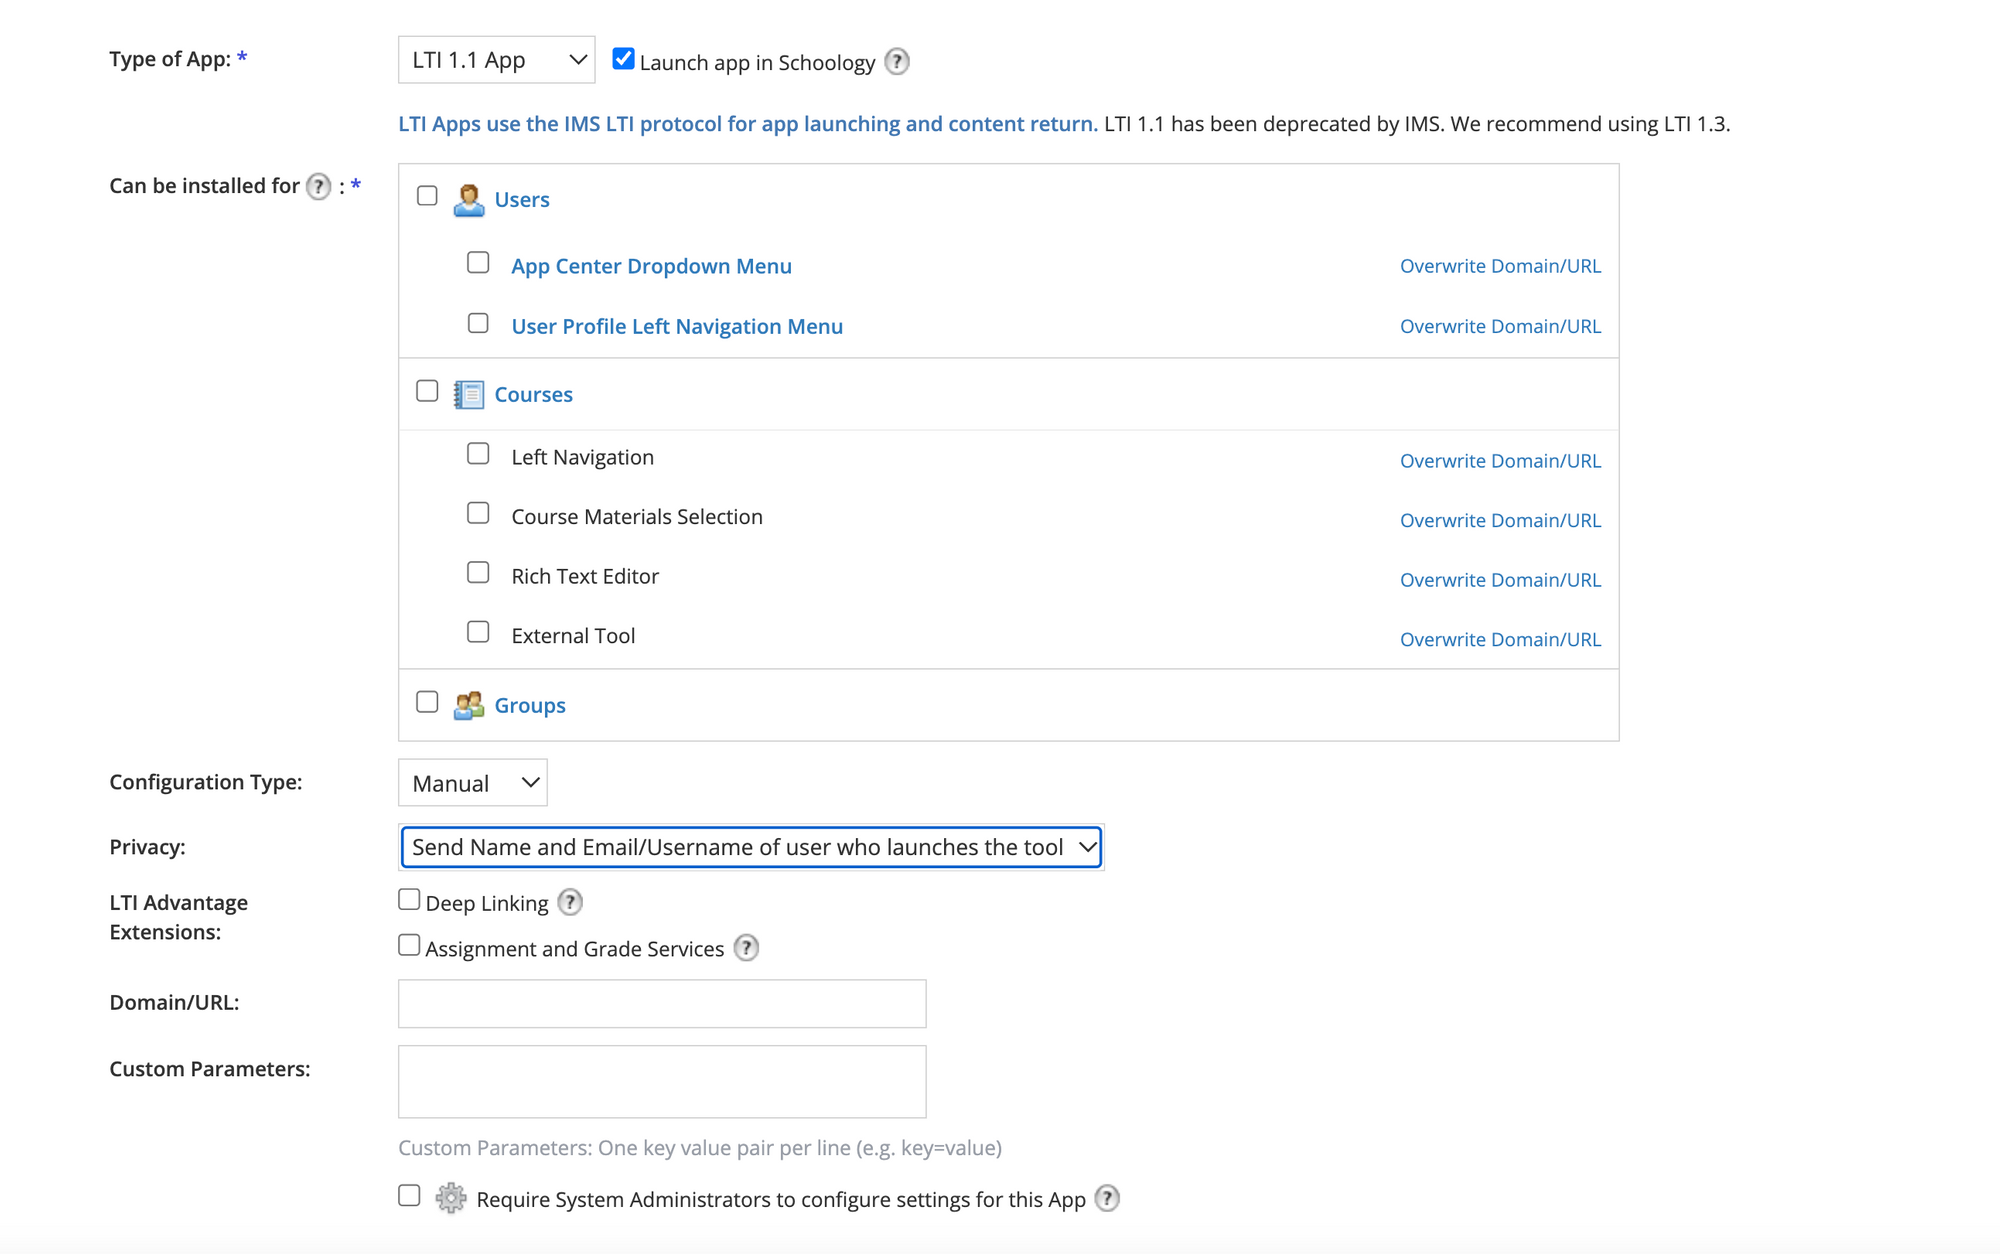
Next to LTI App 1.1, you'll see the option Launch app in Schoology.
Note: Check with your contact at the learning app to confirm if in-app launching is supported.
If you're unsure, leave it unchecked. The app will launch in a new window.
Then fill in:
- Can be Installed for: Select applicable categories
- Configuration: Manual
- Privacy: Send Name and Email/Username of user who launches the tool
- Domain/URL: In your Edlink dashboard, go to the Overview tab of your app and copy the LTI Launch URL
- Custom Parameters: None
- Terms of Use: Check this box
Click Submit.
You should see "Your App has been created."
Click Install LTI App, then I Agree, and Add to Organization.
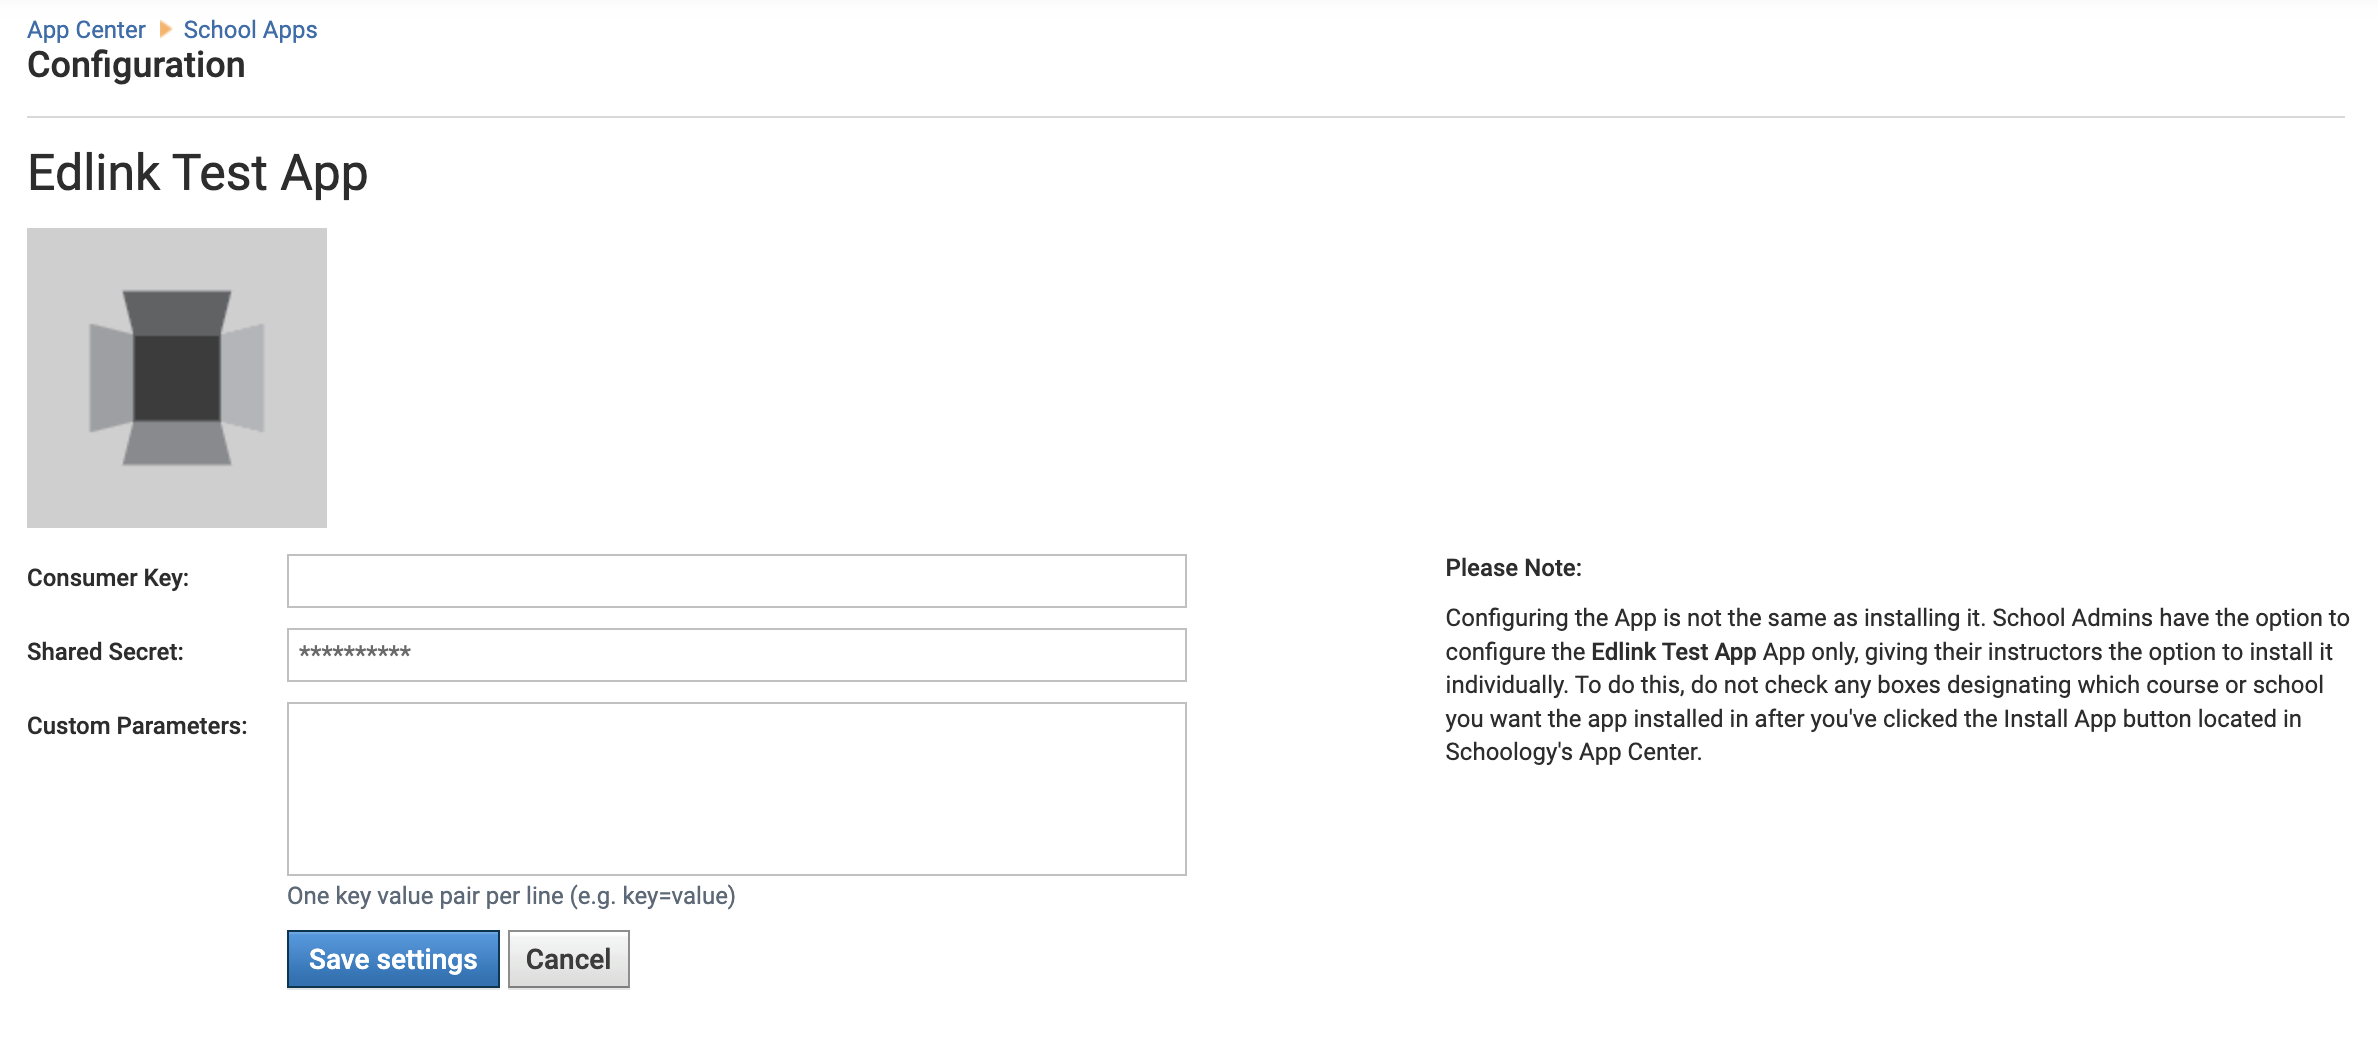
Step 4: Configuring
Click Configure next to the app in App Center > Organization Apps.

In your Edlink dashboard, return to the Overview tab.
Copy the Consumer Key and Shared Secret, and paste them into the corresponding fields in Schoology.
Leave Custom Parameters empty.
Click Save Settings.
Step 5: Installing
Once configured, click Install/Remove next to Configure.
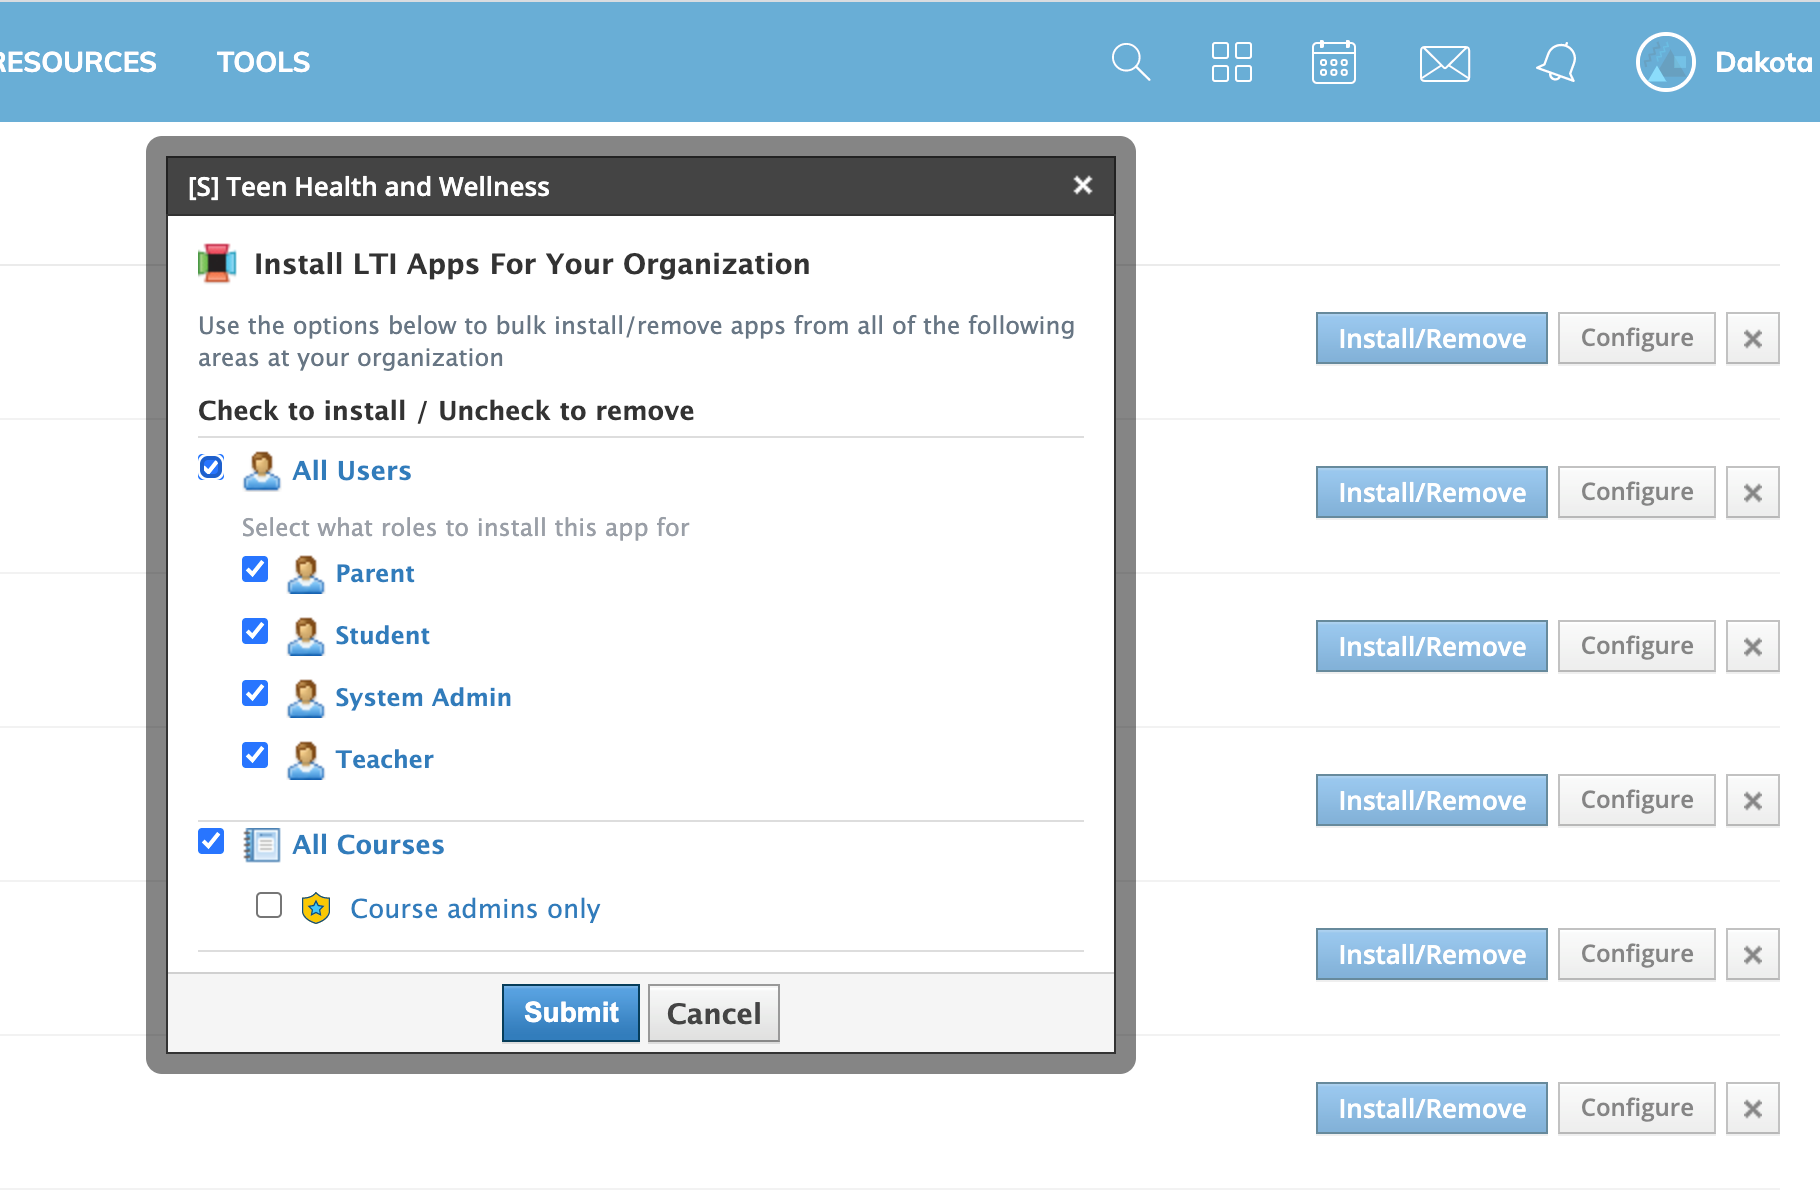
Select any that apply:
- All Users
- All Courses
- **All Click **Submit**.
Step 6: Checking the App
You've successfully installed your app!
Students and teachers can now access it through Schoology.
Go to your App Center, then Organization Apps.
Find the app you installed and confirm it's working as expected.
Missing the "My Developer Apps" Option?
If you don't see My Developer Apps, your admin account permissions may need updating.
- Click Tools at the top of the page, then select User Management
- In the sidebar, click Manage Users, then Roles/Advanced
- Search for your name and make sure your role is System Admin
If it's not, use the dropdown to change it - Click Save Changes
Then:
- In the sidebar, go to Permissions
- Ensure System Admins have both Install apps and Develop apps checked
- Click Save Permissions
SSO Error When Attempting to SSO Using LTI
If you installed your LTI app within 24 hours of connecting to Edlink, your initial sync might not have completed yet.
Once the sync completes, the launch should start working.
Any Questions?
If you still have questions or need help, please contact our support team and we'll get back to you within 1 business day.