
Widgets is Edlink's framework for user interfaces that can be used on your website. The widget is a single script for which you can enable different plugins depending on the functionality you want.
What is this for?
Sometimes adding a feature like creating assignments to your product can require more than simply making an API call. You need to build UI with validation and error handling, and then proxy the API call through your own server to avoid exposing your API key. This is a lot of overhead for what is sometimes an expected feature. With Edlink widgets, you can add features like creating assignments to your product in less than 5 minutes.
The Edlink widgets are a set of UI components that allow you to embed this kind of functionality into your website without having to build the required frontend and backend. You simply add a small snippet of code to your site and then load different plugins instantly providing your users with the ability to do things like create assignments from your website. You can even customize the appearance and behavior of the widgets to match your product.
Installation & Usage
To install the UI Widget SDK add the following script to your website.
<script src="https://ed.link/widgets/edlink@1.0.0.js"></script>
This will make the Edlink object available in your browser's window and as a result the global scope of any JavaScript on your site.
If you are building a Single Page Application (SPA) we recommend adding this to your app's index.html file or equivalent entry point.
This ensures that the SDK is loaded before your application code and thus available in the scope.
First you will need to initialize an instance of the SDK with your Application ID as the client_id in the configuration object.
const edlink = new Edlink({ client_id: `00000000-0000-0000-0000-000000000000` });
Next create a widget instance.
const widget = edlink.createWidget();
You can then activate a plugin on the widget instance.
widget.activatePlugin({
    // Name of the plugin you wish to activate
    name: 'authentication',
    // Some plugins may require additional options to be passed in
    // We'll cover this later in the plugin specific documentation.
    options: {
        redirect_uri: 'https://acme.com/auth/callback'
    }
});
Finally, you can show the widget when ready.
widget.show();
For each plugin you wish to use, you will need to call createWidget and create a seperate instance.
Do not call activatePlugin on the same instance more than once. This is not supported and will result in undefined behavior.
Customizing the appearance
You can customize the appearance of the widgets by providing custom colors to the Edlink SDK. primary is the only required color. The rest are optional and will default to a light theme.
To do so, pass a colors object in the configuration when initializing the Edlink instance.
Use the example of a dark theme below for reference:
const edlink = new Edlink({
    client_id: `00000000-0000-0000-0000-000000000000`,
    colors: {
        background: '#18181b',
        foreground: '#ffffff',

        border: '#424242',

        primary: '#e63946',
        primary_foreground: '#ffffff',

        secondary: '#27272a',
        secondary_foreground: '#ffffff',

        subtle: '#424242',
        subtle_foreground: '#ffffff',

        muted: '#27272a',
        muted_foreground: '#e0e0e0'
    }
});
Some plugins may not support all color properties. However, primary and primary_foreground are always fully supported.
Authentication
When using plugins that require authentication, because they interact with a user's Edlink account, you will need to provide their email. This property is ignored when not required so it's safe to always provide it. We will attempt to find the user by email and if not found a new account will be created.
const edlink = new Edlink({
    client_id: `00000000-0000-0000-0000-000000000000`,
});

const widget = edlink.createWidget({
    email: 'jaron@k12.mnps.org'
});
Be aware that if the email provided to the widget does not match the email used when the user set up their integration in Edlink they will not be able to view the widget.
Advise your connecting districts to use the same email for their account in Edlink as the one they use for your platform to mitigate this issue.
Plugins
Widgets consists of plugins that each provide different features and UI.
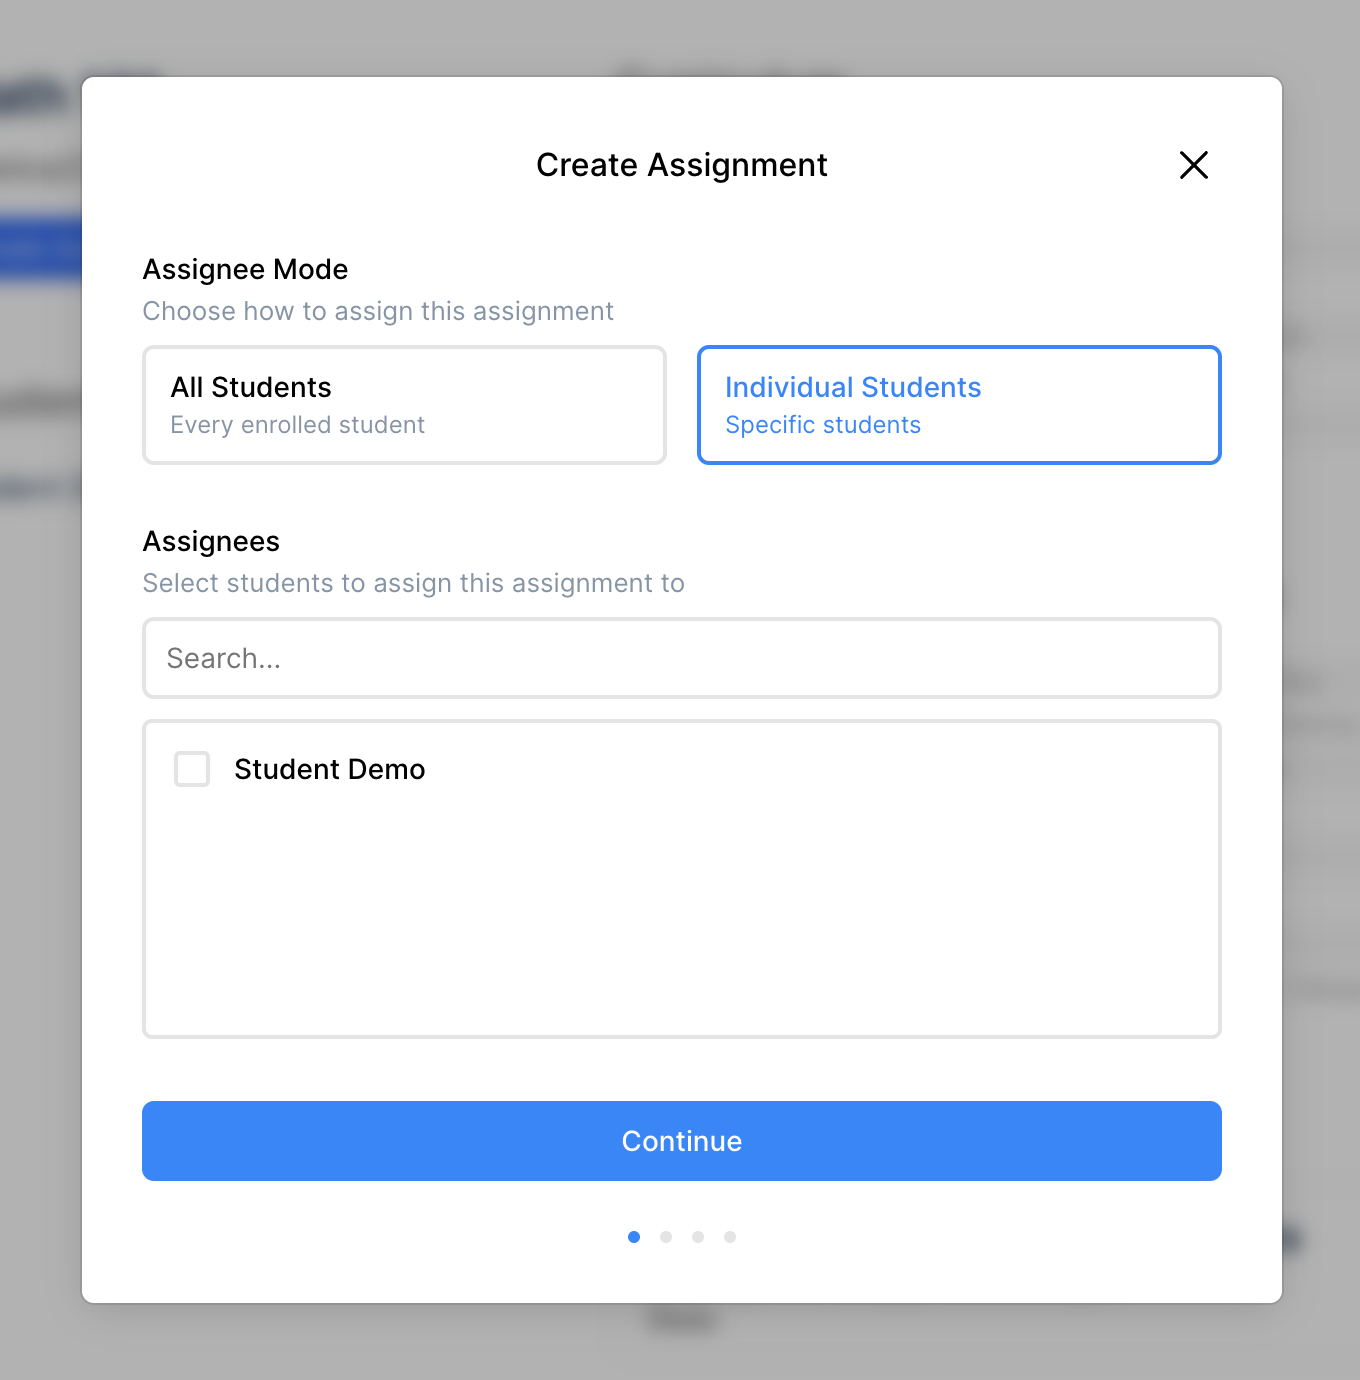
Assignment Builder
You can find documentation on how to use the assignment builder plugin here.
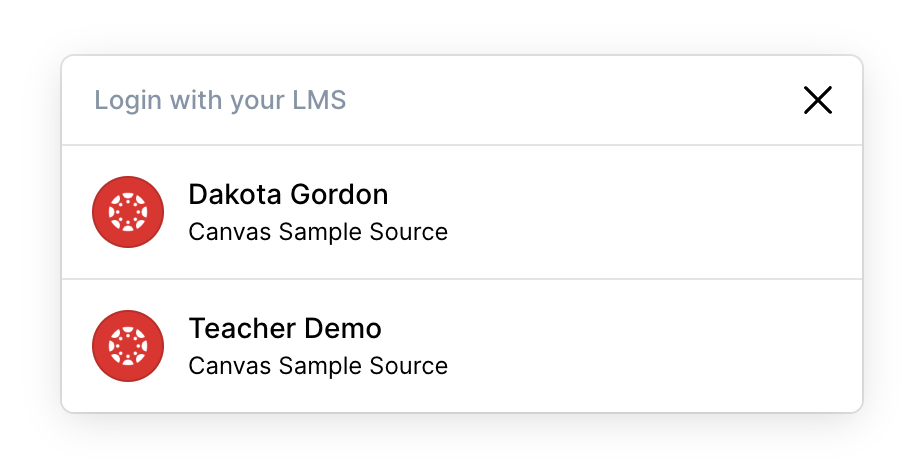
Authentication
You can find documentation on how to use the authentication plugin here.
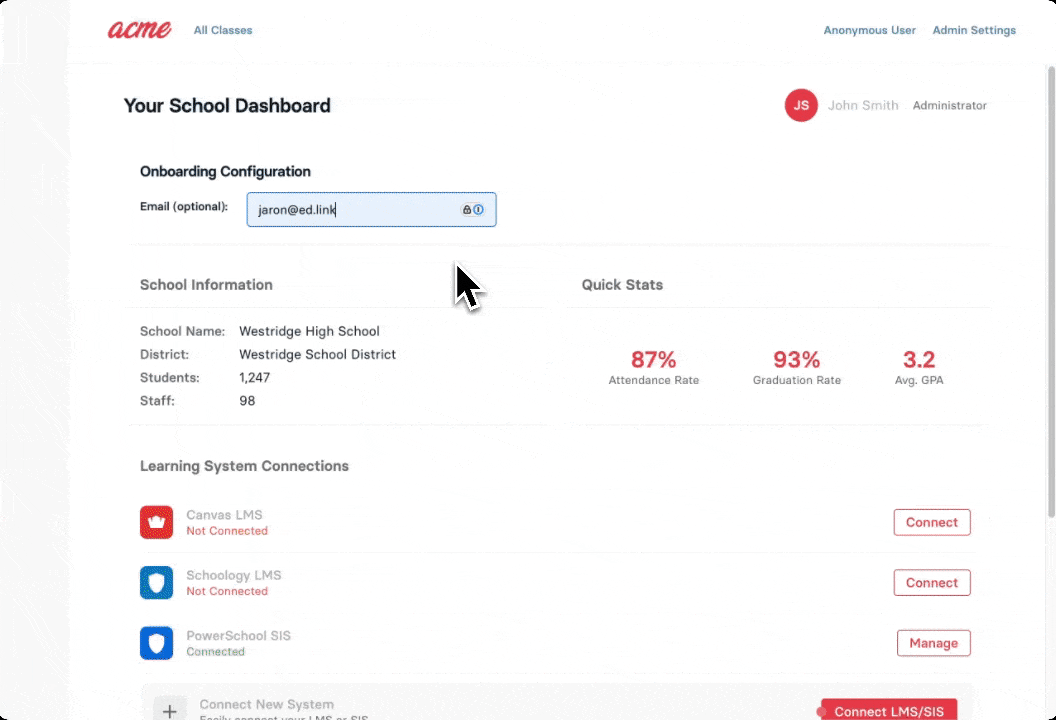
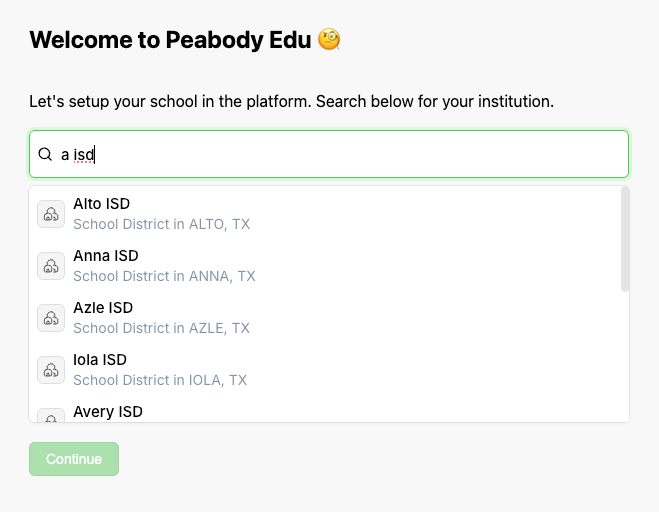
Embedded Onboarding
You can find documentation on how to use the embedded onboarding here.
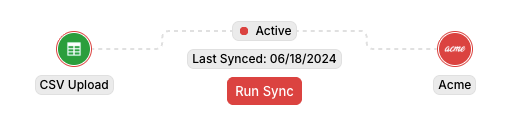
Integration Status
You can find documentation on how to use the integration status plugin here.
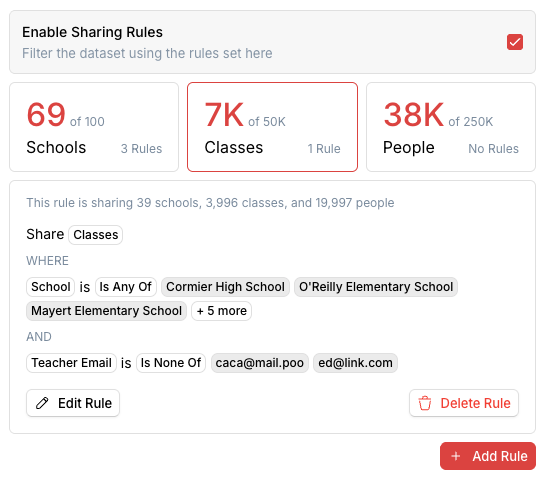
Integration Sharing Rules
You can find documentation on how to use the integration sharing rules plugin here.
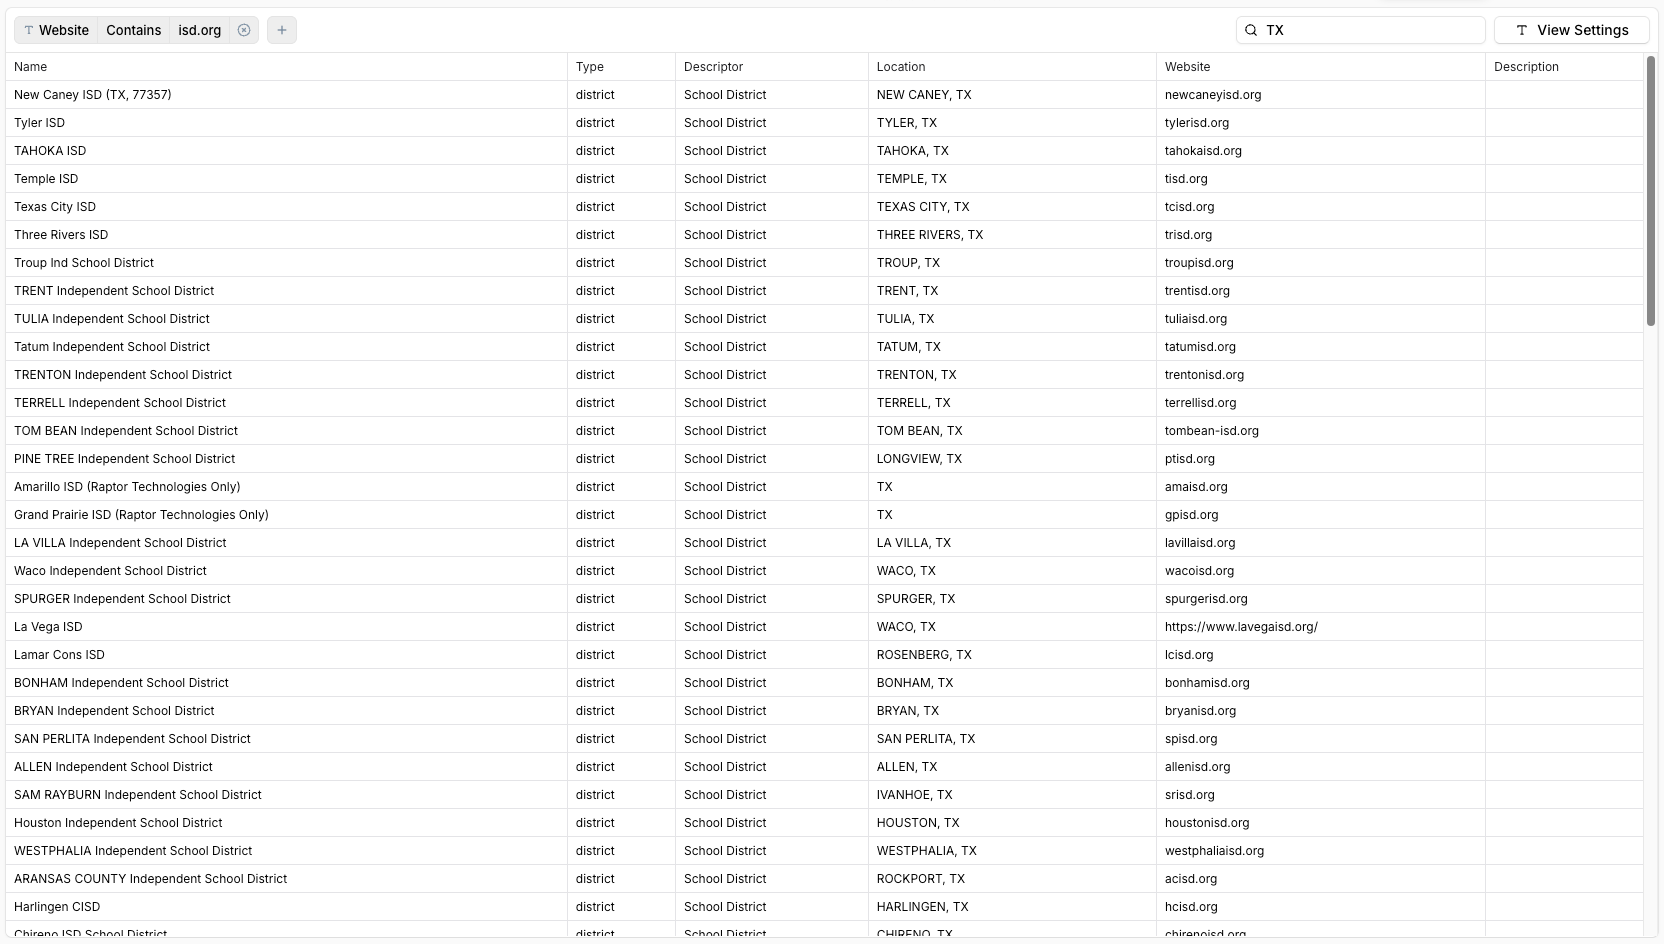
Public Data Search
You can find documentation on how to use the public data search plugin here.
Public Data Browse
You can find documentation on how to use the public data search plugin here.
F.A.Q.
Does this support LTI? What LMSs does it work with?
Yes, widgets supports LTI where possible. The Authentication plugin supports any SSO provider in Edlink. However, the Assignment Builder plugin will only work with systems that Edlink can create/modify assignments in.
Where does it get the list of classes / students / sessions / etc?
A token is generated for the Person based on the person_id passed to the widget and the cookies Edlink has for this person.
This token is used to make requests to the Edlink User API.
This means the person will need to have authenticated with Edlink at some point in order for the widget to work properly.