Before We Get Started:
You must be an Edlink Administrator to complete the integration process.
Edlink accepts CSVs of school data in any format. This requires creating a configuration to map the CSV to Edlink's data model. This guide will walk you through the process of connecting your source and mapping your CSV.
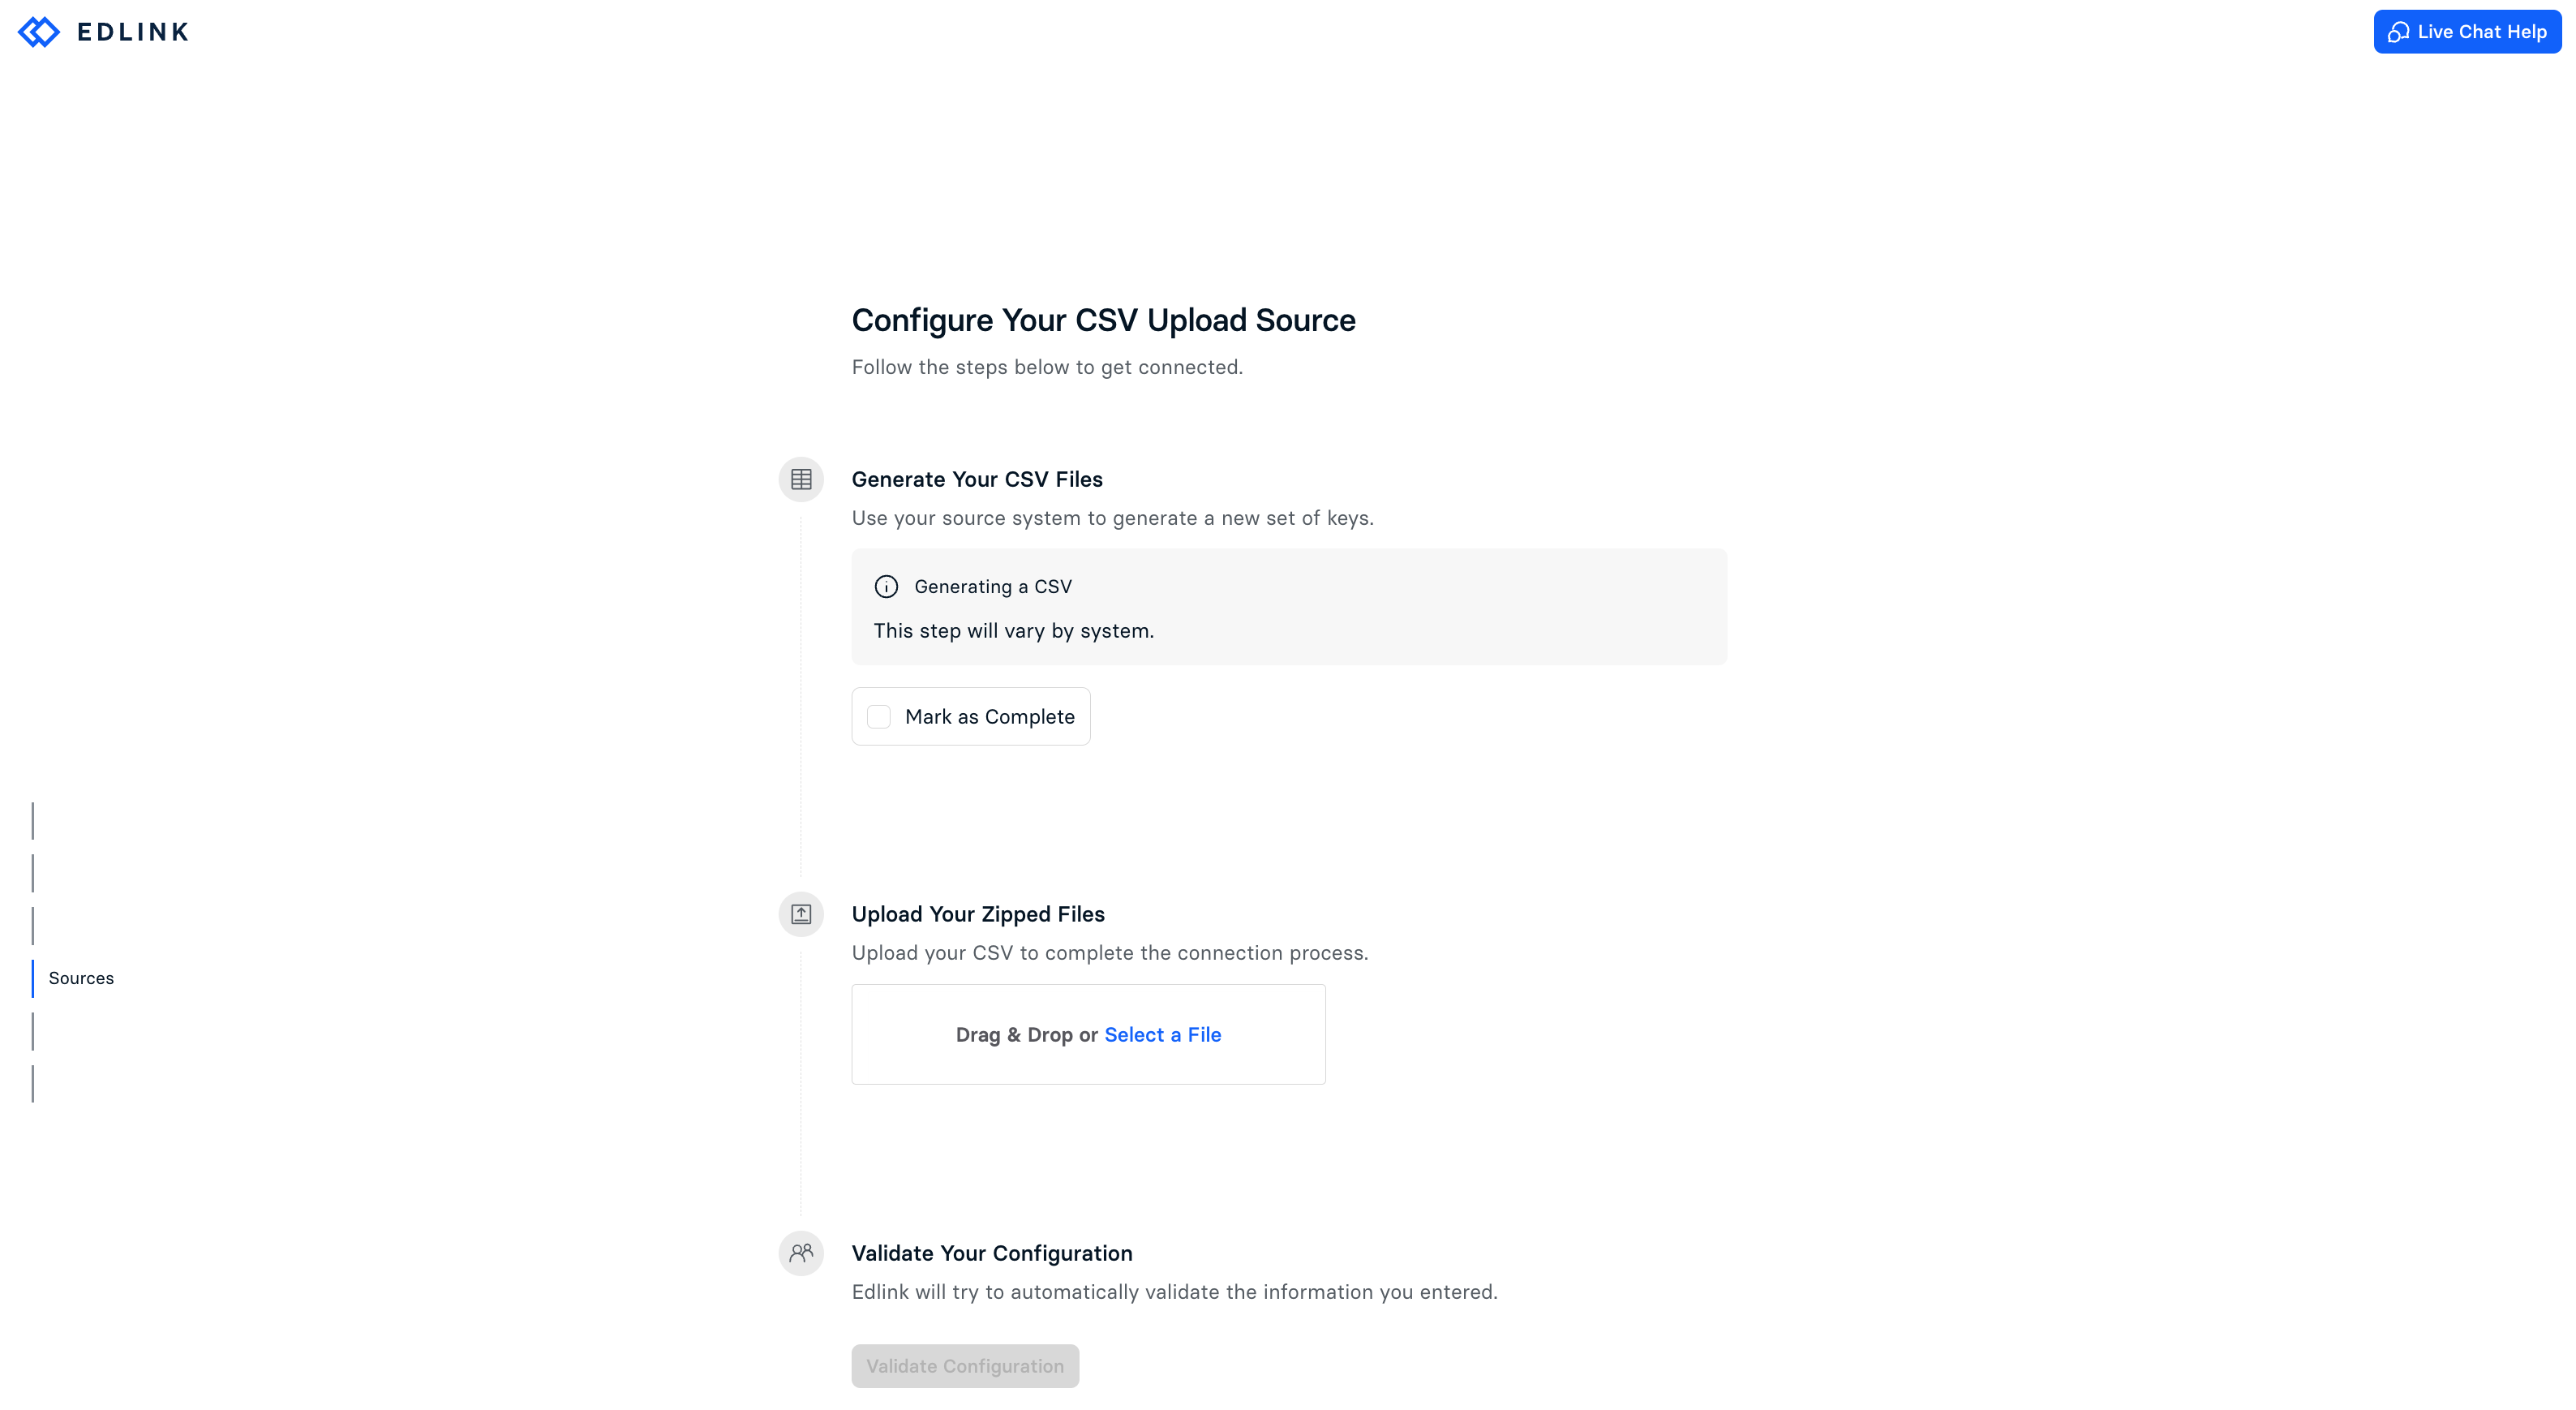
Connecting Your Source
- Click the integration link provided by your learning app.
- Create an Edlink account if you don't already have one.
If you've connected an app to Edlink before, log in with your existing account.
- Navigate to the SIS tab, then click CSV from the list of available data sources.
- Choose your preferred data storage region.
- Upload your CSV to Edlink by either dragging and dropping or selecting a file in the upload field.
- Click Validate Configuration, then click Continue Setup once your configuration is validated.
Mapping Your CSV
For each entity you want to create from a CSV, you must create a formatting rule for that entity type. For example, to create a school entity, you'll need to define a formatting rule for the school entity.
Steps to Create a Formatting Rule:
- Go to the source in the Edlink dashboard.
- Click CSV Mapping on the left column.
- Select the file to which the rule will apply, then click the Add Formatting Rule button.
- In the drawer that opens, choose the entity type you want to create from the rows of the selected file.
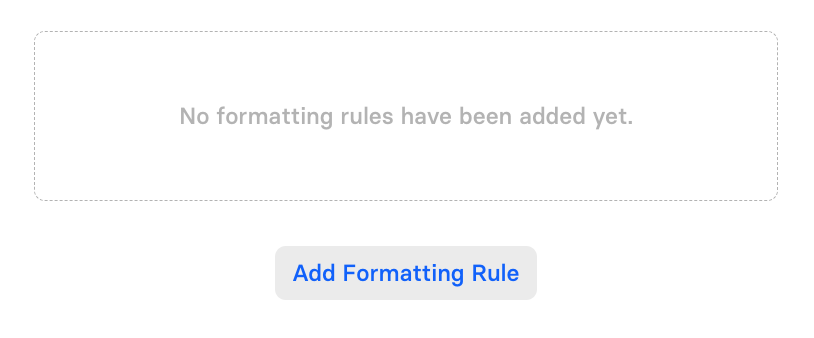
Once created, the rule will appear in the list of formatting rules for the file. You can add as many rules as needed. Expanding a rule reveals:
- Condition Field: Determines when a rule applies.
- Entity Properties: Maps CSV columns to properties on the entity.
Each rule creates a new entity of the selected type for each row in the file when:
- An
external_idis provided. - Either no condition is specified or the condition evaluates to
true.
To map a property directly to a column, type the column name. In your expression, you'll work with data from one row at a time.
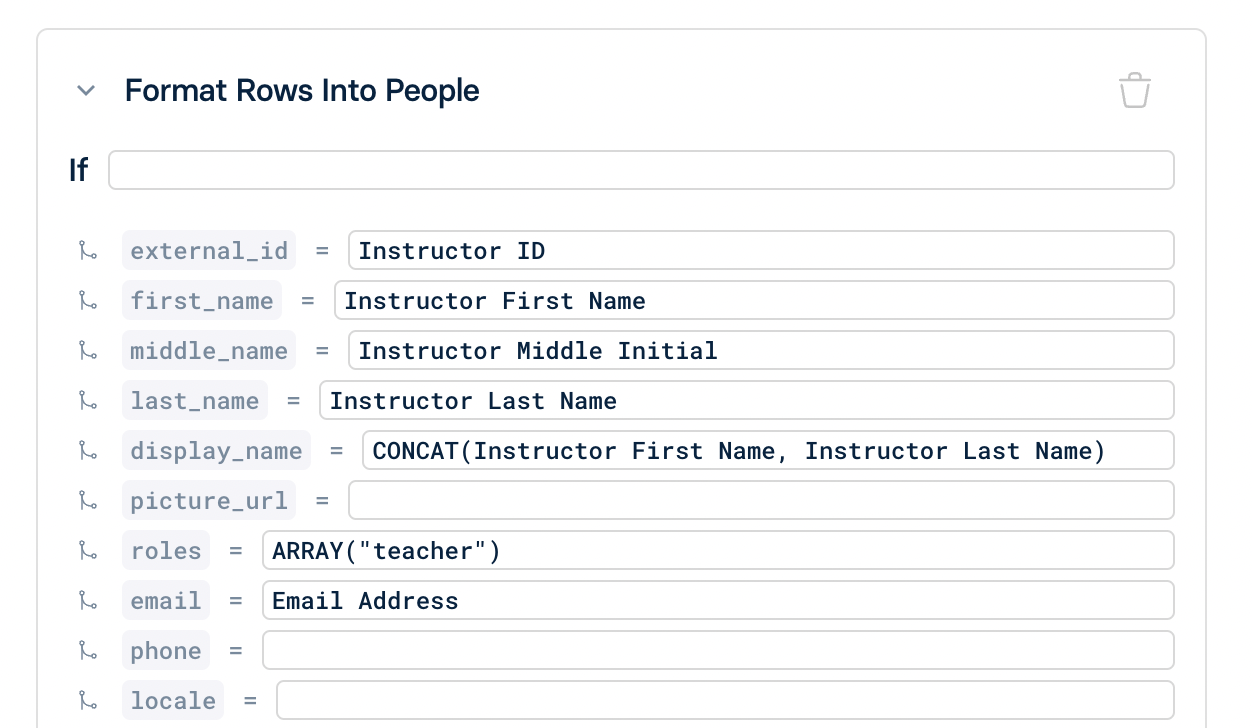
If you have data for one entity across multiple files, you can create a formatting rule for the same entity that evaluates to the same external_id. For example, if you have one file with the name of a person and another file with the email of a person, you can create a formatting rule for the person entity that evaluates to the same external_id for both files. This will create a single person entity with both the name and email properties.
Additionally, if the data you want to combine is, for example, a list of schools the person is in, you can change the field to merge instead of overwrite. This allows data to be merged into a list. To do this, click the merge icon to the left of any property. You can also add custom properties and identifiers to the entity by clicking the Add Property or Add Identifier button.
Restrictions and Limitations
- Column names are case sensitive.
- You cannot have your column name be the same as any of the functions in Lynx.
- Column names cannot start with a number.
- Column names cannot contain parentheses, brackets, or commas.
Use escaped column names to get around these restrictions. See the Lynx documentation for more information.
Any Questions?
If you have any questions or encounter issues, please contact our support team. We'll respond within 24 business hours.