You must be a Canvas Administrator to complete the integration process.
Canvas administrators will have an "Admin" tab on their left-hand sidebar. You must also have the ability to create API Developer Keys.
Have you connected a learning app to Edlink before? If so, skip to Step 2: Completing the integration.
Step 1: Creating Canvas Developer Keys
Log into your Canvas admin account and navigate to the +Developer Key button in your Admin tab.
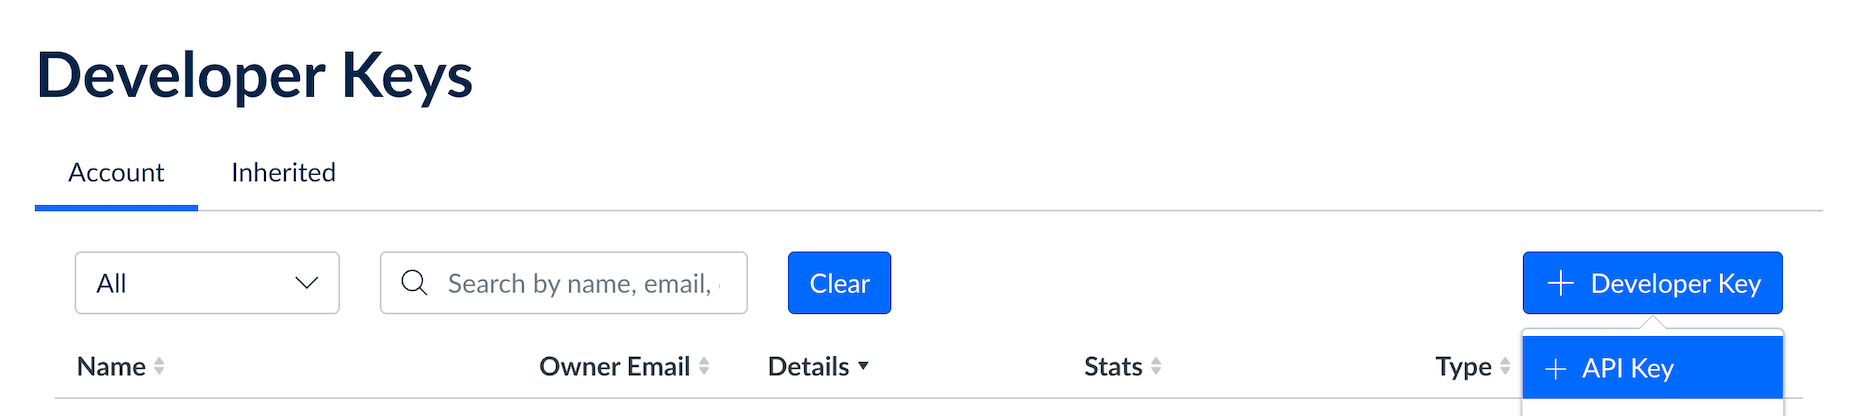
Select +API Key and insert the following details:
- Key Name: Edlink
- Owner Email: support@ed.link
- Redirect URIs: (Please note: These URIs should be on separate lines in this field.):
https://ed.link/api/authentication/canvas https://ed.link/sso/administrator
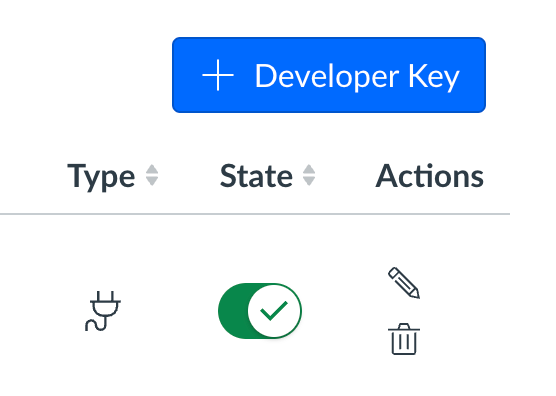
All other fields should be left blank. Hit Save, and switch the State toggle next to the developer key to ON.
Step 2: Completing the Integration
The learning app you want to connect to should have sent you an integration link that looks like this:https://ed.link/integrate/00000000-0000-0000-0000-000000000000
If you don't have this link, contact support@ed.link or create a support ticket for assistance.
The link will direct you to create an Edlink account.
Enter your Canvas domain (including https://) into the provided field. Next, copy and paste the Developer Key ID and Developer Key Secret into the respective fields.
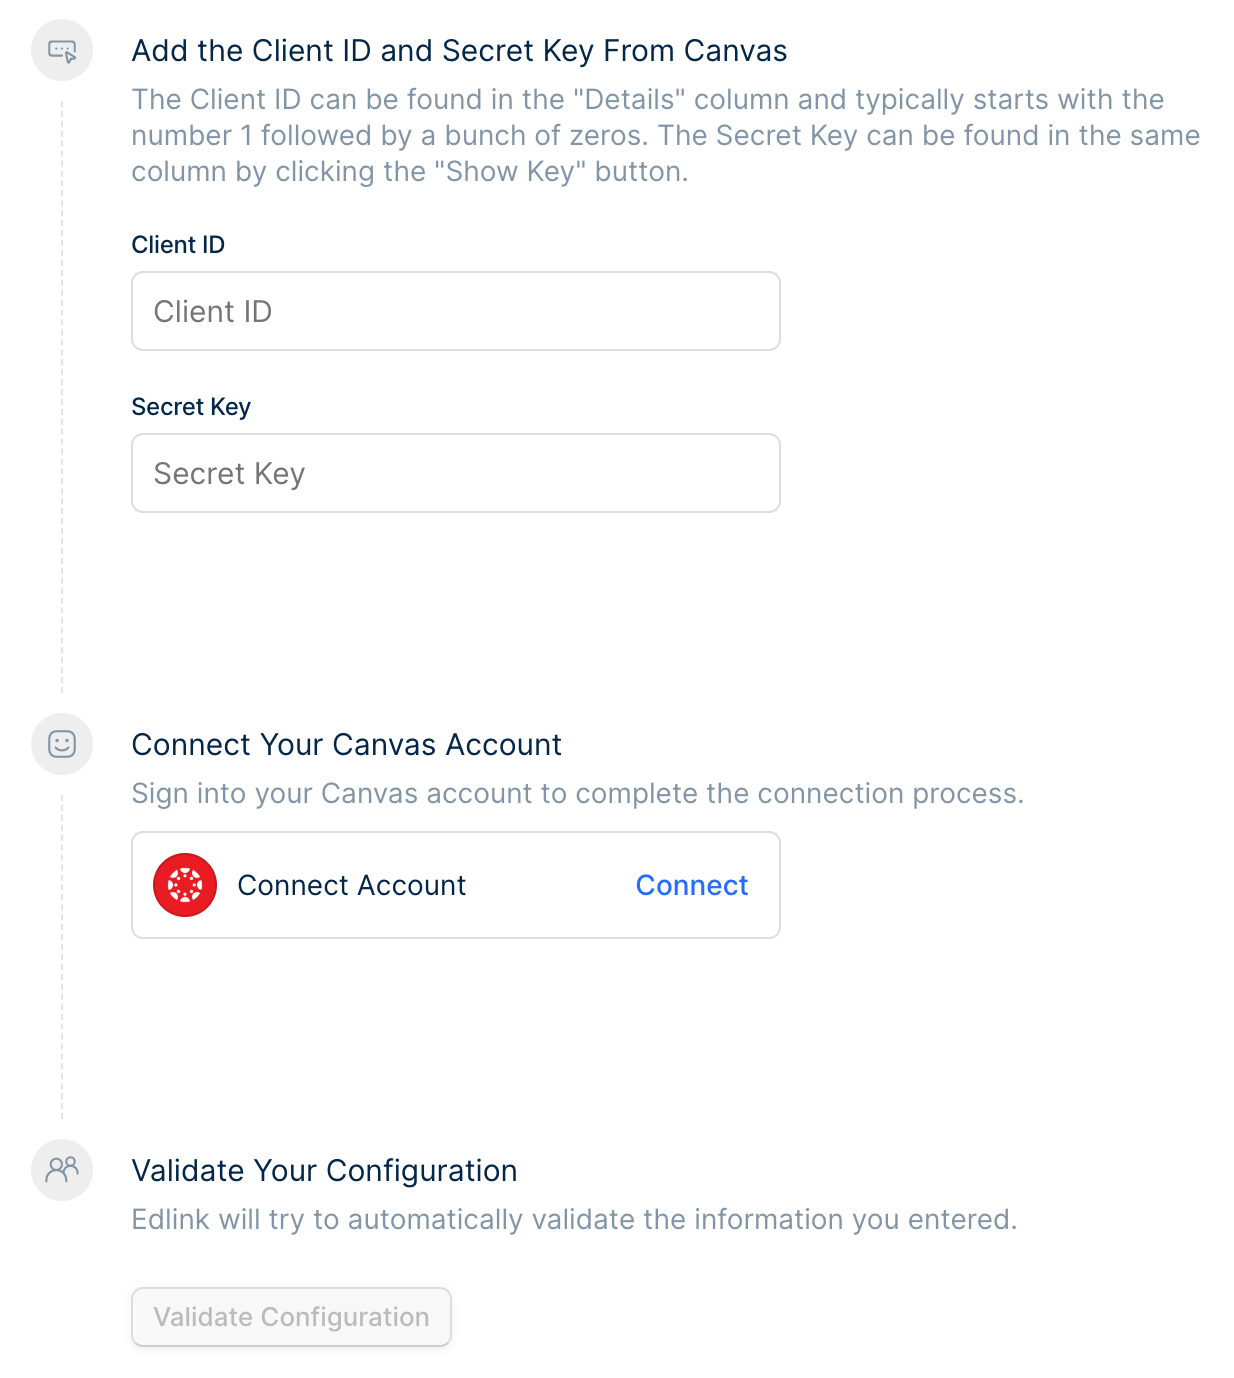
Once all fields are completed, select Connect to link your account. You will be prompted by Canvas to authorize Edlink to access your account. Selecting Authorize will bring you back to Edlink.
Next, click Validate Your Configuration to confirm the integration has been configured correctly.
Scoping Canvas Developer Keys
Edlink does support the use of API scopes, but it is not recommended at this time due to constraints in the Canvas API. The following are the scopes that Edlink needs:
- Select
Allow include parameters - Select
Read Onlyscopes - Select the following additional write scopes:
url:POST|/api/v1/courses/:course_id/assignmentsurl:PUT|/api/v1/courses/:course_id/assignments/:idurl:DELETE|/api/v1/courses/:course_id/assignments/:idurl:POST|/api/v1/courses/:course_id/assignments/:assignment_id/submissionsurl:PUT|/api/v1/courses/:course_id/assignments/:assignment_id/submissions/:user_id
Once you create the scoped developer key, you'll follow the same Edlink onboarding guide, with one difference: Select Advanced Options and Enable Scopes in the onboarding flow
Well Done!
You're now finished. Your organization's data will appear in the dashboard within 24 hours.
Any Questions?
If you still have questions, please contact our support team and we'll get back to you within 24 business hours.