
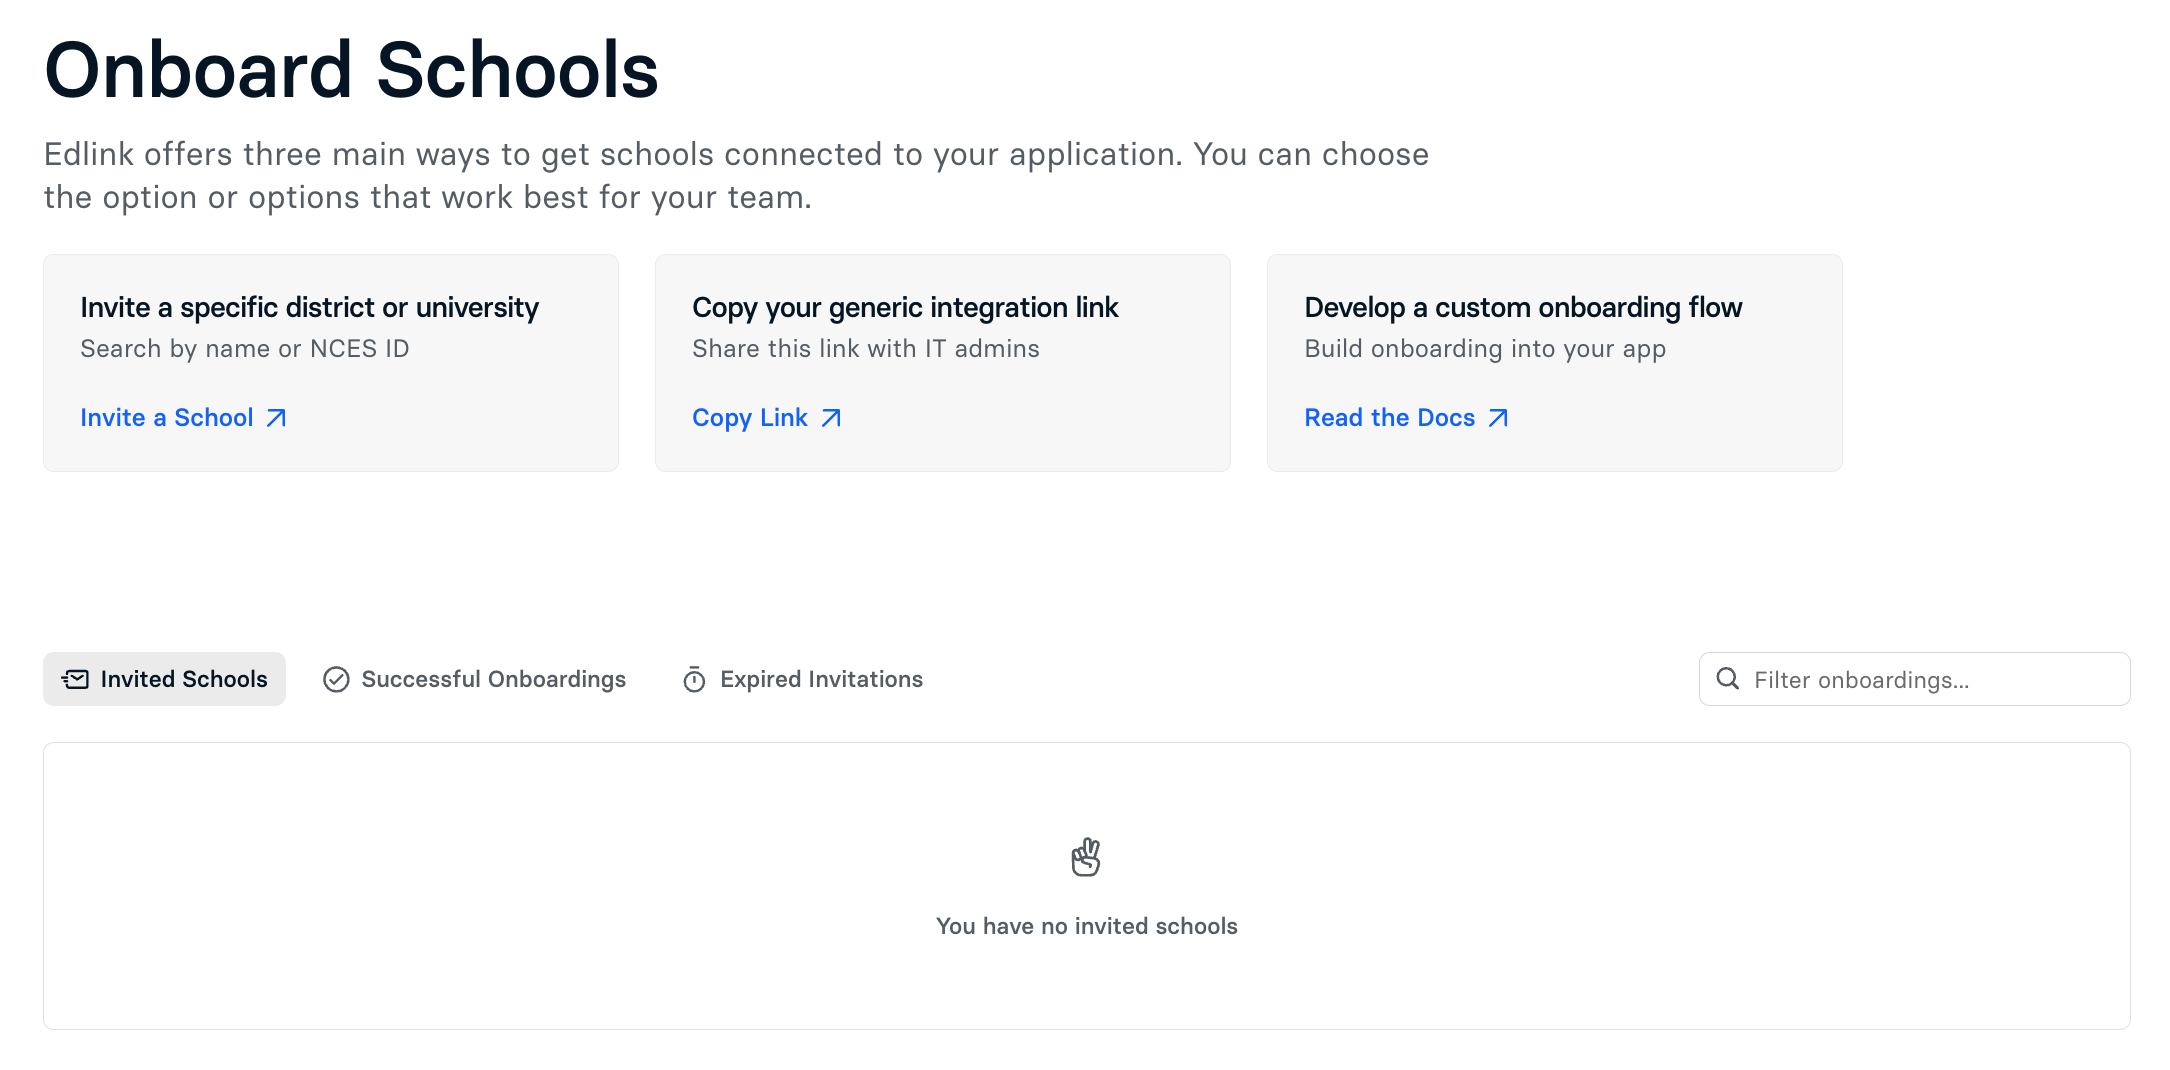
There are three ways to connect a district or university to your learning application in Edlink.
To start, head to your Developer Team in Edlink, then click Onboardings in the left column of the Edlink Dashboard.
Invite a District or University Directly
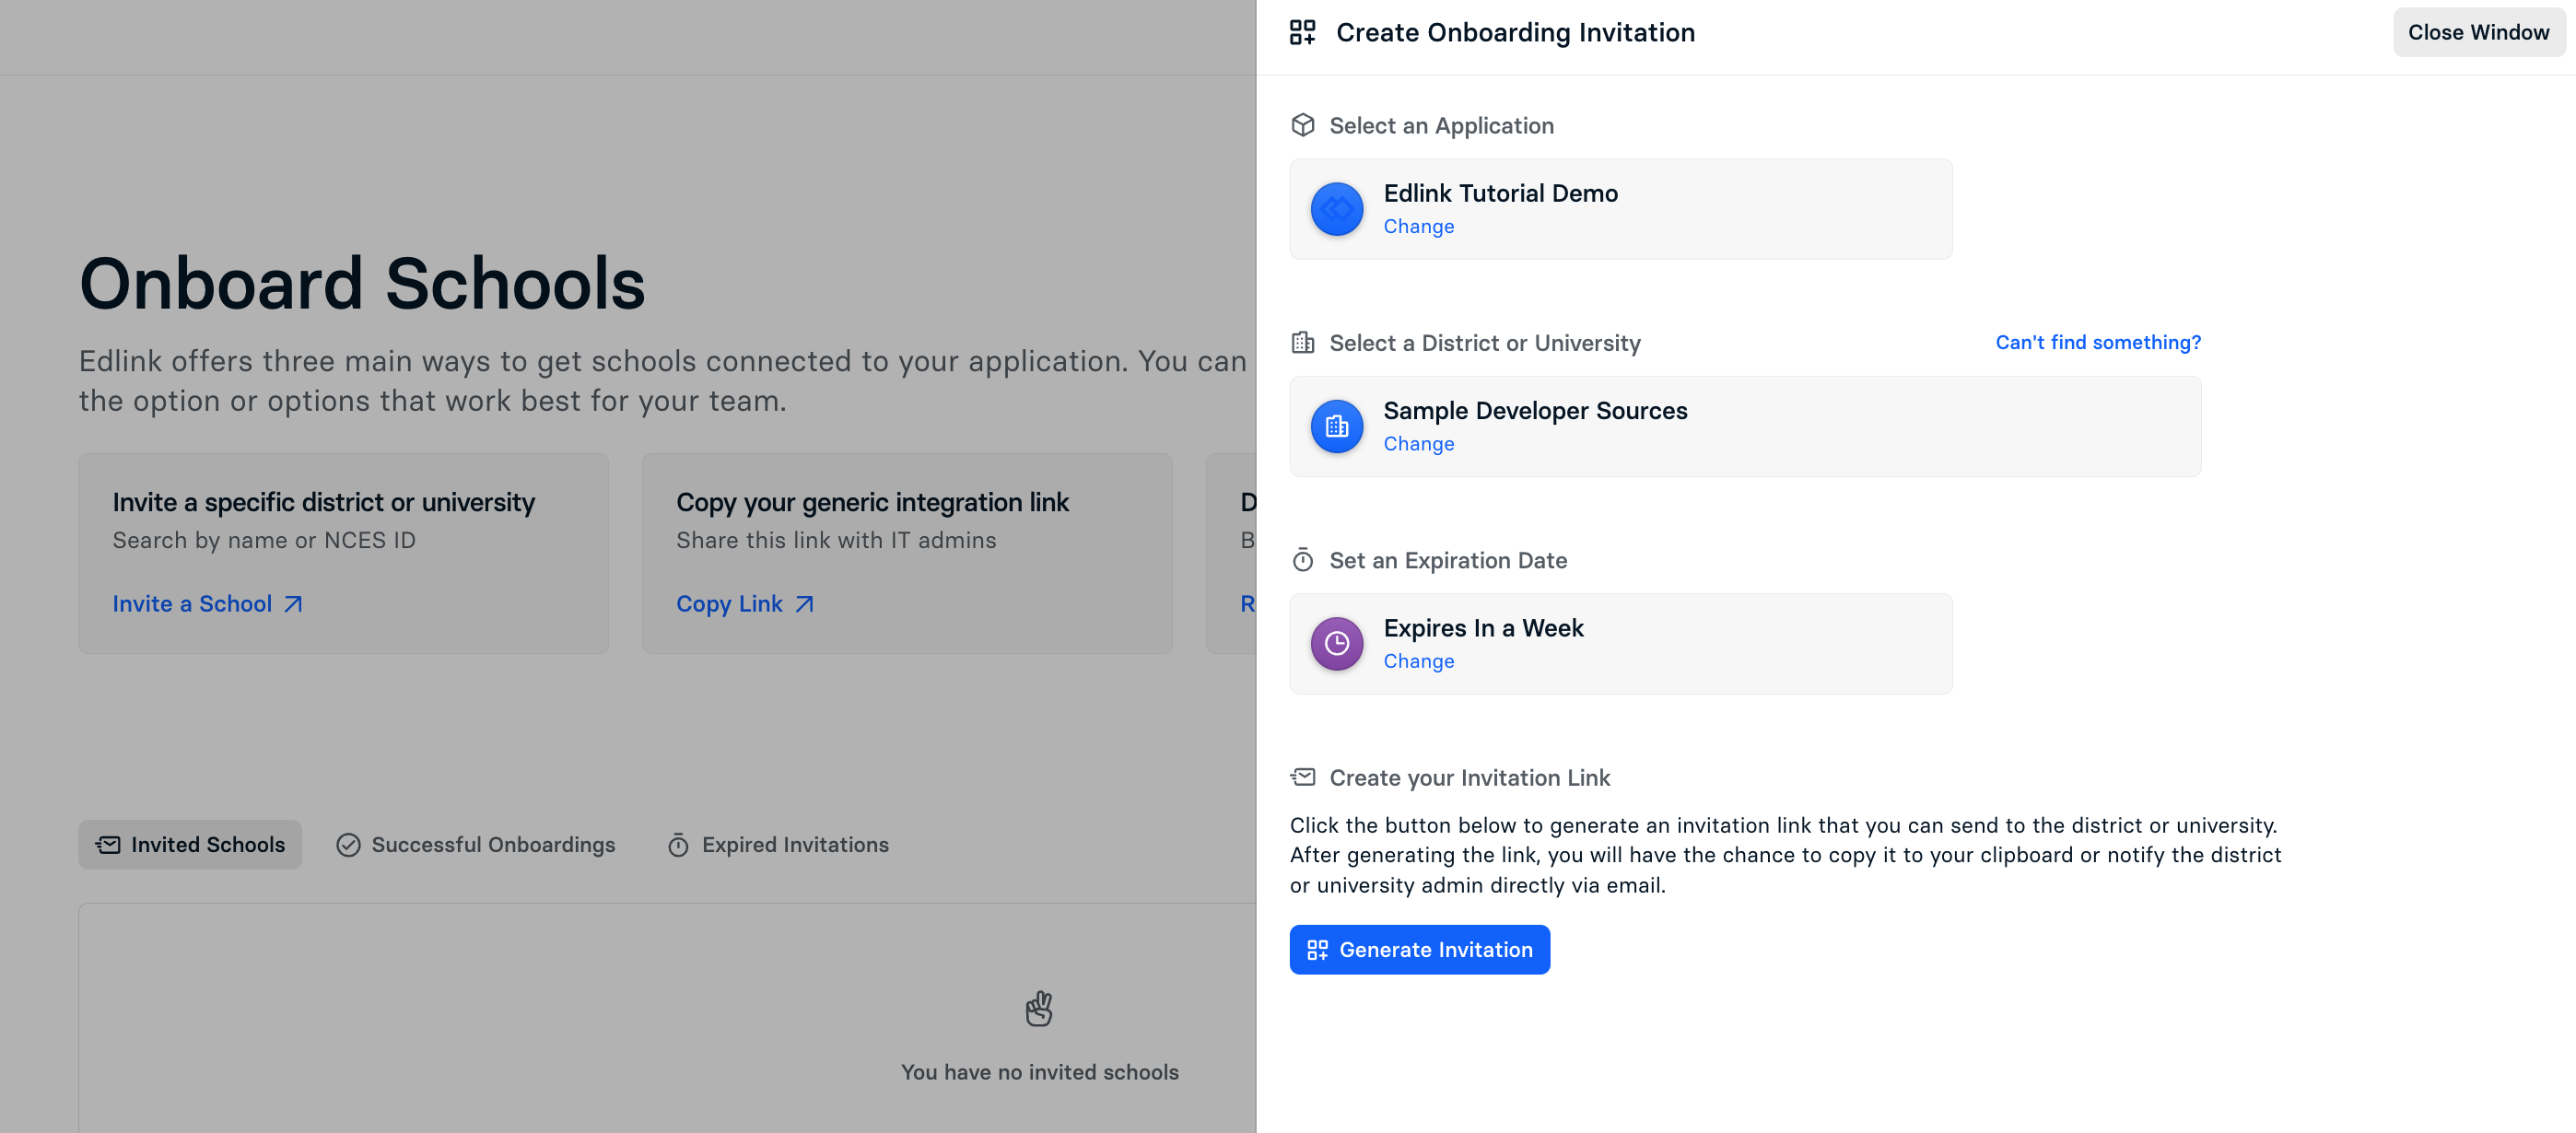
This method allows you to send an onboarding link directly to a university or school that already exists in Edlink. You can also set an expiration date for the onboarding flow.
To invite a district or university, click Invite a School, select your application, search for and select the district, set an expiration date, and then click Generate Invite. Once complete, you’ll receive a unique onboarding link that you can share directly with the district or university to complete their onboarding flow.
Copy Your Generic Integration Link
This is your generic integration link that is tied to your application and does not change. You can find this link by navigating to the Onboardings section on the left-hand sidebar of the Edlink Dashboard.
To get started, click Copy Link, then select your application. The link will automatically be copied to your clipboard.
Note: You can also find this link in the Edlink dashboard by navigating directly to your application and clicking Copy Integration Link in the top right-hand corner of your screen.
Custom Onboarding Flow
Edlink allows you to develop a custom onboarding flow that can be built directly into your app. For more information, check out Custom Onboarding Flows.