
Configuring Your Edlink Application in Clever
- Go to your Clever Application Settings page and open the Integration tab.
- In OAuth Settings, confirm the following Redirect URI is listed and is the first URI in the list:
https://ed.link/api/authentication/clever/{edlink-application-id} - Switch to the General tab and scroll down to API Credentials.
- Copy your Client ID and Client Secret — you’ll need these for Edlink.
Configuring Clever in Edlink
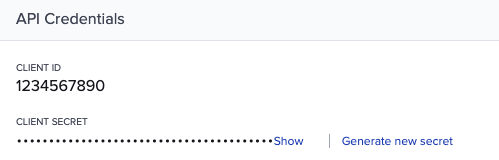
- In Clever, open your Application Settings → General page.
- Scroll to API Credentials and copy:
- Client ID
- Client Secret
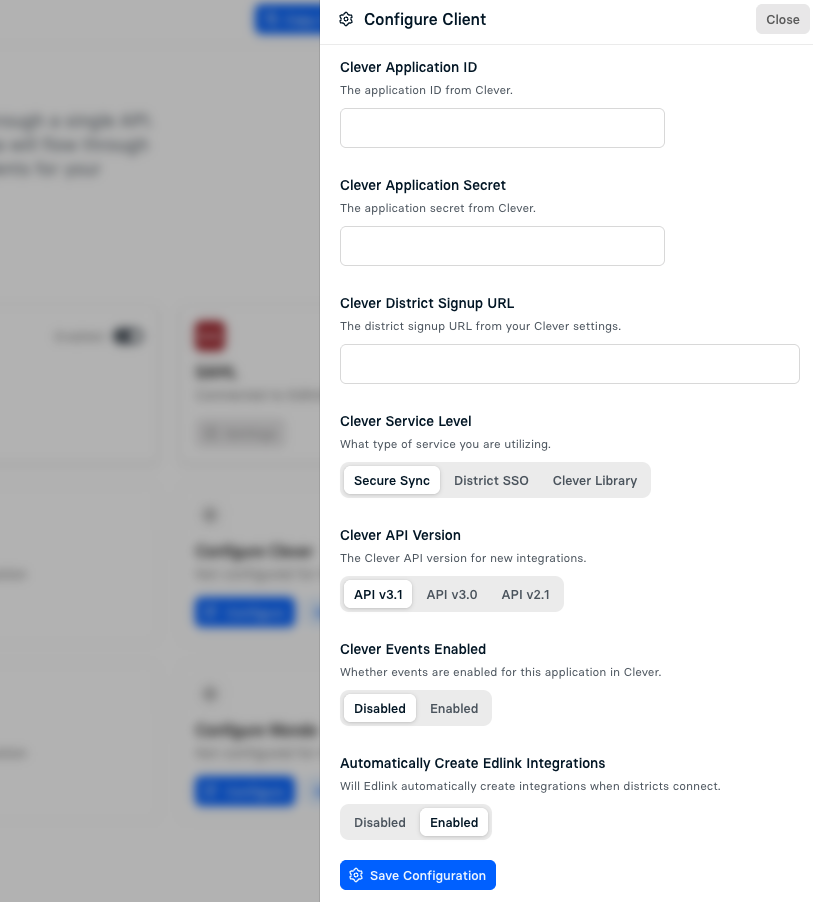
- In Edlink, open your application and select Data Providers from the left menu.
- Find Clever and click Settings.
- Enter the following values:
- Clever Application ID — required
From Clever API Credentials. - Clever Application Secret — required
From Clever API Credentials. - Clever District Signup URL — optional
Provided in your Clever settings. - Clever Service Level — defaults to Secure Sync
- Secure Sync — District-managed roster data sync
- District SSO — District assigns Clever login tile
- Clever Library — Teacher-installed Clever app store login
- Clever API Version — defaults to v3.1
As of now, **v3.0** may provide better stability with Edlink.- Clever Events — disabled by default
Webhook-style notifications when roster or login activity changes. - Automatically Create Edlink Integrations — enabled by defaultDisabling this is useful when Clever is primarily used for SSO rather than the main data source.
- Clever Application ID — required
- Save your configuration and enable Clever from the list of data providers.
You will need to have your application certified in Clever before your application becomes available.
Click here for more information on the Clever Certification process.