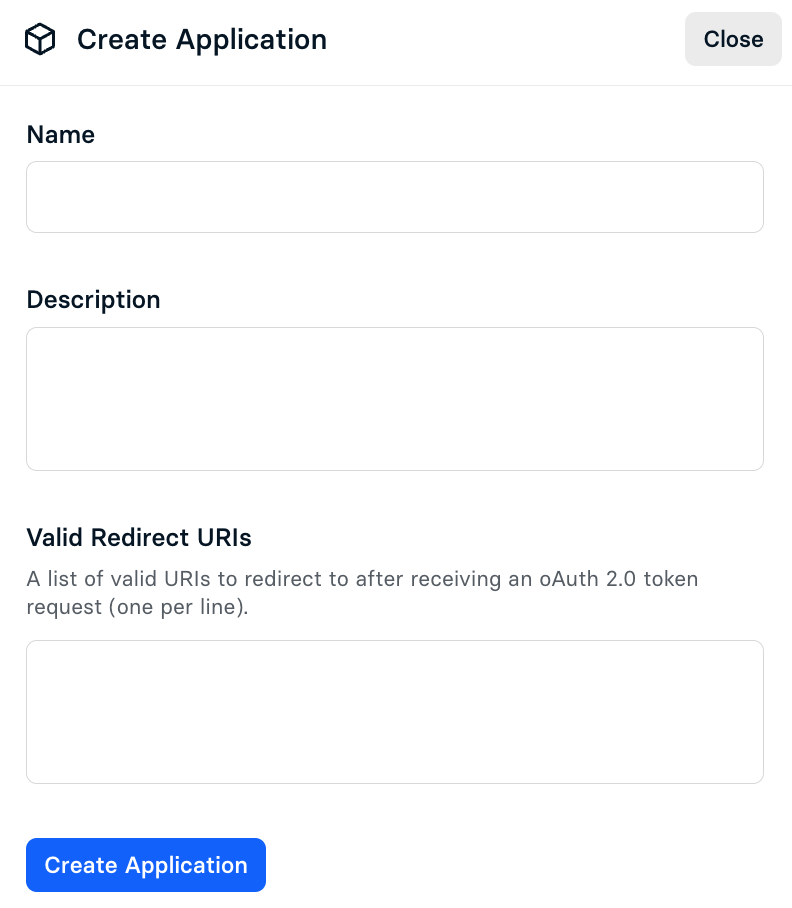
Before creating an application, log into your account, head to your developer team in Edlink, and select Applications in the navigation header. Once there, select Create Application. After that, all you need to do is enter the Name and Description of the application in the appropriate fields. When finished, select Create Application. This will bring you to the Application Overview page.
From the Application Overview page, you may access the following menus to let you manage your application:
- Keys & Permissions: View your Application ID and Secret Key. Also edit the permissions you want your users to have when accessing your application and select which data sources are valid.
- Integrations: View the list of organizations that are currently using your application.
- Settings: View and edit descriptive information about your application. You may also choose to destroy your application.