
Configuring Your Edlink Application in the ClassLink Partner Portal
- Go to your ClassLink API Keys page.
- Create a new API Key and copy it — you’ll need this later.
- Open your Application in ClassLink and create (or edit) your Edlink SSO connection with the following settings:
- SSO Connection Type: OAuth2 / OIDC
- Domain: add
ed.linkand request certification - OAuth Enhancement: Optional Enhancement
- Initiation Type: ClassLink Initiated
- Redirect URI:
https://ed.link/api/authentication/classlink/{applicationID} - Enable PKCE: No
- Save your changes.
- Copy the generated Client ID and Client Secret — you’ll need these for Edlink.

Configuring ClassLink in Edlink
- In ClassLink, open your Application → Edlink SSO Connection page.
- Scroll to API Authentication Details and confirm/copy:
- Client ID
- Client Secret
- Go to your ClassLink Application → API Keys page and copy the API Key you generated earlier.
- In Edlink, open your application and select Data Providers from the left-hand menu.
- Find ClassLink and click Settings.
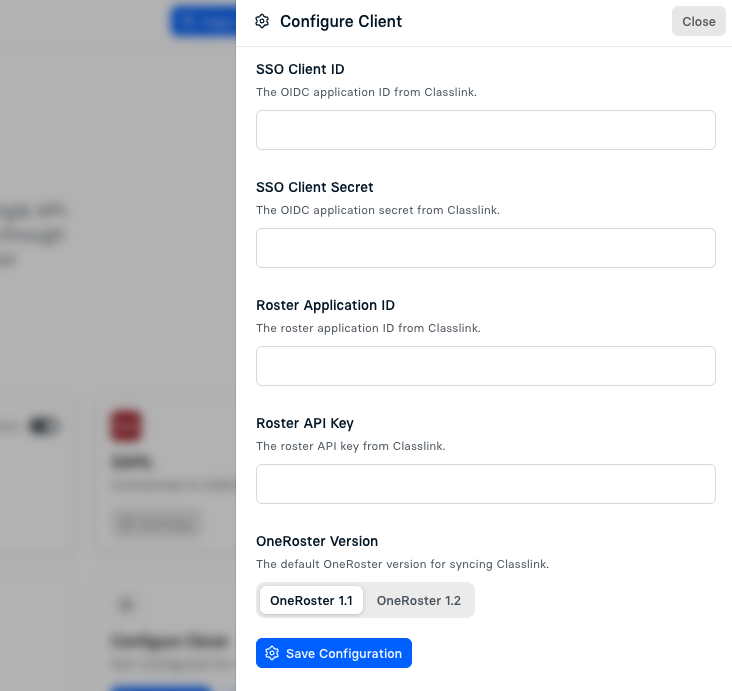
- Enter the following values:
- SSO Client ID — required
From the ClassLink Application Settings page. - SSO Client Secret — required
From the ClassLink Application Settings page. - Roster Application ID — optional
The ClassLink roster application ID (if applicable). - Roster API Key — required
The API Key generated in ClassLink. - OneRoster Version — defaults to 1.1
This is the OneRoster version used for syncing via ClassLink.
- SSO Client ID — required
- Save your configuration and enable ClassLink from the list of data providers.
You will need to have your application certified in Classlink before your application becomes available.
Click here for more information on the Classlink Certification process.