This guide will walk you through the setup process to create a connection between your Cognito User Pool and Edlink. This will allow you to use Edlink's SSO capabilities to authenticate users into your application.
Prerequisites
This guide will assume that you:
- Have at least a passing familiarity with AWS Cognito.
- Have already created a Cognito User Pool.
- Already have an Edlink developer account and application set up in the Edlink Dashboard.
Creating a Cognito Connection
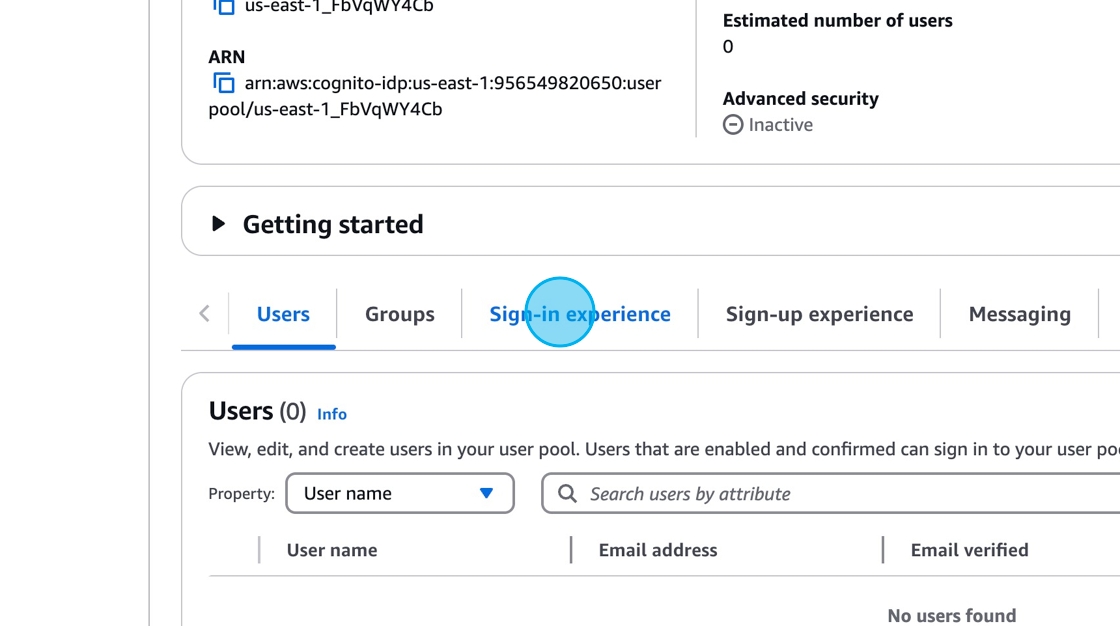
Within your Cognito User Pool dashboard select 'Sign-in experience'
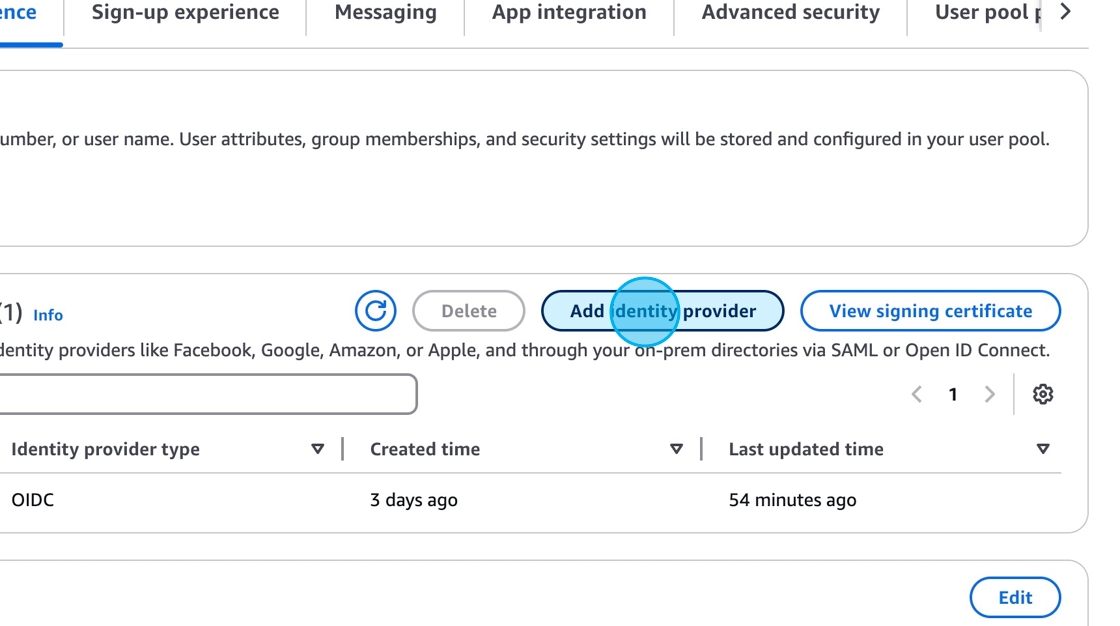
Click the button called Add identity provider and select OpenID Connect (OIDC).
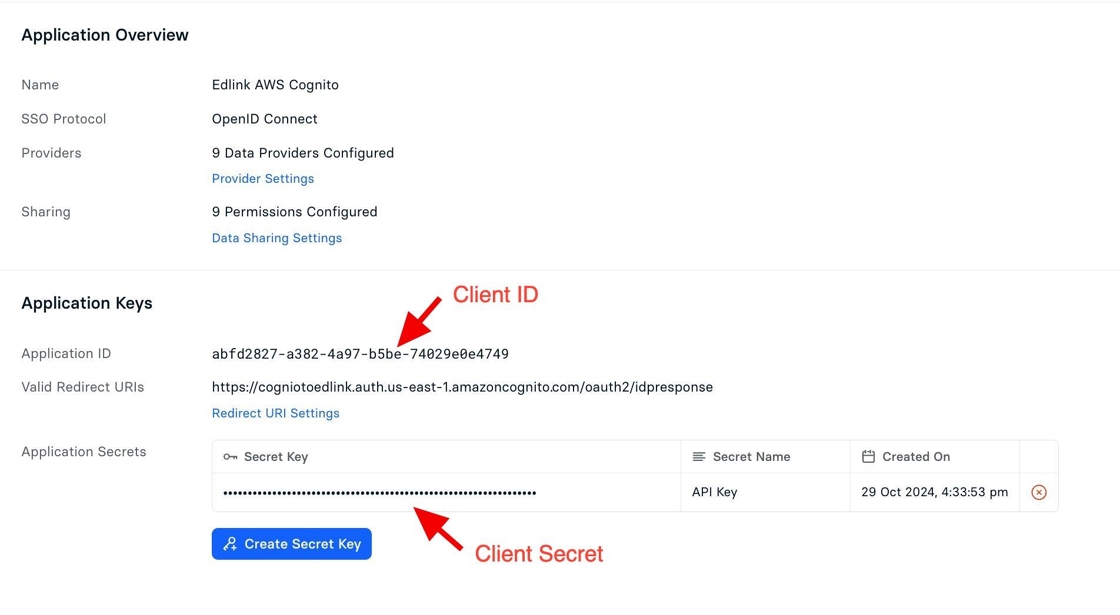
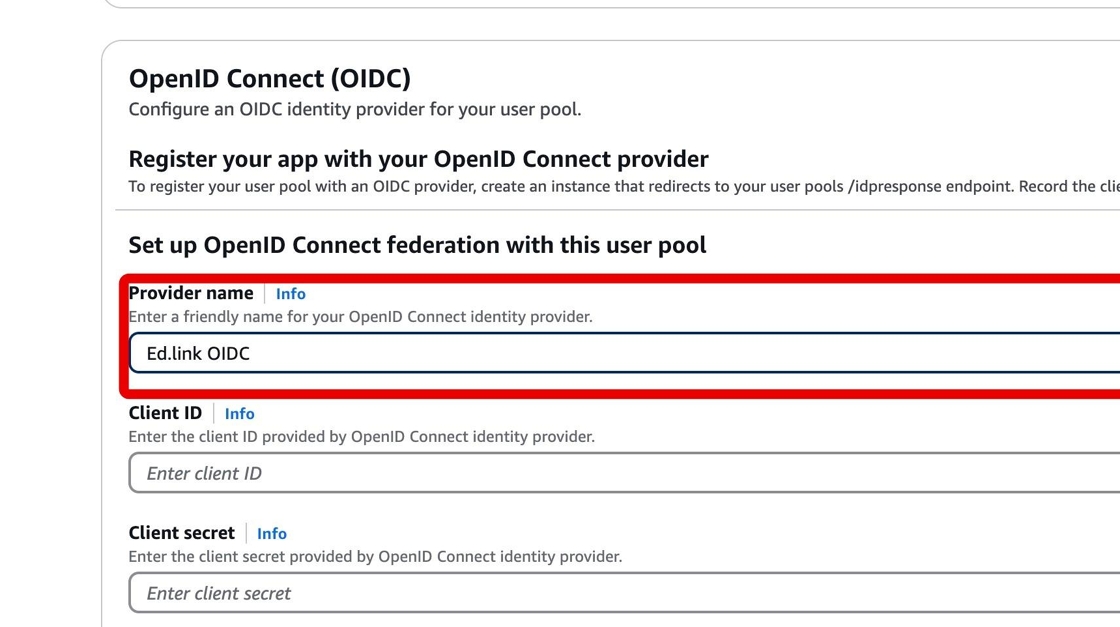
Enter Edlink in the provider name field, as well as the client ID and secret key from the Edlink dashboard.
We want to select the Manual Input option when it comes time to enter the additional OIDC details.
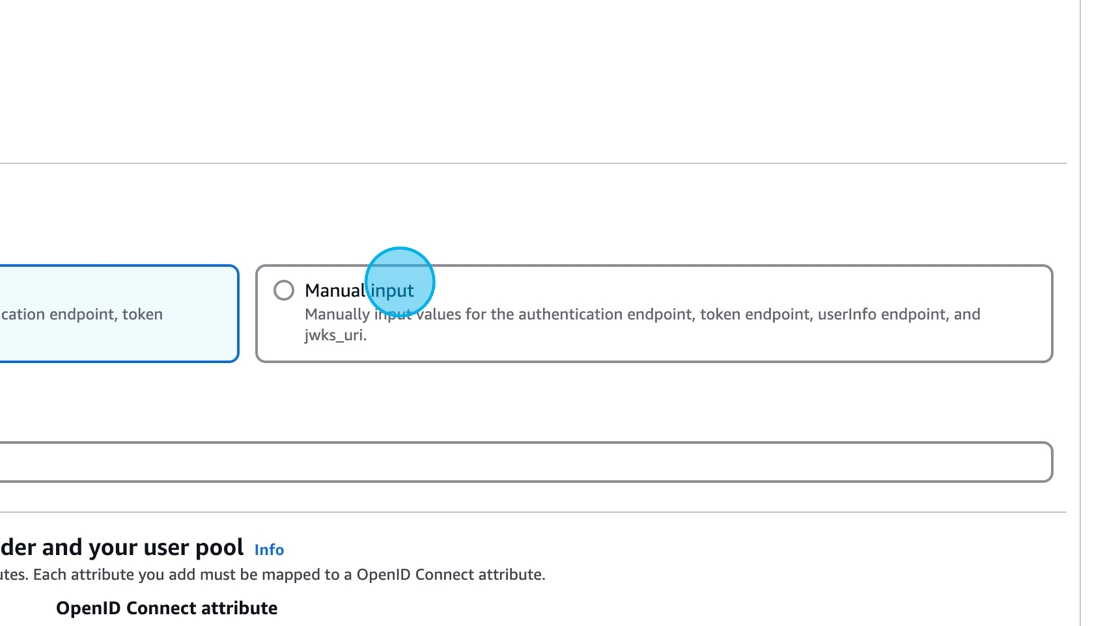
Insert the following URLs into the appropriate fields.
| Field Name | Value |
|---|---|
| Issuer URL | https://ed.link/api/authentication/oidc |
| Authorization endpoint | https://ed.link/api/authentication/oidc/authorize |
| Token endpoint | https://ed.link/api/authentication/oidc/token |
| UserInfo endpoint | https://ed.link/api/authentication/oidc/userinfo |
| Jwks_uri endpoint | https://ed.link/api/authentication/oidc/jwks |
Optionally, you can map any required attributes then click Add identity provider to complete the process in the AWS console. As a result, Cognito will generate some values that you'll need to copy back into Edlink.
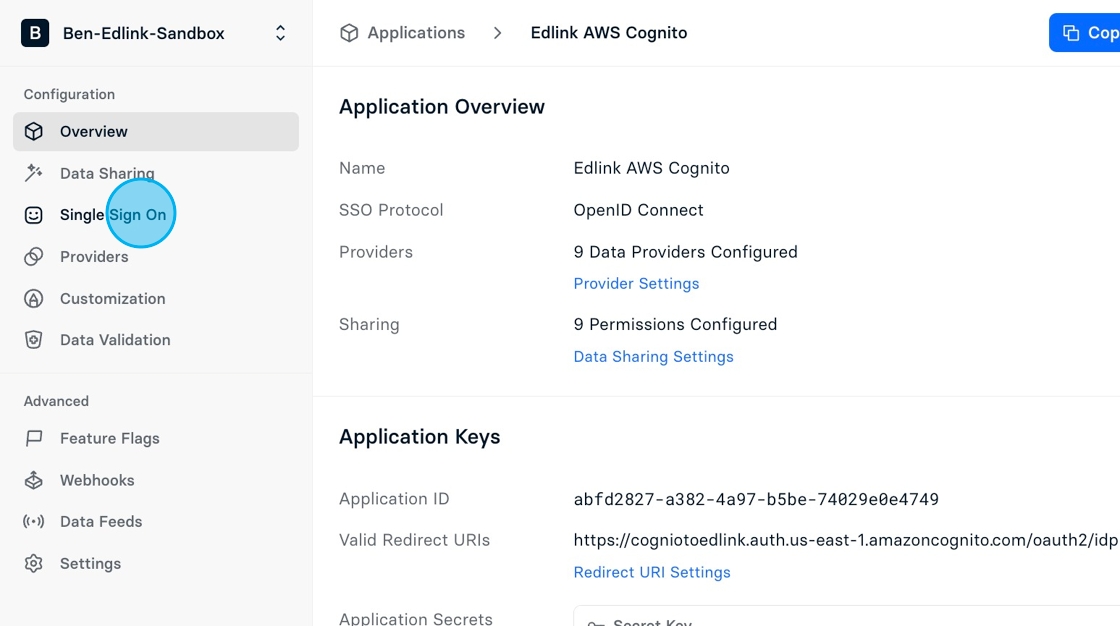
Heading Back Over to Edlink
Head back to the Edlink Dashboard, navigate to your application settings, and click "Single Sign On". Make sure single sign on is set to Enabled and that the SSO protocol is set to OpenID Connect.
Finally, enter the Redirect URIs provided by Cognito into the field below and click Save Configuration.
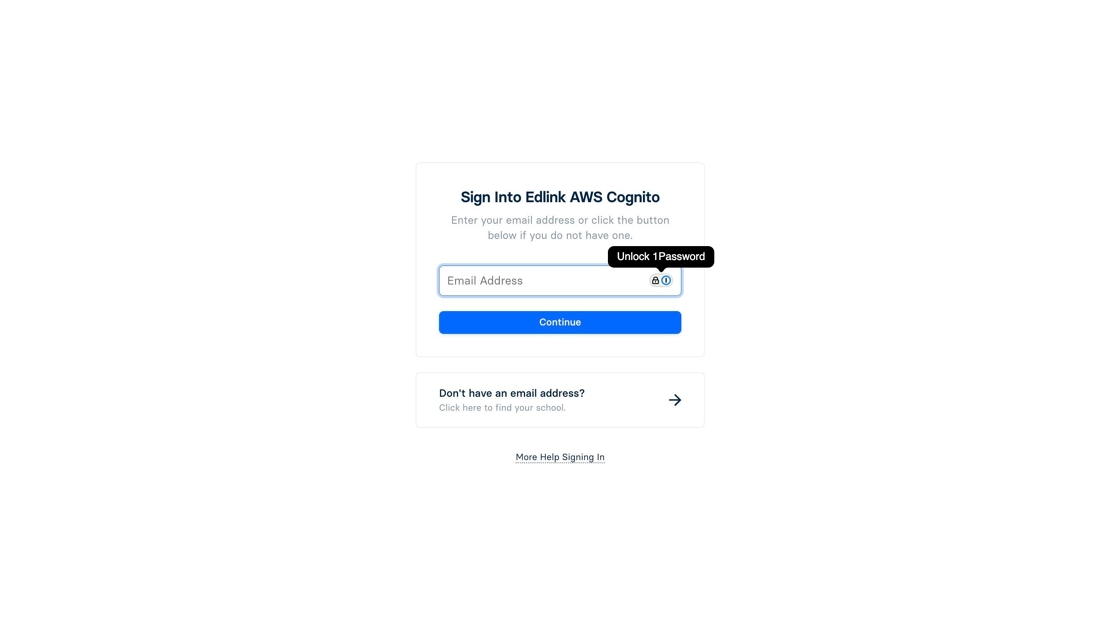
Test Out Your Integration
Initiate the SSO flow in your edtech app. If you hit this Edlink sign in page, you have completed this setup successfully!