
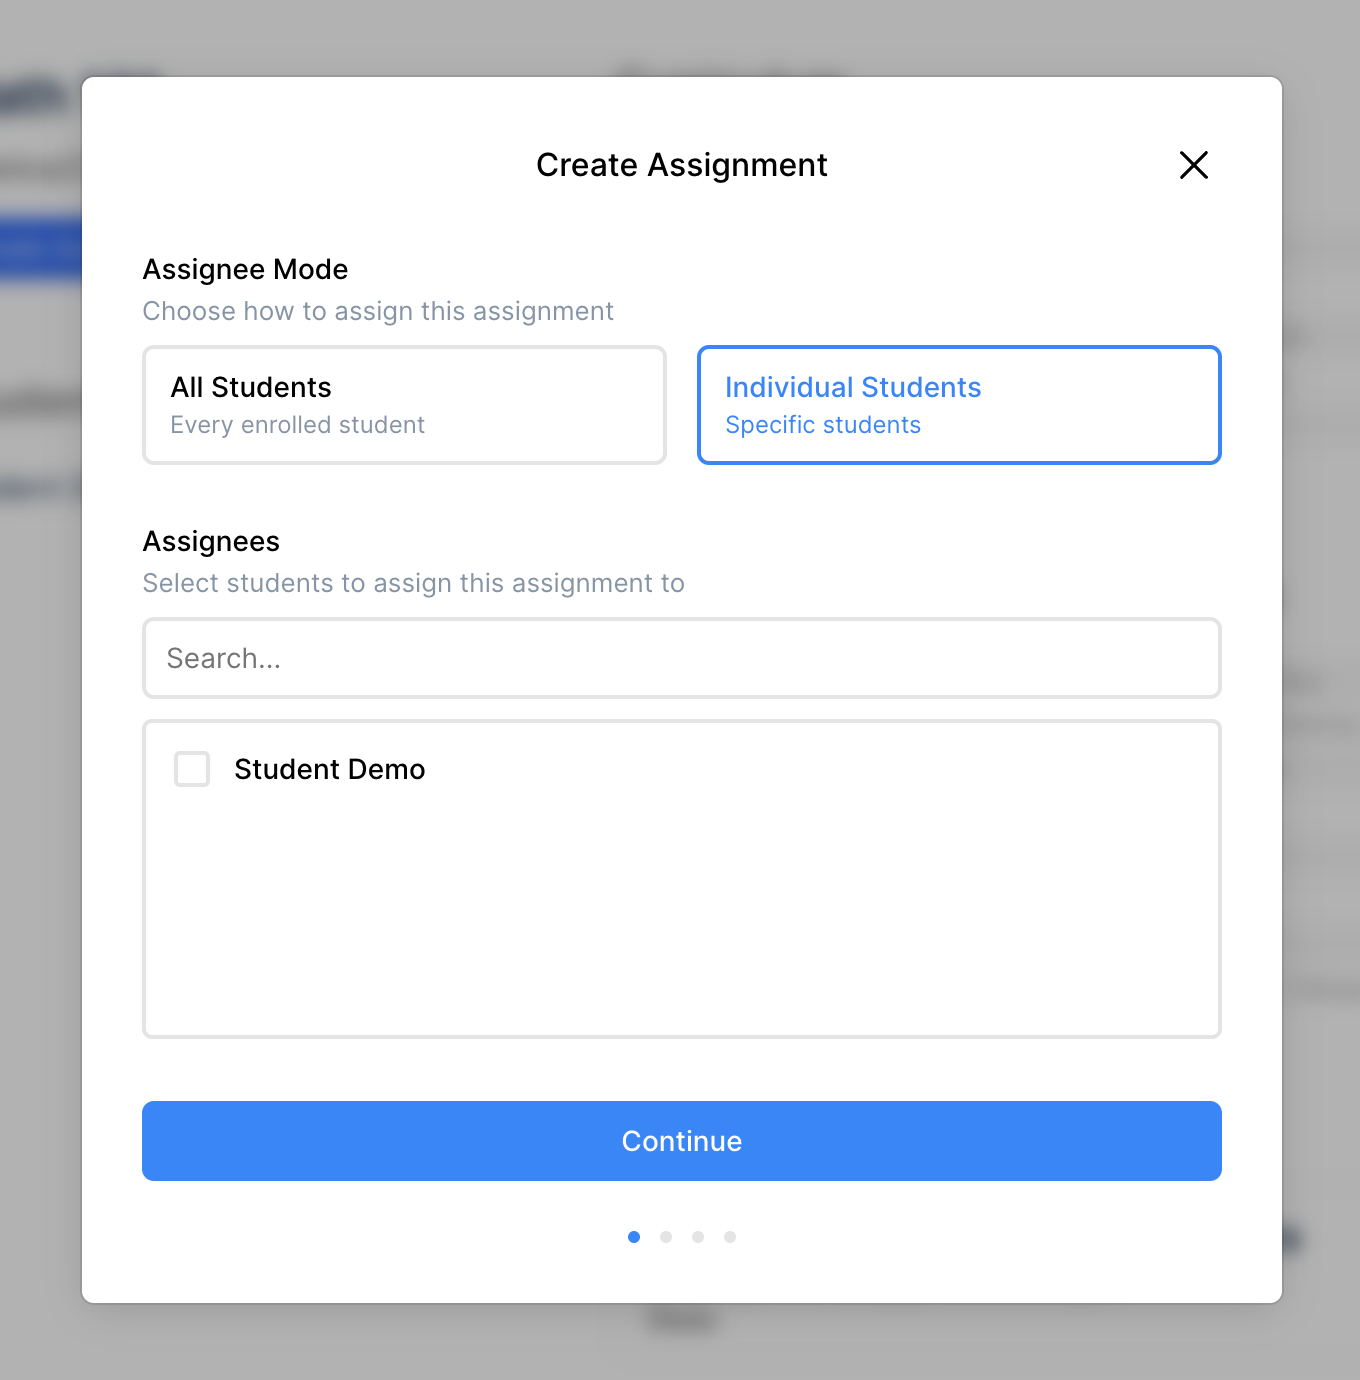
The Assignment builder plugin allows developers to drop in the ability for users to create Assignments from their website. It is required the user login via Edlink's SSO. This is because the widget uses a cookie that is set during the SSO process.
Configuration
The following is a list of configuration options for the assignment builder plugin. These can be provided in the options object when activating the plugin.
| Option | Type | Description |
|---|---|---|
auto_close | boolean | If true, the widget will automatically close after the assignment is created. |
fields | object | An object containing the fields to show in the widget. (Read more below) |
Fields Configuration
The fields configuration option is an object that contains the fields to include in the assignment.
Each field has the following options:
| Option | Type | Description |
|---|---|---|
default | string | The default value for the field. (optional) |
required | boolean | If true, the field will be required. |
mutable | boolean | If true, the field will be editable in the widget. |
hidden | boolean | If true, the field will be hidden in the widget. |
options | array | An array of options for the field if an enum. |
Below is an example of how to configure the fields. It is recommended that you copy this config and only edit it if you know both your system and the source system (of the authenticated Person) can support what you change.
{
    fields: {
        class_id: {
            // If you know the class_id, you can pass it in here (optional)
            default: '<PASS UUID HERE>',
            required: true,
            mutable: false,
            // If class_id is hidden a default value must be provided
            hidden: true,
        },
        title: {
            // If you want to have your user set the title, simply remove the default option
            // and set hidden to false and mutable to true (the same goes for description and any other field)
            default: 'Provide a title for the assignment',
            required: true,
            mutable: true,
            hidden: true
        },
        description: {
            default: 'Provide a description for the assignment',
            required: true,
            mutable: true,
            hidden: true
        },
        assignee_mode: {
            default: 'all',
            required: true,
            mutable: true,
            hidden: false,
            // If the field is an enum, you can limit the options
            options: ['all', 'individuals']
        },
        submission_types: {
            default: 'text'
        },
        grading_type: {
            default: 'points',
            required: true,
            mutable: true,
            hidden: false,
            options: ['points', 'percent', 'pass_fail', 'letter_grade']
        },
        category_id: {
            required: true,
            mutable: true,
            hidden: false
        },
        session_id: {
            required: true,
            mutable: true,
            hidden: false
        },
        due_date: {
            required: true,
            mutable: true,
            hidden: false
        }
    }
}
If you want to add Attachments to the assignment you can do this in the fields object as well. There is no UI component for attachments. Edlink does not host attachments.
{
    fields: {
        attachments: {
            default: [
                {
                    type: 'link',
                    url: 'https://ed.link/',
                    title: 'Edlink'
                }
            ]
        }
    }
}
Using the Assignment Builder
This example shows how to use the Assignment Builder plugin.
1. Installation
First add the Widgets install script to your website. You can do this by adding the following script tag to your website:
<script src="https://ed.link/widgets/edlink@1.0.0.js"></script>
Then initialize and configure the widget like so:
const edlink_widget = new EdlinkWidget({
    person_id: '<PASS UUID HERE>',
    client_id: '<PASS UUID HERE>',
    show_errors: true,
    colors: {
        primary: '#0088ff',
        background: '#181818',
        background_secondary: '#212121',
        background_tertiary: '#424242',
        text: '#ffffff',
        subtext: '#8395a7',
        button_text: '#ffffff'
    },
    background_alpha: 0.7,
    background_blur: 10
});
Make sure the install script runs before you create an instance of the widget
2. Activation
You can then activate the Assignment Builder plugin with the activatePlugin method.
Here you will pass configuration depending on the behavior you want.
You can also use this configuration to pre-fill values that you already know.
edlink_widget.activatePlugin({
    name: 'assignment_builder',
    options: {
        auto_close: false,
        fields: {
            class_id: {
                required: true,
                mutable: true,
                hidden: false
            },
            title: {
                default: 'Assignment title goes here',
                required: true,
                mutable: true,
                hidden: true
            },
            description: {
                default: 'This is a description of the assignment for the students.',
                required: true,
                mutable: true,
                hidden: true
            },
            assignee_mode: {
                default: 'all',
                required: true,
                mutable: true,
                hidden: false,
                options: ['all', 'individuals']
            },
            submission_types: {
                default: 'text'
            },
            grading_type: {
                default: 'points',
                required: true,
                mutable: true,
                hidden: false,
                options: ['points', 'percent', 'pass_fail', 'letter_grade']
            },
            category_id: {
                required: true,
                mutable: true,
                hidden: false
            },
            session_id: {
                required: true,
                mutable: true,
                hidden: false
            },
            due_date: {
                required: true,
                mutable: true,
                hidden: false
            }
        }
    }
});
3. Usage
Then when you are ready to display the widget to your user you can call the show() method.
edlink_widget.show();
And then you just wait for the user to finish creating the assignment and close the widget. The widget hosts an event bus that you can listen to so you know when the user is done.
You can listen for events like so:
// Listen for errors from the widget
edlink_widget.on('error', (data) => {
    console.log('there was an error: ', data);
});

// Listen for when the widget is closed
edlink_widget.on('close', (data) => {
    console.log('widget closed');
});

// Listen for a successful assignment creation in the assignment builder plugin
edlink_widget.on('assignment.success', (data) => {
    console.log('assignment successfully created', data.id);
});
If the user navigates somewhere different but a page reload is not triggered you can 'destroy' the widget by calling the destroy() method.
This will remove the widget from the DOM requiring you to create a new instance.
edlink_widget.destroy();
F.A.Q.
How do I know what assignment was created?
You can recieve an event on creation of the assignment that will give you the assignment ID. Store this ID in your database to keep track of the assignment if you want to reference it at a later date. This will be the same object and ID you would receive calling the Edlink API to Create an Assignment directly.
How do I send back grades for the assignment later on?
You can send back grades for an assignment by calling the Edlink API to Update a Submission directly. Make sure to store the assignment ID so you can list submissions for the assignment when you need to send back grades.